Cooking low 'n slow with lump or briquettes poses a challenge of maintaining a low temperature (ca. 225F) with a wood/lump/briquette-fueled heat source for, ideally, an overnight session. A Weber Smokey Mountain handles this well by utilizing a really tight design allowing a controlled amount of air to give the long slow burn. Doing this in a simple 22.5" kettle, the most awesome and ubiquitous cooking instrument on earth, is trickier. Most use a the mini-minion method whereby a few lit pieces of fuel are placed atop a pile of unlit fuel and the kettle closed up with only a slight bit of airflow. Most of the time this works, sometimes we wake to a kettle that went cold in the middle of the night.
Another solution was brought to my attention recently. Stump's smokers are pretty awesome; at the heart of these brutish beasts is a gravity feed chamber in which a *covered* vertical chute of fuel permits perfect delivery of fuel. Load it up, let it go. The vertical chute has an opening at the bottom only. The only fuel that burns is as high as the air can get in, the rest of the fuel does not burn. This is in contrast to a open-top chimney many use to ignite a batch of fuel. The only problem with Stump's Smokers is they're about $2,000 (and 2,000 pounds) on the low end. I'm philosophically opposed to making pulled pork at that price and sought to find a cheaper alternative using this same elegant principle buried inside my faithful kettle.
Depicted below is a hacked up piece of stove pipe, only 4" wide and 12" tall, to see if I could get a working preliminary model. This small rig took about 20 briquettes. This was placed in an uncovered kettle. The briquettes at the bottom burned for over 5 hours (then I went to bed)! More later as this develops ...


NOW, the update: 12-May-2013
I used a chimney starter, covered all the holes on the side by securing some thin aluminum around it and charged it up with fuel. It's been running all day with little maintenance and a bunch of observation and running steady at 240F in the dome.
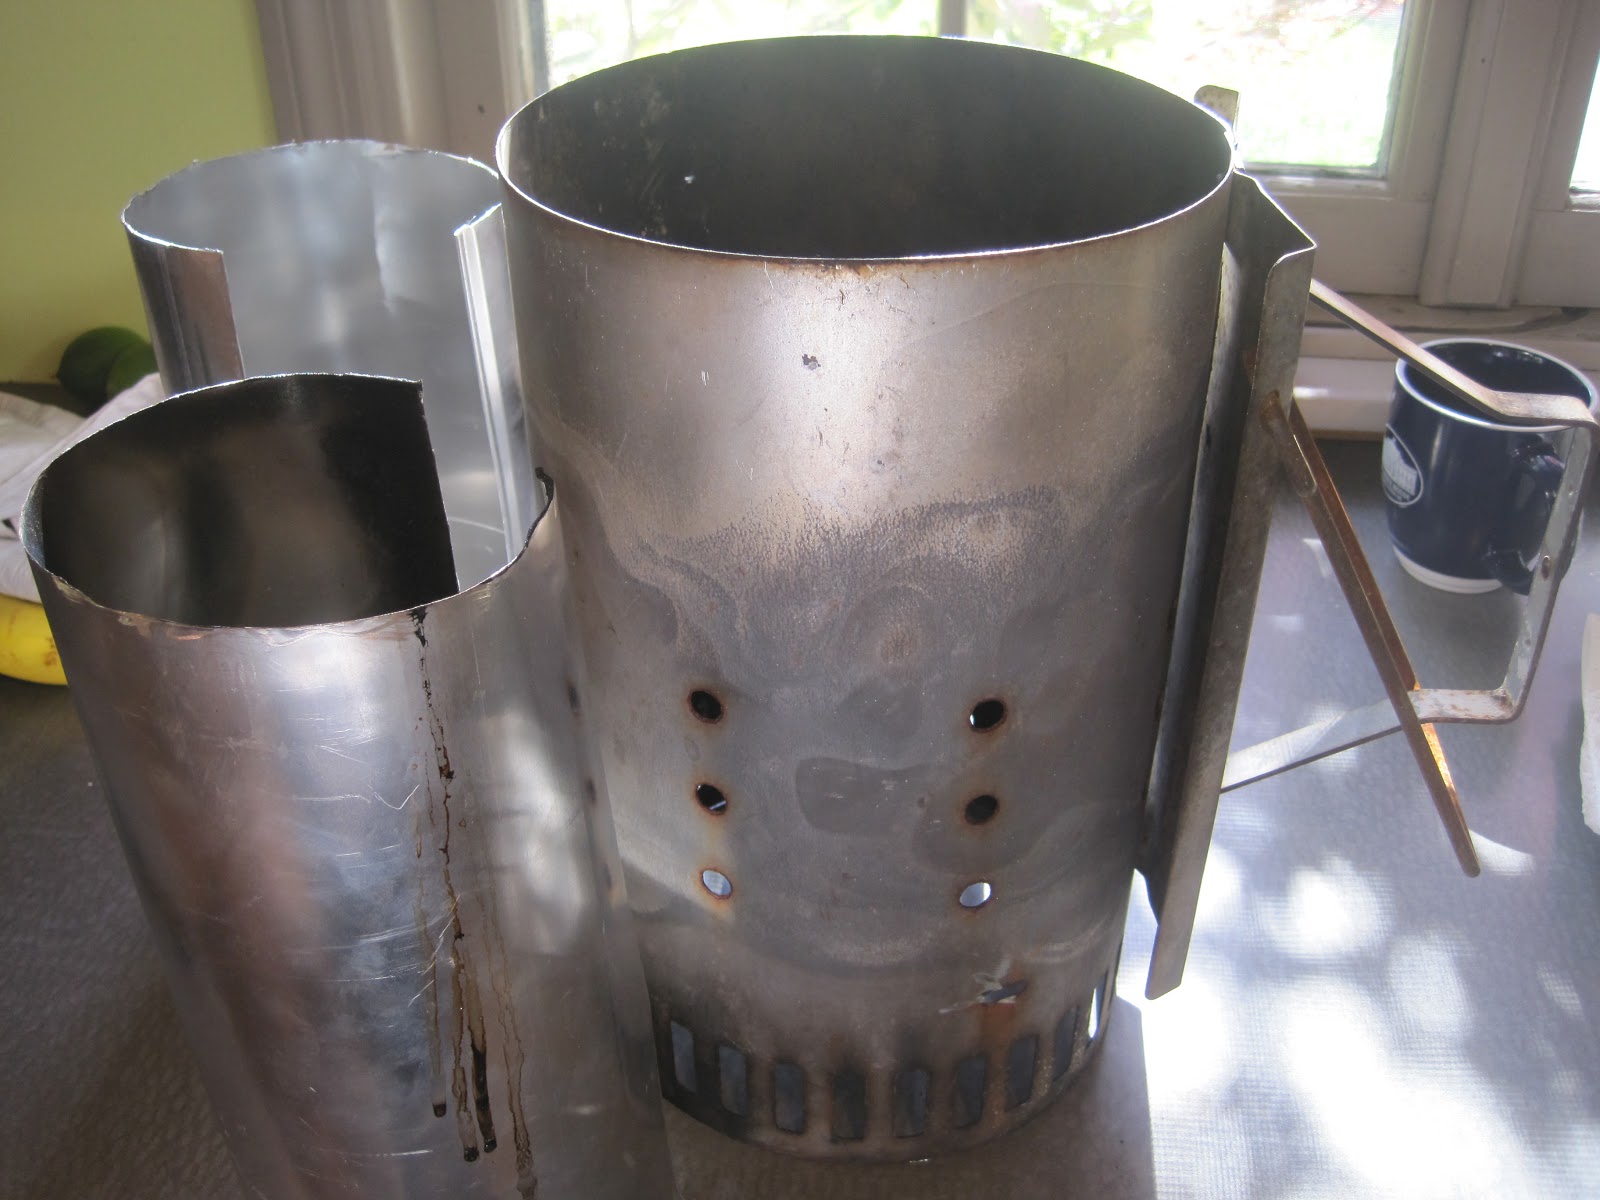
Here's a typical chimney starter. I shaved off the outside pieces that held the grate in the middle so the sides have holes in them but is smooth. I found a curved piece of aluminum at Lowe's in the duct section, cut it in half and affixed them to the outside of the chimney and secured the already snug fit with a piece of copper wire. The sheets of aluminum were slid most of the way down so only a little of the lowermost vents were showing.
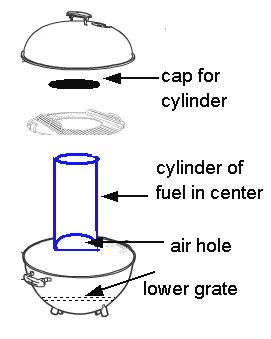
Behold a cylindrical fuel cell for lump or briquettes.
This thing is placed over a few lit coals, charged up (holds about 10 pounds of briquettes) sprinkled with cherry chips and a plate sitting perfectly on top of the cylinder so it snuffs the combustion at the top. Place meat in, leave. The vents in the kettle are all open, the combustion is completely controlled by the amt of vent at the bottom of the fuel feed chamber. The temp at the exit vent of the kettle stayed at 240F. I'll show a temp profile later. I ran this rig about 8 hours before the meat went on, dead stable temp. I think it should run about 8-10 hours on a charge of fuel.
Finally, a tedious graph of last night's action!
Last charge at 6 pm, took off meat at 6 am. Fuel to spare. Dip in temp at the end, uncertain. Click image to embiggen.
The only problem at this point is the dome temp at the exit is hotter than the cook surface. I think the cook surface is only about 200-225, need to redo this with the temp probe at the cooking surface and maybe expose more of the vents in the bottom of the cylinder to adjust the temperature. Still looks promising.
Update/Future (01-Sept-2013)
A commenter and others have asked about this. I'm currently worried the temp is too low at the cooking surface. These temp profiles are in the dome. So, I need to redo a run, put the probe near the cook surface and if it's too low, figure out a new configuration or venting for the chimney of fuel. Sorry no better news.