In the grocer's meat case, there is no shortage of products called "smoked" sausage. Most of these products are bland.
This past weekend, we were in Newark, Ohio and ate at a place called Dicky's. Chain bbq place, but good. Had some lovely smoked kielbasa (or brats?) and immediately, I had a mission.
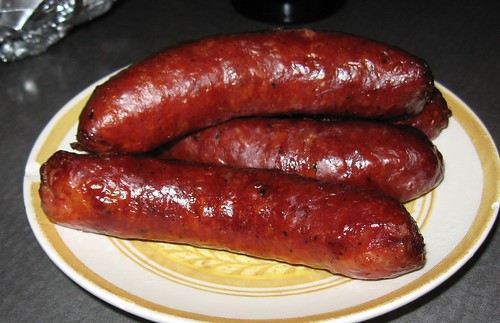
My new favorite hangout online these days is The Virtual Weber Bullet Forums. Perhaps the most informative and civil forum I've ever visited. Lots of good information and courteous contributors. From a discussion today, I gleaned I should smoke sausage low 'n slow, with apple wood if possible and to an internal temp of 170F. I got some kielbasa from Giant-Eagle today, smoked between 250-275F (dome temperature) for about 2 hours using lump with a mixture of mesquite and lump. I took 'em off at an internal of 180F because I was distracted socializing around the neighborhood. However, they smelled so good, we almost had them as a second dinner.
I wrapped them and put them in the fridge. I may make use them in red beans and rice. Not sure. For now, I'll just stand in the fridge and smell the smokiness of a real smoked sausage.
3.26.2008
I might give these guys names.
3.17.2008
If Weber-Stephens gave Nobel Prizes, I would be the laureate for 2008.
Ever since I managed to discover the dome vent method for temperature regulation during long smoking sessions, I've regained new interest in my kettles. I bring my blue one flowers daily.
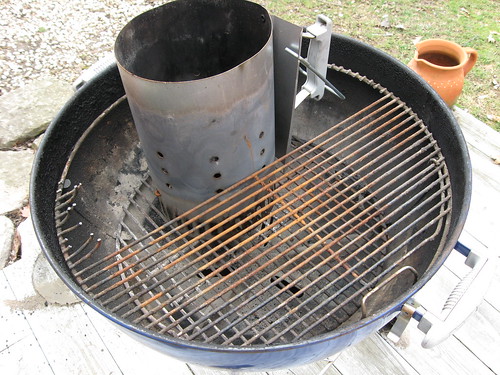
I've gone one step further with my new mod. With the temperature regulation handily taken care of, I now wanted it to be easier to stop and start for my indirect sessions. When the lump charcoal is loaded on one side, it works fine, but to stop and restart, one has to re-stack the fuel, get messy and light it again. With a chimney inserted in the kettle, the fuel could dispense itself perfectly and the burned stuff just falls out. But, could the chimney be placed right inside the kettle? With a little cutting, no problem.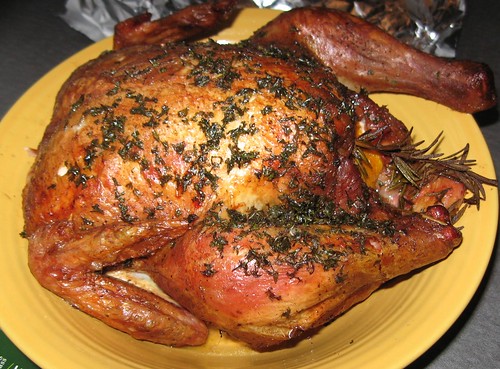
I lost a bit of cooking surface, a tad less than with normal indirect, but gained ease of operation. I stack in the fuel, ignite it, let it rip ... tonight I did a chicken (with mesquite and maple) at 330-deg-F for 1.5 hours ... close the vents and finish. The remaining fuel is still loaded and ready to go for the next session. No re-stacking the fuel, just toss another piece of paper in and light it and ready to go in about 10 minutes (tonight's fired up in about 5-10 minutes, 1 match). This chicken was prepared while we ate dinner. After it was done, I wrapped it up to contain the smoky goodness and it's ready for dinner tomorrow.
Update
Been hanging out on the Weber Bullet forums the past day asking about dome vent temp control and realized I made a huge mistake. Or, I conducted a method prone to overheating. The setup should remain the same. However, the chimney should not be lit from the bottom. This will quickly ignite ALL of the fuel making for one vicious mound of heat. Using something called the minion method, I should have lit a few pieces of fuel and placed them on top of the fuel. And the fuel should contain several pieces of smoke wood in the pile. Then, as the lit coals proceed to ignite fuel below them the burn will commence in a slower manner than all the fuel ignited at once.
The chicken was still killer but the heat source was hard to control. Can't wait for another run. Same set up, just minion method and I'm there. May even be able to keep the top vent open if the fuel burns slower. Keep you posted on further developments.
3.15.2008
Flour Grind, Particle Size Effect
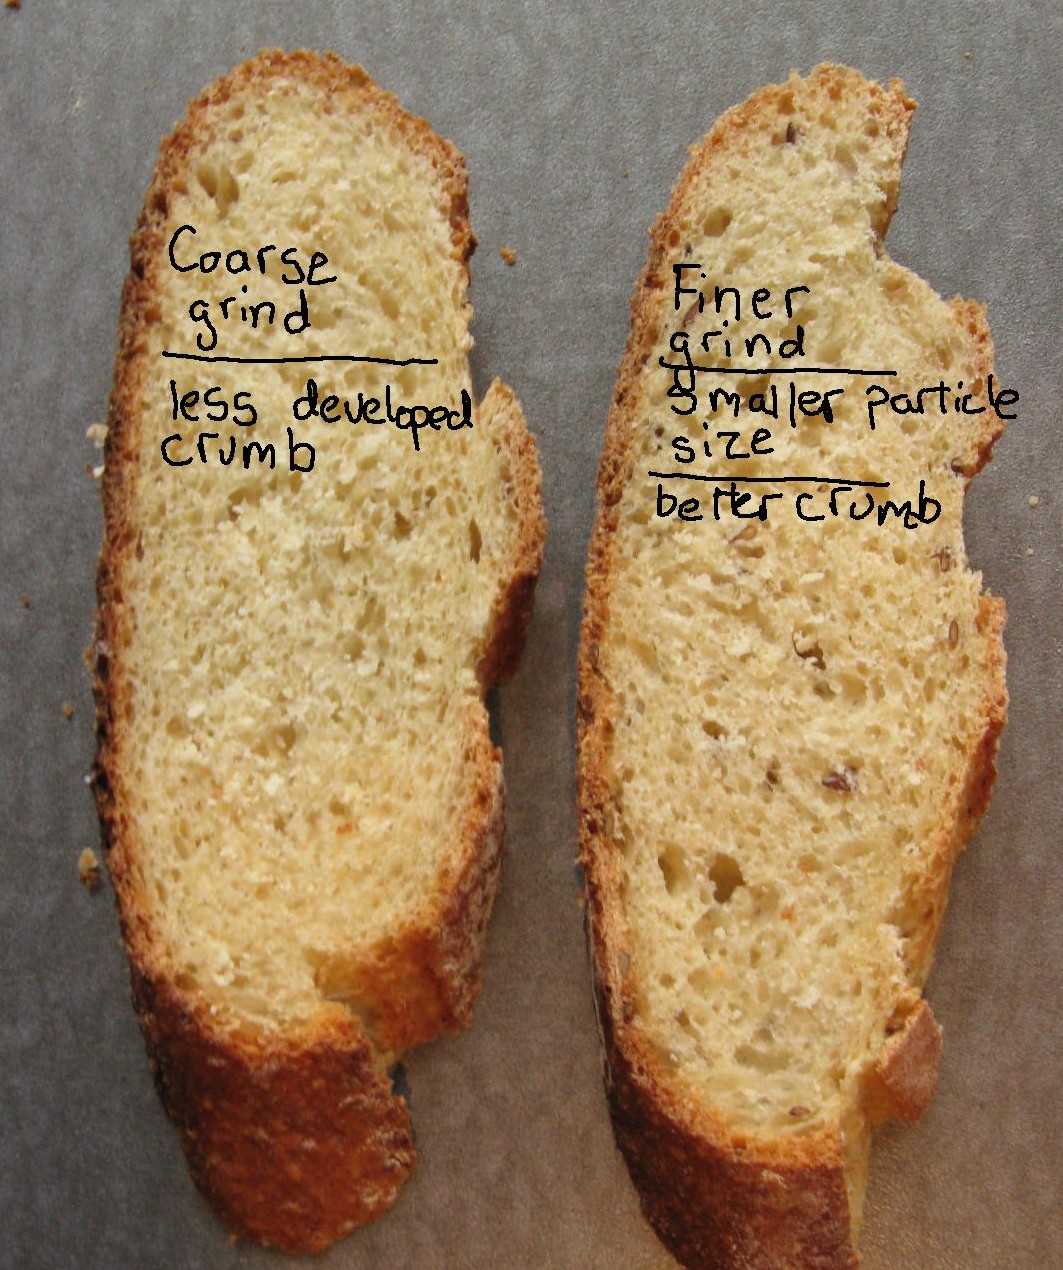
The past couple weeks, I've been playing with fresh ground flour from red wheat berries. I've ground it using a coffee grinder on the finest setting. Still kind of coarse but incorporating it into my baguette recipe for 1/3 of the flour bill. On the left is a typical cross section using this flour. It's got what I characterize as an underdeveloped crumb. No long, swirly streaks of crumb but a more granular appearance.
On the right is a slice with using a slight variation. Still a 1/3 substitution of the flour but I've processed the flour to an additional fineness with a whirly coffee grinder. These mills are inadequate for large quantities of flour but was appropriate for the 100 g I needed for this experiment. It was a finer grind (smaller particle size) by visual inspection and in the final loaf, it showed. The crumb appears more "swirled" and had a better texture. Still not great though.
I've been doing this because I don't like any whole wheat flour I've ever tried and want to "grain up" my breads. Commercial whole wheat flours suck. Bitter and dark and bad tasting in a lean loaf. They're fine for enriched (fat and sweetener) loaves. I may be giving up this effort soon since the texture of the final loaf is inadequate.
I've heard these same observations on message boards of from communities of people who buy fancy mills and make their own flour. The big particle size apparently isn't good for gluten development and the final loaves are grainy.
I'm also currently testing King Arthur's White Whole Wheat with limited success. No big conclusions, just an interesting observation I thought I'd share. Experiments don't always yield a a complete story.
3.09.2008
Dave's Beer
Despite owning the domain registration Dave's Beer.com, I'm not a fanatic brewer. Dave's Beer embodies the spirit in which I would like to live. Kicked back, relaxed, sharing food and spirits with friends. I'm a tad type A to fully realize that dream. Something to work on.
I do love to brew though. With parenting and work, brewing gets low priority. In addition to celebrating food, I also have a passion for process development. Not quite an idea man, I don't invent many things, but I see opportunity for improvement on underdeveloped good ideas.
If you Google no boil ale, the #1 search result is a 2001 piece from a periodical called BYO (brew your own). Kind of interesting but not a popular concept. Boiling the wort (beer before it's fermented) takes a long time and I don't know how important it is since I do only malt extract brews with some specialty grains infused.
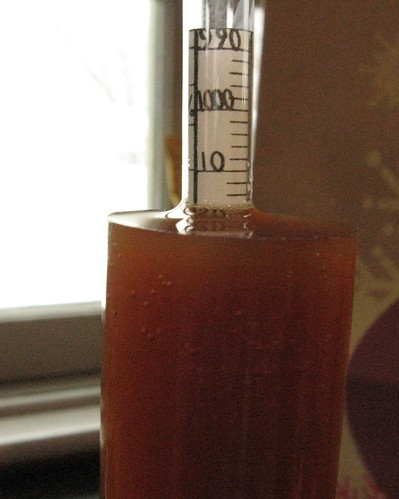
A couple weeks ago, I put this method to the test. I infused some chocolate malt (1/2 lb.) and 120 crystal malt (1 lb.) in 140-deg-F water for an hour. This mini mash was filtered and added to 6 lbs. Breiss Gold dry malt extract and about 2 ounces of Fuggles hops and a couple teaspoons of gypsum and dissolved in water that was about 140-deg-F. The mixture was stirred vigorously and a Nottingham yeast culture was added once the mixture cooled to about 75-deg-F. I aerated it vigorously and let it ferment for about a week. My basement was approximately 60 +/-10 degrees (we lost heat for a day during that period), but the fermentation kept going along, ending the primary at 1.015 F.G. (O.G. 1.060). Should be a nice copper colored brown ale about 6% alcohol by volume. The sample so far is better than any recent batch. And, much easier brew! We'll see after a brief secondary and bottling/kegging for the final test.
3.02.2008
Weber Temperature Regulation
Yesterday I scored an 8-lb picnic roast from Giant Eagle for about a buck a pound. I'm cooking it for my neighbor who helped me cut down a tree several weeks ago. There should be a few scraps leftover for our dinner. I was giddy as a school girl. The picnic is my favorite pork shoulder cut. It's fattier, but the fat is more easily separated from the meat than the more common Boston Butt during the pulling (the more times you state butt in a post, the more it gets read).
I gave it a rub last night and plopped it on my weber this morning at 6:15 using the minion method for setting up the fuel. In the past, I had regulated the temperature of the Weber using the bottom vents cracked and the top full open and "controlled" the temperature by placing only a few briquettes in at time. This requires intermittent fussing during the day. Maybe only every few hours, but still kind of a pain. Using this method the temperature bobbles around 250-325-deg-F.
The minion method permits one to charge lots of fuel at a time and have it ignite slowly over time. This way, less maintenance during the 10-12 hour burn is required. More time to sip brew and contemplate life (or chase little girls around the park).
I've only been moderately successful with the minion method. My heat undoubtedly gets to 400 and then slows down but takes too long to cool. In all the years I've been cooking pork roasts, I never bothered to attempt to regulate the heat via the top vent of the Weber.
Today, on the sabbath, my eyes have been opened.
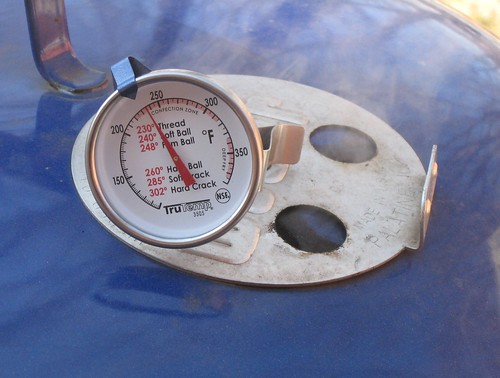
That top vent is as precise as the dial on your oven. After the erratic morning I spent trying to control dome temperature, I nearly shut down the vent, all but a crack, and left a thermometer in the dome to watch. There's a TON of fuel charged (briquettes, maple and mesquite) ignited and the temperature is ROCK STABLE at about 240-deg-F. I think I have conquered the ultimate lazyman's slow cooking method on the infamous Weber. I hope I haven't hurt the roast from the early exposure to high heat. Over the next few hours, the temperature never moved more than +/- 5 deg-F. I'm going to pull it off around 4 for a rest before a 5:30 dinner. A damn good day for 'q.


