12.16.2010

Chicken 'n rice

Grilling in the Summer is de rigeur, in the Winter grilling is special!  A few projects culminated in a simple and tasty meal the other night.

A few days ago, I was continuing my foray into all grain brewing.  I have been accumulating a lot of spent malted barley.  Before it got dumped in compost, I grabbed a couple hundred grams to play with.  Yes, as regular reader(s) know, I love the meatball in all its forms.  Combining the coarsely ground thighs (200 g) with the hydrated spent barley (100 g), spices (salt, pepper, oregano, basil) an egg, couple T of milk (chicken, milk and grain - add some pork fat and we couldn't desecrate Kashrut more) and enough bread crumbs to keep it together, I formed them into patties and grilled them.  I used a hot direct flame for a few minutes per side per patty.

These little grilled patties were very nice and even better as a leftover. I served them with a simple pilaf, asparagus and a dipping sauce of labne, water, lemon juice, crushed garlic (trace), honey and salt.

12.12.2010

Pizza on cast iron

Some time ago, Bethia asked if I used cast iron for cooking pizza a la Heston Blumenthal.  Blumenthal's pizza may be good, but the method is too clumsy for me to consider when cooking for a crowd.

The valuable nugget I did glean from this is the possibility of baking pizza on cast iron.  What a wonderful, buy-it-once-per-lifetime cooking surface.  While there exists a 15" round cast iron pan at Amazon that makes me salivate excessively, I found a cheaper griddle for a few bucks the other day at the thrift store to experiment with.  My first pizzas on this were going to be wispy thin pizzas inspired by California Pizza Kitchen (love their pies - think CPK will give me ad money now??).  Made some dough [water 300 g, salt 5 g, sugar 10 g, olive oil 30 g, yeast 1 pkg, unbleached white 300g, kneaded in a machine, placed in fridge for the week].  A few hours later, I pulled 100 grams of the dough to make a couple afternoon snacks.

Preheated oven to 450F, rounded the balls and rolled them into 8" diameter shells (click image to make larger).

50 g rounded dough rolled to a ca. 8" shell
Here's a shot of the cast iron griddle in the oven.
Topped the shells with a bit of tomato paste, thinly sliced, roasted cauliflower, ham, sprinkle of parmesan and a drizzle of oil and baked it about 12 minutes.

In conclusion, the cast iron was awesome.  I'll be getting a nice round for the Firedome.  In the meantime, for these 8" personal pies, I may make them a tad thicker, but this thinness was pretty nice.  And, califlower is pretty nice as a pizza topping.

12.05.2010

Savory flatbread / sticks

Note the surface has been painted with oil and scored using a pizza cutter.  
One of the flatbreads out of the oven.  The pizza cutter scoring isn't showing up, but they are there.  Also, this scoring is as good as docking the bread, so no worries about it puffing like a pita.  This was 180 of dough rolled to 14" x 8" (roughly).
Once thoroughly cooled, break apart and hide them.  The flavor develops over an hour after baking.  They need no special packaging.  They're fine out on the counter, they won't last very long.

12.01.2010

Every crockpot needs a thermocouple

Our first crockpot ever. I've always used a cast iron Dutch oven in a low oven. This is probably a cheaper alternative.
I'll also be checking the warm setting and its temp fluctuations for a sous vide attempt.

11.23.2010

If it floats, it is a witch and should be burned on the briquettes

Anyone who knows me even a little, knows I am one congenial bastard when it comes to the holidays. This Thxgvng (twitter spelling), I'm brining the bird, cooking the bird, and drinking beer while others in the home cook. So, here it is. I hunted for my bird near Weiland's today. I plopped it in a bag-lined box, topped it with brine (1/4 C salt and sugar/quart water) until it was swimming. It floats. It'll brine for a day and a half and then to the coals. Probably medium, indirect, cut and eat. Have an awesome frickin' day y'all.
Enhanced by Zemanta

11.16.2010

notes to self for pain au levain

x = 30 g

1. 1x(flour) + 2x(pineapple juice) + 2d ---> 3x[A]

2. 3x[A] + 1x(pineapple juice) + 1x(flour) + 1-2 d ---> 5x[B] see image

3. 5x[B] + 1x(water) + 2x(flour) + 1-2 d ---> 8x[C] see image

4. 4x[C] + 1x(water) + 3x(flour) + 1 d ---> 8x[D]

5. 4x[D] +9x(water) + 12x(flour) + 4-8 h ---> starter= [S]

>> [S] can be refreshed according to:
1x[S] + 2x(water) = 3x(flour) ---> 6x[S]

Pain au levain

3x[S] + 5x(water) + 8x(flour, mixed) + 6-8 h ---> levain

16x[levain] + 11x(water) + 16x(flour) + 1% w/w salt ---> dough

(a strategy to follow based on Reinhart's Artisan Breads Every Day (some rounding)

11.06.2010

Just Ale

(Lot = http://j.mp/9mqoXv --> 14-Nov-2010: archive sample bottled and remainder kegged)
I started brewing all grain recently and haven't had much luck with logistics. Most stuff now, I think, is worked out. Today I'm doing a simple practice ale to check out techniques and equipment. After reading a bit, I decided to try a higher dilution single infusion mash. I wanted to do as much as possible with an in place kettle because carrying around hot liquids is heavy and unpleasant. Higher dilution mash, ca. 2L / pound grain, means I'm not going to sparge, simpler. Results? We'll see.

Dave's Beer (Ale)
Breiss 2 row, 10 lbs
Crystal Malt, 60°, 1 lb
Black patent, ca. 1/4 lb
hops, Fuggles, 1.6 oz

1. Took a 50L pot (one can never have too much headspace) to 162°F and placed the cracked grain and mesh grain bag in (using a half-assed cooling rack/false bottom), stirred and let sit at ca. 150-145°F for an hour.
2. Warmed to 170°F and let sit 15 min.
3. Pulled grain bag (kind of messy pull, got snagged), squished it and rinsed it a bit, total 22L 10°Brix, ca. 225 points. This grain bag will be replaced with a fine stainless mesh more rigid bag when I finish it.
4. Brought to boil, added hops intermittently throughout an hour, careful huh?
5. Cooled to <70°F using an immersion chiller (thanks cold weather) in ca. 15 min.
6. Aerated the pulp out of it.
7. Dumped into a bucket to ferment while filtering out hot/cold breaks. OG = 12°Brix (1.048).
8. Charged yeast slurry to wort at 68°F.
9. waiting patiently...
10. gravity after 3days = 1.016, bummer, a little high, another 2-3 points and I'd be happy. Taste is pretty good (as much as I can tell at this stage).

Enhanced by Zemanta

10.31.2010

Firedome: A new and easier fuel configuration, indirect - still a work in progress

Warning:  Long post (with water balloons)

What seemed correct with the Firedome to date was a symmetrically placed ring of fire about the cooking surface.  It's served me (and friends) well for over a year now, but a few lingering flaws forced me to persist in its development.

1. briquettes are good, but lots of byproducts and I could not boast "wood fired" to a more discerning crowd. I wanted to switch to wood. Something easier and cheaper to use and recharge on the fly without a mid-burn disassembly.
2. A wood fire would be hard to maintain in a circular configuration.
3. Any good pizza oven I've observed has the fuel source "indirect," not directly below the food, but in a pile offset.
4. I have a continuous stream of wood on my property.  Oaks give it up every time it's windy (remember Ike?).
5. One pile of fuel is trivial to start; a ring is often a pain.
All modifications must still result in uniform cooking top and bottom of the dough.

Today the wood fuel vision begins to come into focus; I think we might be hitting the oven that was intended in the first place.

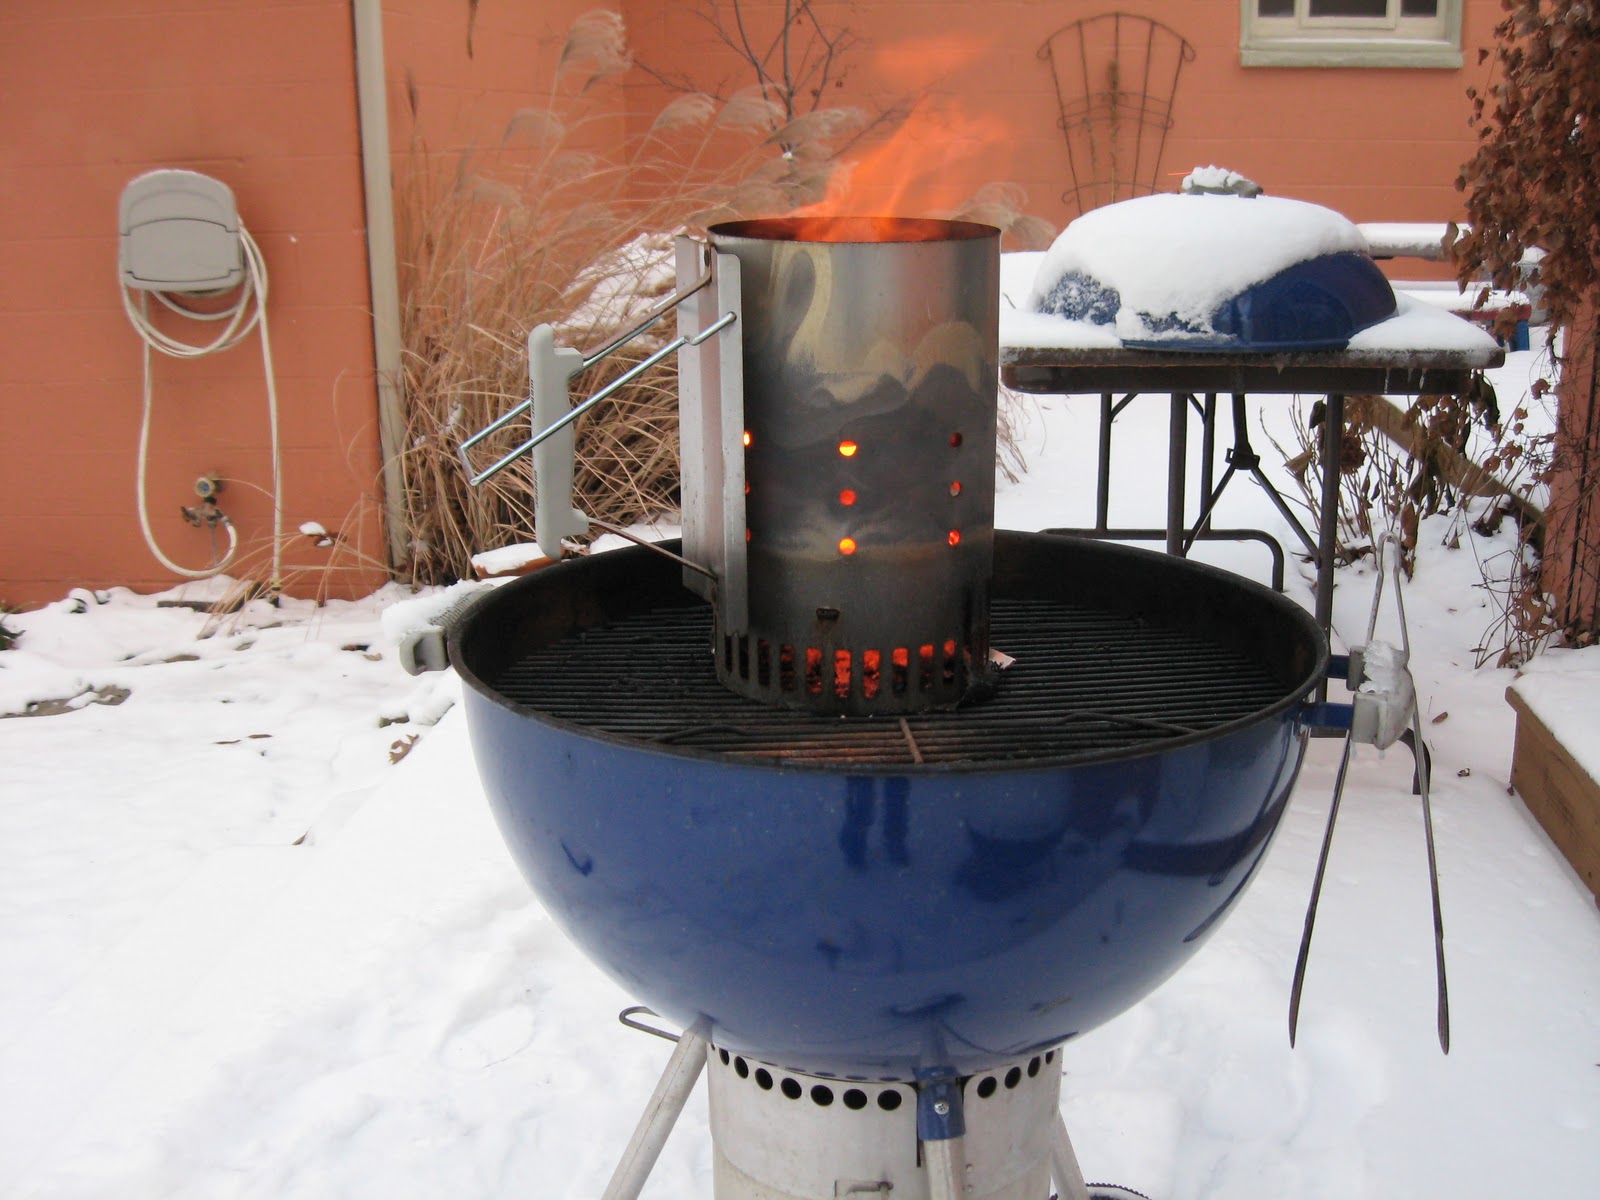
A chilly morning seemed the perfect time for a fire and it's always a good time for lightly smoke-infused flatbread.  Made some dough, fired up a chimney of briquettes (briquettes are a killer starter for any fire by the way).  After  a few clumsy reorganizations, I placed the fuel on one side of the lower grate of the Firedome, placed the cooking surface on the upper grate and positioned the clay cooking surface on the opposite side of the grill.  On top of the briquettes, I placed several pieces of oak, they started immediately, a kick ass fire in minutes.  I capped the dome, lifted the door, positioning the opening so the blazing fire was on the right and the cooking surface to the left.

Here's how the morning progressed in a few frames and a few movies:

The circle of fire is ok, but laborious to maintain. Also!.. note the decorative chimnea stand I scored in someone's trash. Elegant? I think so.


This was shot after I moved everything to either side.  In this way, I could add to the fire by pitching wood right through the door as I need.  The flames would swoop around and I'd be cooking "in the tube" of the firewave.  It also tolerates water balloons tossed in when you need that extra bit of humidity.


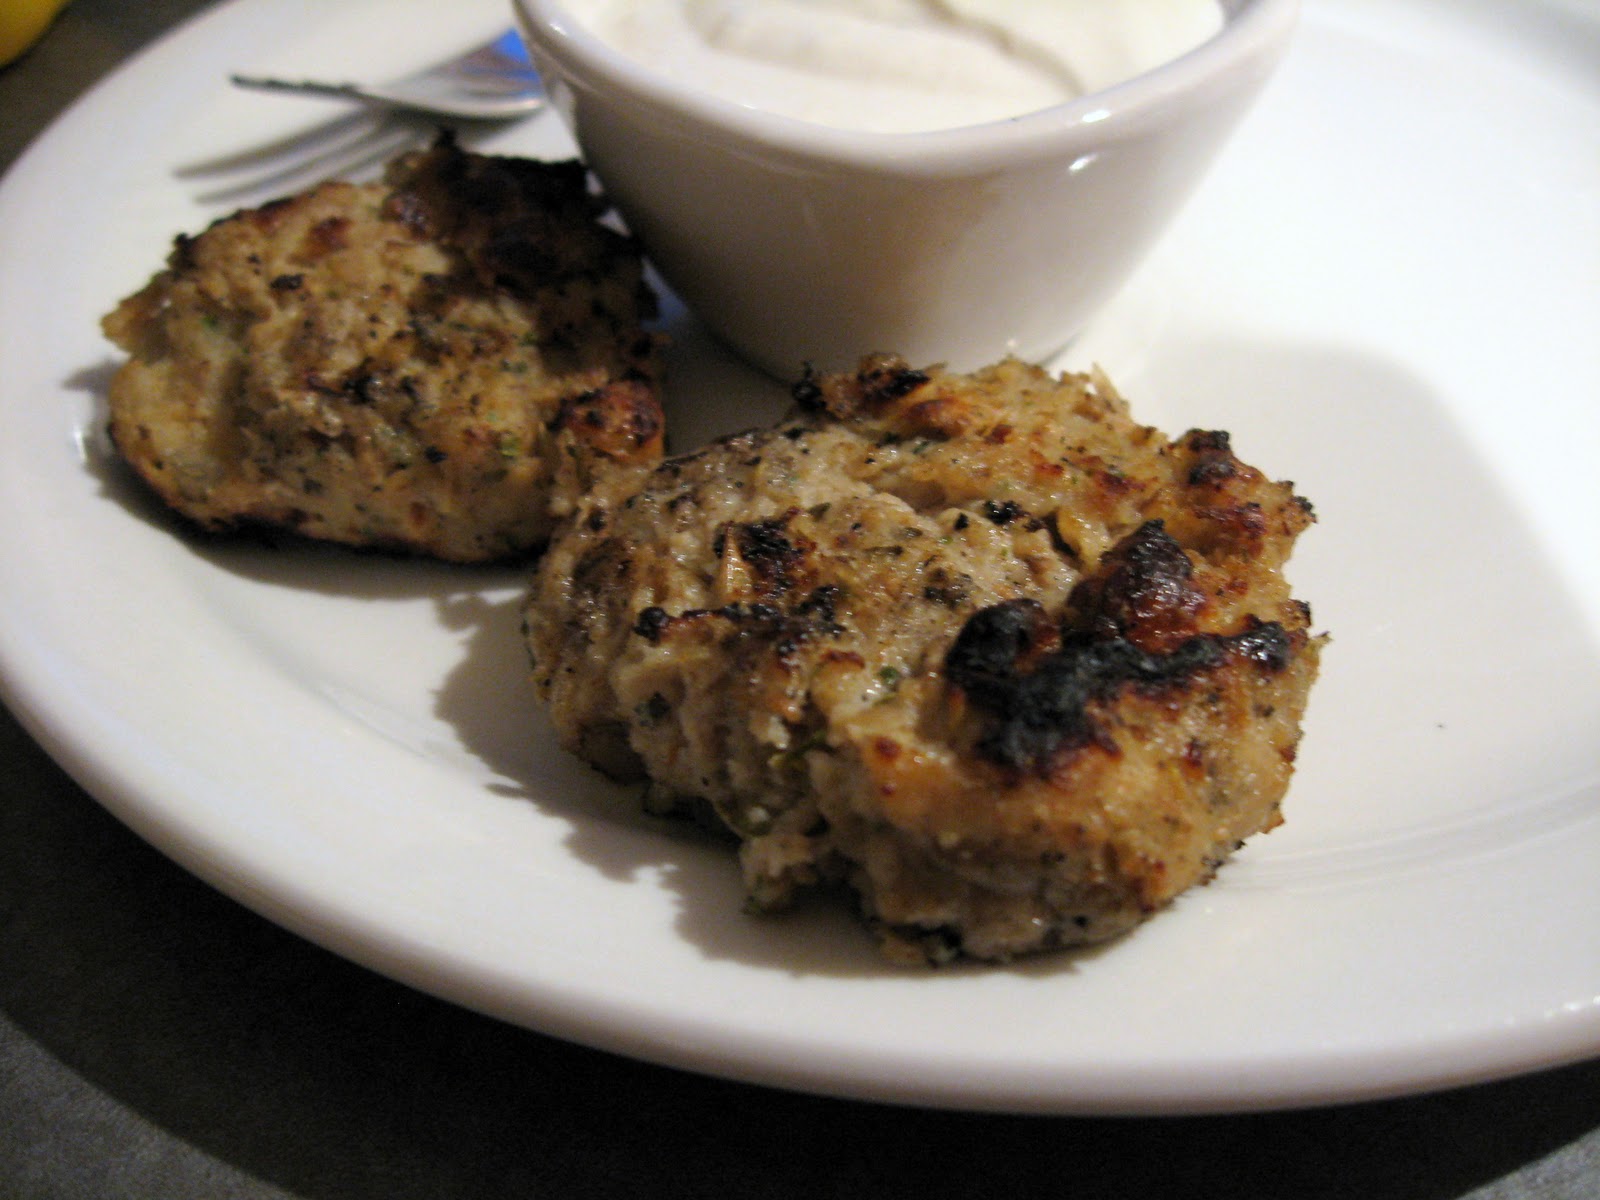
Final product.  To be eaten with tonight's roasted red pepper hummus.
I'm waiting for a replacement thermocouple or this post would've been oozing with temp data.  However, a pita cooked in about 90 seconds.  I'm guessing the oven was about 750°F while the flames were up, maybe a bit higher.    There will definitely be more to come on this.

Final notes for those following along with your own pet Firedome:
1. one chimney full on one side of the lower grate
2. add small, ca. 8" logs of wood, on the briquettes
3. place upper grate in place with one side of the grate open in a way you can toss wood in
4. place Firedome on top of roaring fire with the hatch open, wait a few minutes and cook away
5. getting some wood this size might require a chainsaw
Enhanced by Zemanta

10.21.2010

Cheddar biscuits

Hurried in from Boston the other night to get dinner on.  Only had a time for a rotobird, steamed green beans and, to add something special, cheddar cheese biscuits.  These little nuggets almost made me puddle up with joy.

Biscuits are one of those amazing foods with a deceptively simple preparation.  Flour, fat, leavening, salt, liquid.  Combine solids, add fat to solids, add liquid to solid mixture, don't over work and done.

By varying the fat, liquid, amount of liquid, etc., biscuits from any two kitchens are never the same.  Lately, I've started going after a layered look and they're coming out pretty sweet.  Despite repetitively folding the dough, about 25 - 26 times, thereby creating a potentially overworked and brutally tough dough, the thin layers served to make the biscuit tender.  Here's the prep.  Frankie even took the one leftover biscuit for lunch the next day, that's how good they were.

Cheddar Biscuits, makes about 6
Butter (70 g) was cut into a mixture of unbleached white flour (250 g), baking powder (2 t), salt (1 t) and sugar (2 t) until crumbly.  Milk (180 g) and a handful of shredded cheddar cheese, ca. 1/3 C were added and the mixture folded with a spatula until it came together in a shaggy blob.  This blob was dumped onto the counter.  Using a dusting of flour, I squished the blob into a squat disk.  Then, the disc was squashed into a 6-8" diameter circle, folded in half, squished out, folded in half, squished out, folded in half, etc.  The shapes, after a few iterations of this get weird, but just go with it.  Once folded about 5-6 times, the biscuits were cut using a sharp, round biscuit cutter and placed on a thin sheet of aluminum and allowed to rest about 10 minutes.  They were tossed in a preheated 450°F oven for 15-20 minutes, allowed to cool a bit and eaten with enthusiasm.
Enhanced by Zemanta

10.15.2010

The primal pleasure of cast iron on the grill

Last night, our pork roast drippings went to good use.  I roasted, on the grill, a mix of fingerlings and brussel sprouts to accompany our pot roast.  I don't think I've ever cooked on cast iron on the grill.  It was almost a bit too hot, should've moved it a bit indirect, but the veggies were pretty nice.  Next time I'll stagger the potatoes and sprouts (spuds first).

10.04.2010

Black bean soup

The more I read about cooking legumes, the more I worry. America's test kitchen recently started recommending a salt water soak prior to cooking, Rancho Gordo's cookbook is on the other side saying cook beans with NO spices, gently, presoaked or not. The are tons of other, even less authoritative, sources if information for legume preparation.

I was recently given a most unique and generous gift of fresh dry black beans, just harvested this year by Josie. Instead of saving my most valuable stash for the next depression or the apocalypse, I frivolously tossed the salt-free water soaked beans in with a ham hock and let them barely perk for a few hours. I removed the tender pork from the hock and added some spices to this brew: slivered garlic, salt, fresh ground cumin, pepper and a freshly-ground, just dried sweet pepper from the generous and creative Kate.

The order of beans cooking and spicing was different than I'd usually do, but I usually use canned beans. This prep enabled a gentle cooking/hydration of the beans before the seasoning. The result? I don't think I've ever had such a smooth texture in a bean. The post cooking seasoning was perfectly adequate. Even Frankie had a good sized portion.

Josie and Kate are the ones you want to prepare you for that stay in the bunker 75 feet below the surface of the earth in your shelter. Oh, and allow plenty of time to schedule Lori for desserts to guarantee that said apocalypse is a party.

10.02.2010

A refreshed baguette post (our daily bread)

----short link for this http://bit.ly/daily_bread

I like to repeat posts because:

  • my techniques change
  • ingredients change: flour, yeast (the way it's manufactured), etc.  
  • I lost some old posts 
  • few read archives of a blog
  • I'm prepping for a 4-5 kg run for Frankie's teachers
  • the only people who can possibly stand this tedious site are new readers and they may not be bored with it

So I thought I'd do another (demi) baguette post with a multi-photo layout.

Our daily bread is derived from a recipe by which all ingredients are evaluated:  water 200g, salt 5g, veg oil 6g, instant active dry yeast 1 pkt, flour 300g and I spin it on a bread machine dough cycle.  My current machine cost me $6 at the thrift store (they are always in stock).  I can program the dough cycle to be ready up to 13h in advance.

This type of prep removes lots of variables, e.g., it's a closed chamber, thus most environmental variables are controlled, my kneading, etc.  Bakers will slam me for using instant active yeast, but I love it.  It varies from conventional dry yeast because it has ppm levels of a dough conditioner or two; these give a good volume and a peppy rise.  Doughs made with this yeast can also be refrigerated for days, warmed and baked with no problems.  I love the performance of this yeast; all brands are comparable in my experience and I never use it in bulk.

Here it is, 5 demi baguettes made this morning served with preserves, good butter and some fruit.  This post also happens to emphasize formation of the baguette for proofing using Reinhart's (Artisan Breads Every Day) method of successive formation of a bâtard.

500 g of dough was scaled to 100 g blobs, rounded and allowed to rest 10 min, start preheating the oven to 450F (convection if available)

a rounded dough blob is squashed down and squashed thusly, this begins formation of the bâtard

fold bottom to middle

fold top down

roll to place seam on bottom

repeat until the bâtard evolves into a baguette

baguettes rolled out and allowed to proof 10-12 minutes uncovered

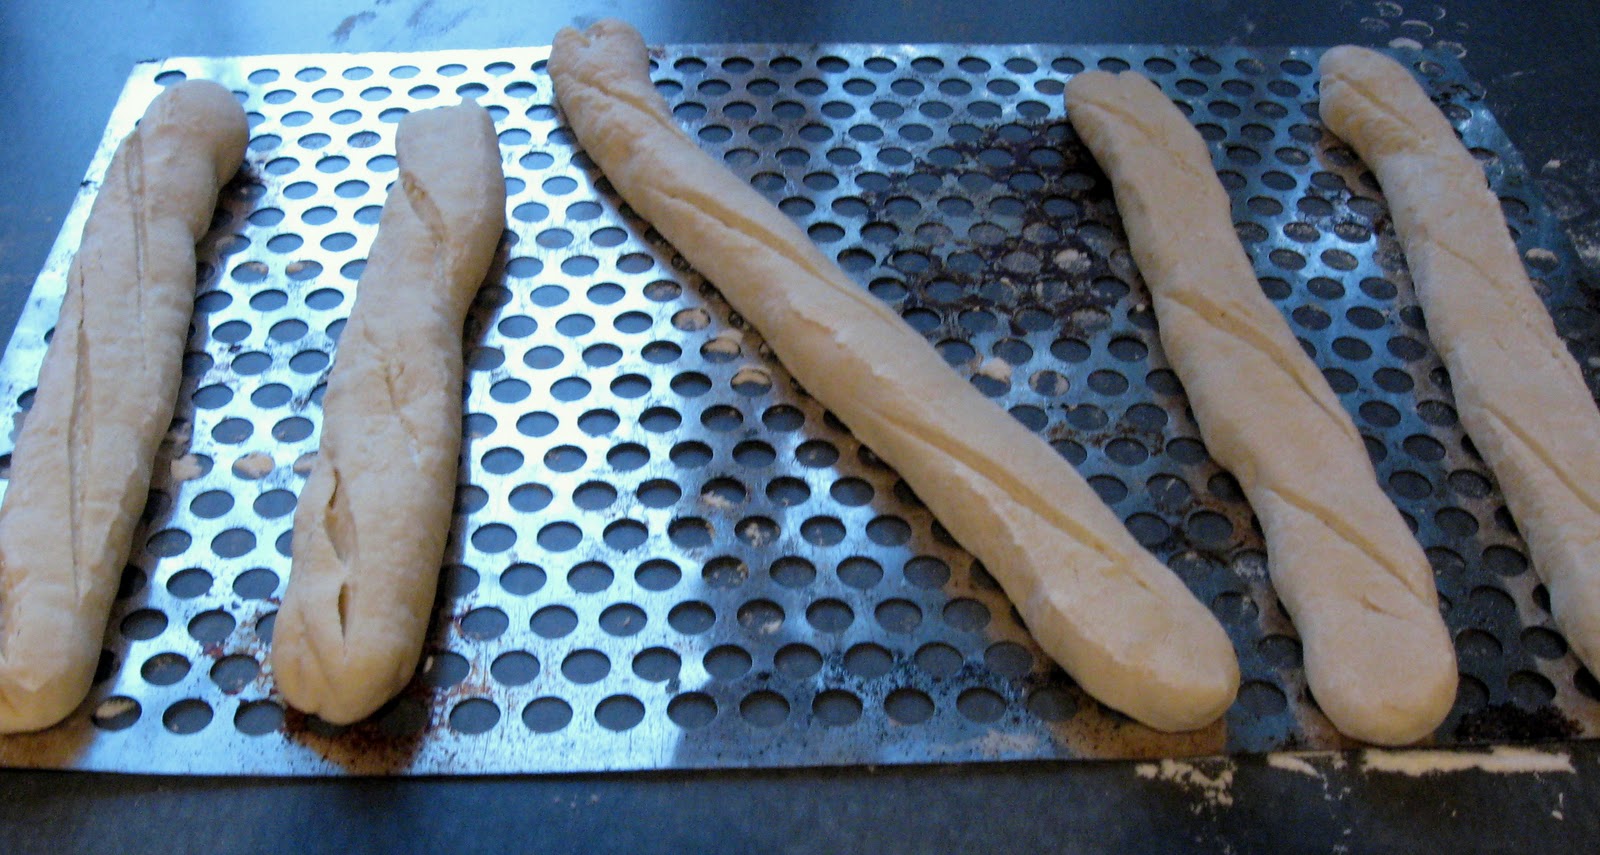
the proofed baguettes placed on my perforated stainless sheet and then docked (slashed with a knife), toss in bottom 1/3 oven with a couple ounces of water tossed on floor to create steam blast

after about 15 minutes in oven

let cool, slice, add butter and jam

10.01.2010

An interesting collection of lean and enriched breads

I have Reinhart's Baker's Apprentice and don't really like it much.  I love to bake, but the preps are a bit involved for me.  I think the processes therein are more targeted to a bakery than a home - larger scale, more production oriented.

I grabbed his Artisan Breads Every Day from the library and can't put it down.  It's got a bunch of starter-derived (levain, starter, etc) breads and, yeast-loaded, enriched, soft breads.  It's rare to see a baking book with the word artisan in the title that has processes for enriched loaves.  I've always had a fondness for enriched loaves, they have a bad rep; been beaten down by anyone who lives by the baking metaphor longer rise is better - no exceptions.  

Given my busy schedule lately, my only problem with the book is where to begin.  There's a great seedy wheat loaf that has a great flour blend to keep it light, a soft sandwich white bread, and, of course, a traditional baguette.  Among the next posts will be several executions of Reinhart's breads from this volume.

9.21.2010

I'm Sandra Lee for a night


In my tireless efforts to give the kid memorable lunches, I wanted to give her some special caramel dip for her apples.  I ventured into the deepest, darkest bowels of the corpus of internet urban cooking legends ... the potentially (as in potential energy) explosive transformation of sweetened condensed milk into caramel.


sweetened condensed milk + heat ------> caramel


This transformation is filled with challenges: search, finding authority, chemistry, processed foods, momblogger stories and visions of Sandra Lee obliterated all over her chiffon peach-decorated kitchen.  Irresistible.

Too tired to plow through the billion or so anecdotes, I did read two statements with great frequency:
boil the can - it doesn't explode, and
boil the can - it does explode

I chucked a can of generic sweetened condensed milk into boiling water COVERED BY ONE INCH, and covered the pot with a 3 pound cast iron lid and let it simmer for 3 hours.  Fearfully, I peeked once in a while to insure the level of water never went below the surface of the can.  This instruction is repeated as if it were the unpublished 11th commandment.  No one knows what happens if that level drops below the top of the can.  But, I think if it does, Nader is elected President of the United States (and Sandra Lee gets in a serious kitchen accident).  

During the 3 hours, the can bulged a bit.  Not good.  After 3 hours, I cautiously took the can and let it rest in the kitchen sink overnight covered with the several pound cast iron dome.  The next morning, I opened it and scooped out some heavenly caramel for my daughter's dip.  

I would never do this again if my life depended on it - and I won't hesitate to run my silly Firedome to 1100°F.  This is dangerous.  I feel lucky there was no accident last night.

Oh, and my daughter?  She likes the Marzetti caramel dip way better.  This transformation is one processed food to another, so, there's not one iota of virtue doing it.  I don't pull the phd chemist credential often, but as a "technically qualified person," this shit's dangerous.  If you must make this, pop open the can and cook it in a double boiler.  You'll dirty a bunch of pans, make caramel, and you'll feel like Sandra Lee.

9.02.2010

Pretzels

Really, go make these.  I regret having waited so long.  And, I'm sorry Alton, sodium bicarb isn't good enough.  Get the lye and do it right.  Use gloves (latex gloves are at Lowe's and cheap) to handle, it's not that bad.
Mix 40 g sodium hydroxide in 1 L water.

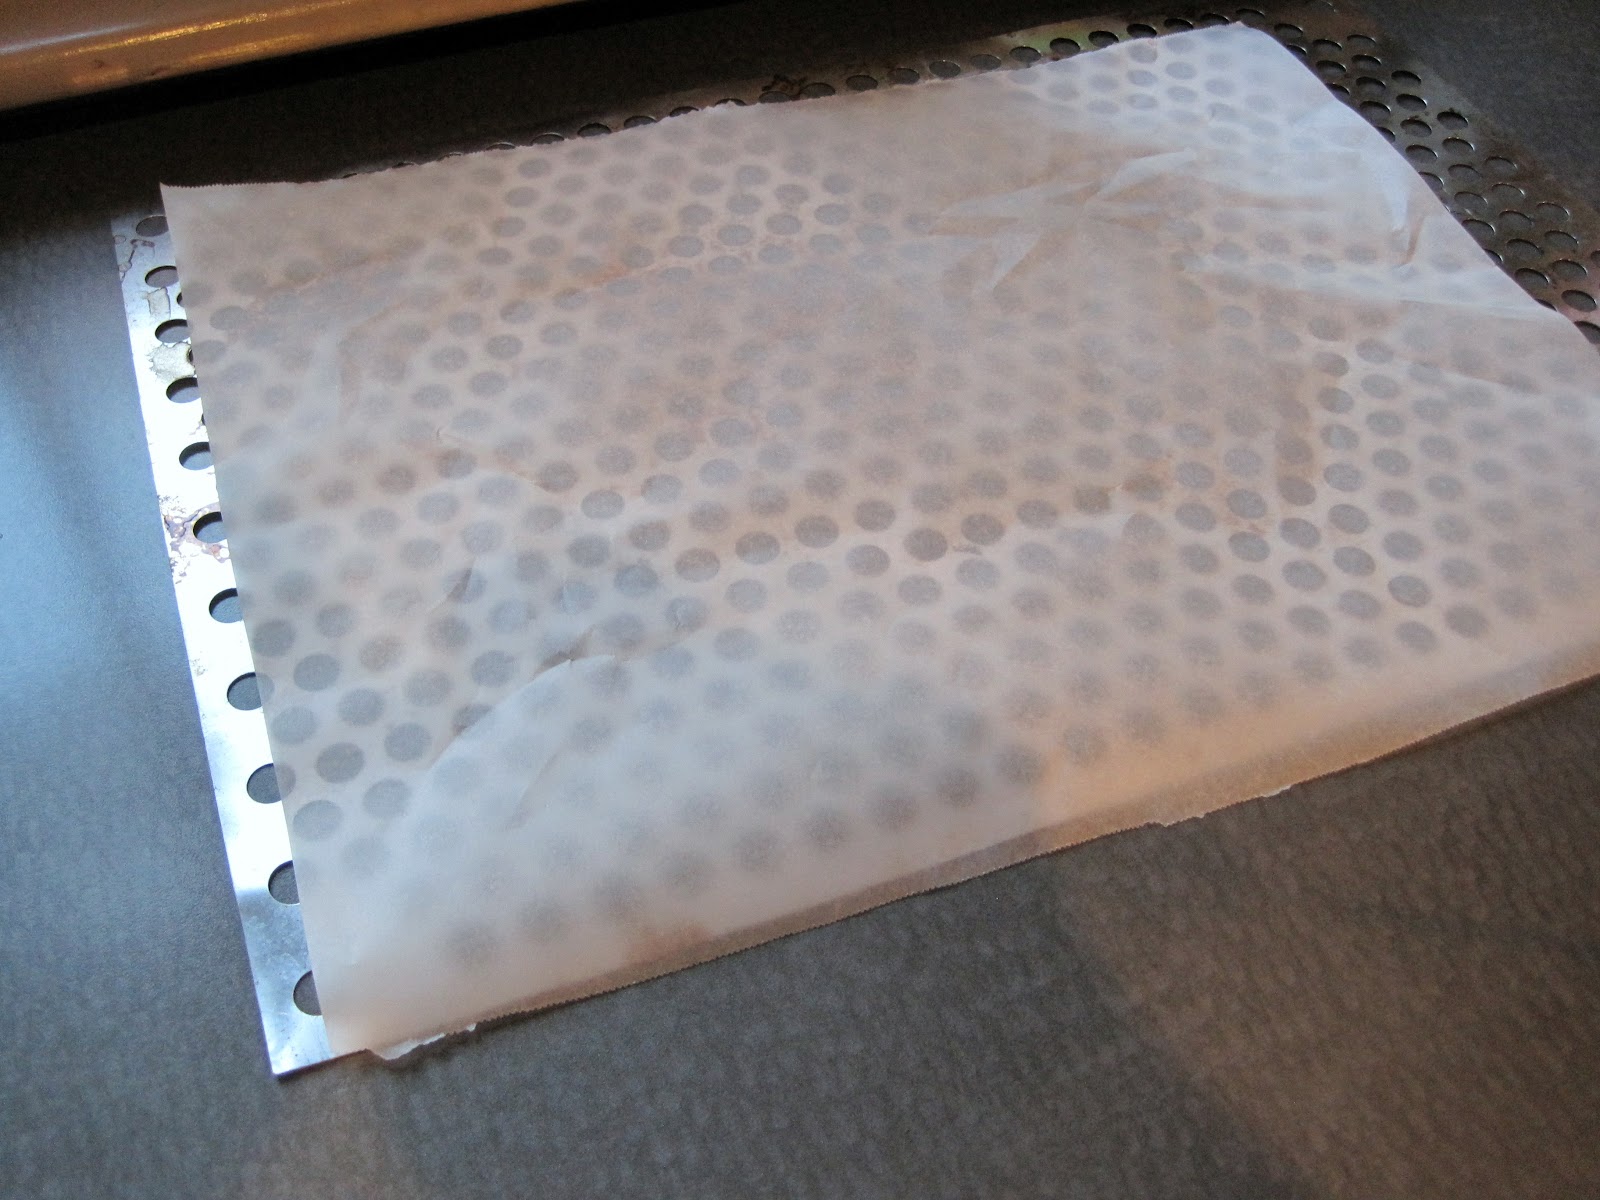
Cover baking sheet with parchment, this is what I'll bake the pretzels on.
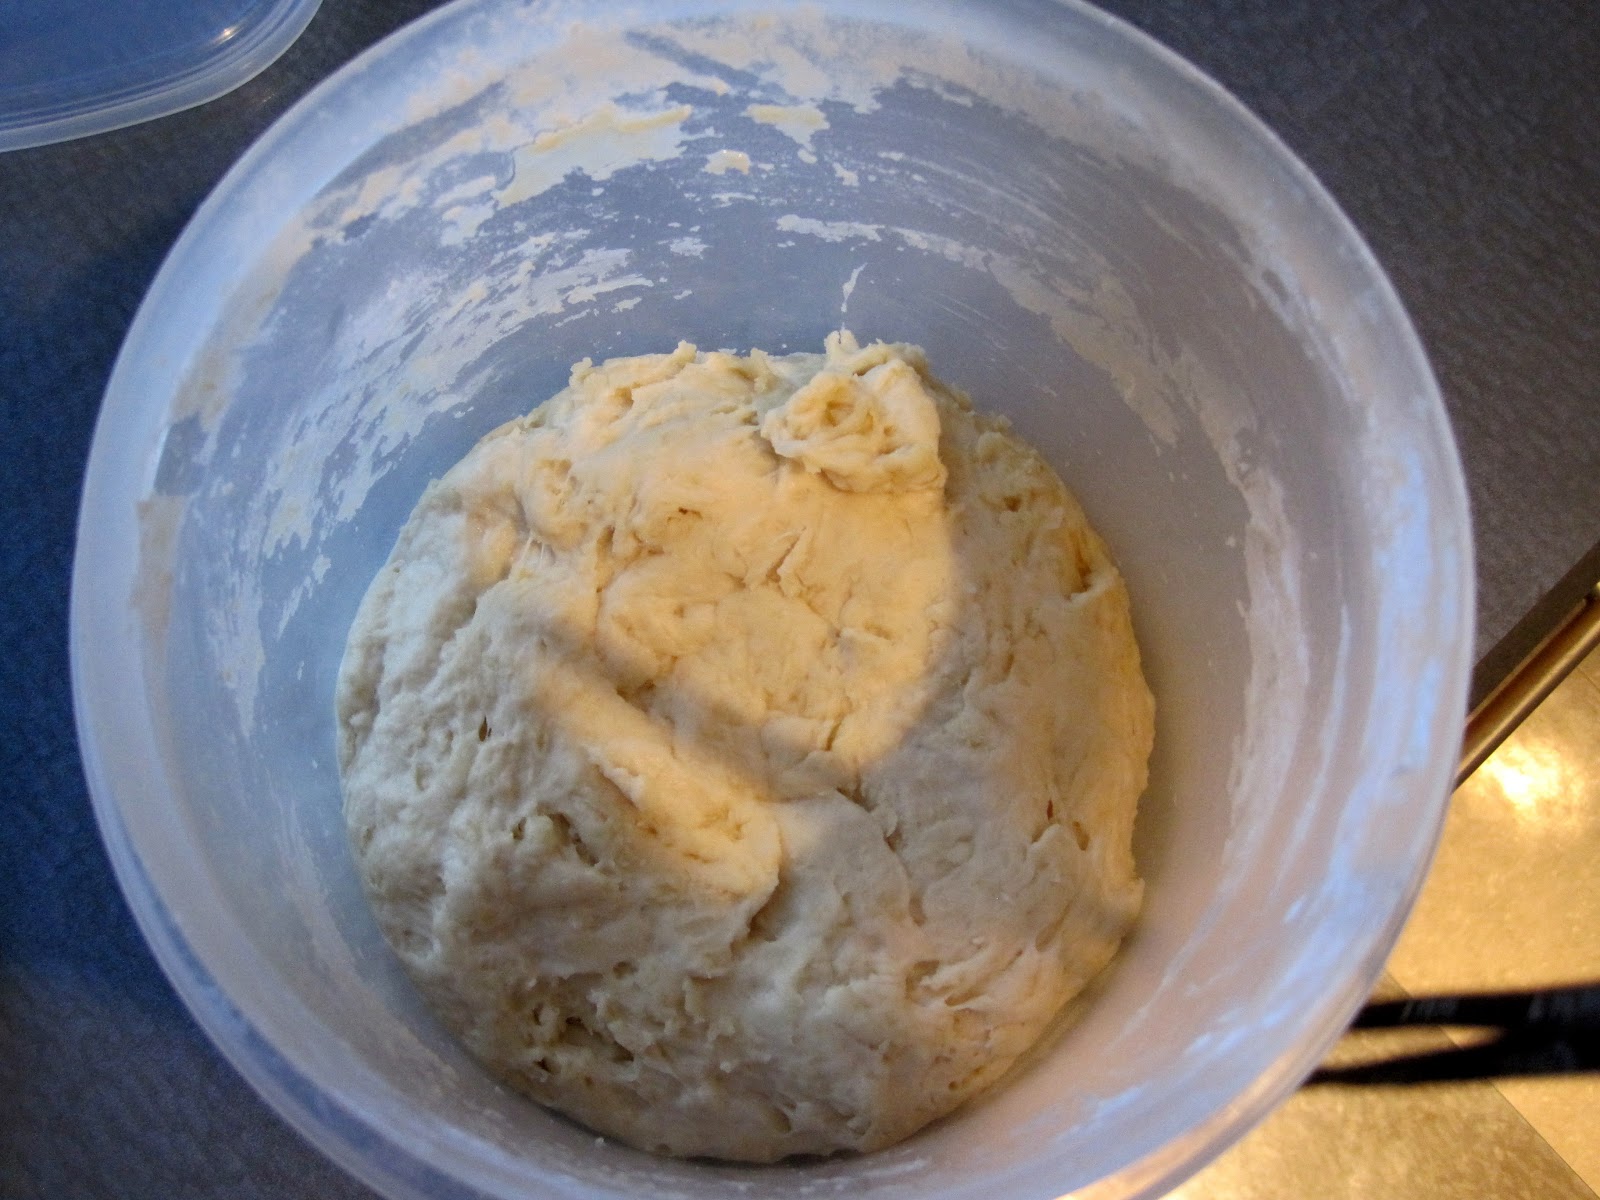
A simple dough of water (200 g), veg oil (20 g), sugar (10 g), salt (5 g), yeast (rapid rise, 1 packet), unbleached white flour (300 g), let rise in fridge overnight (barely kneaded, I kneaded prior to 2nd rise).
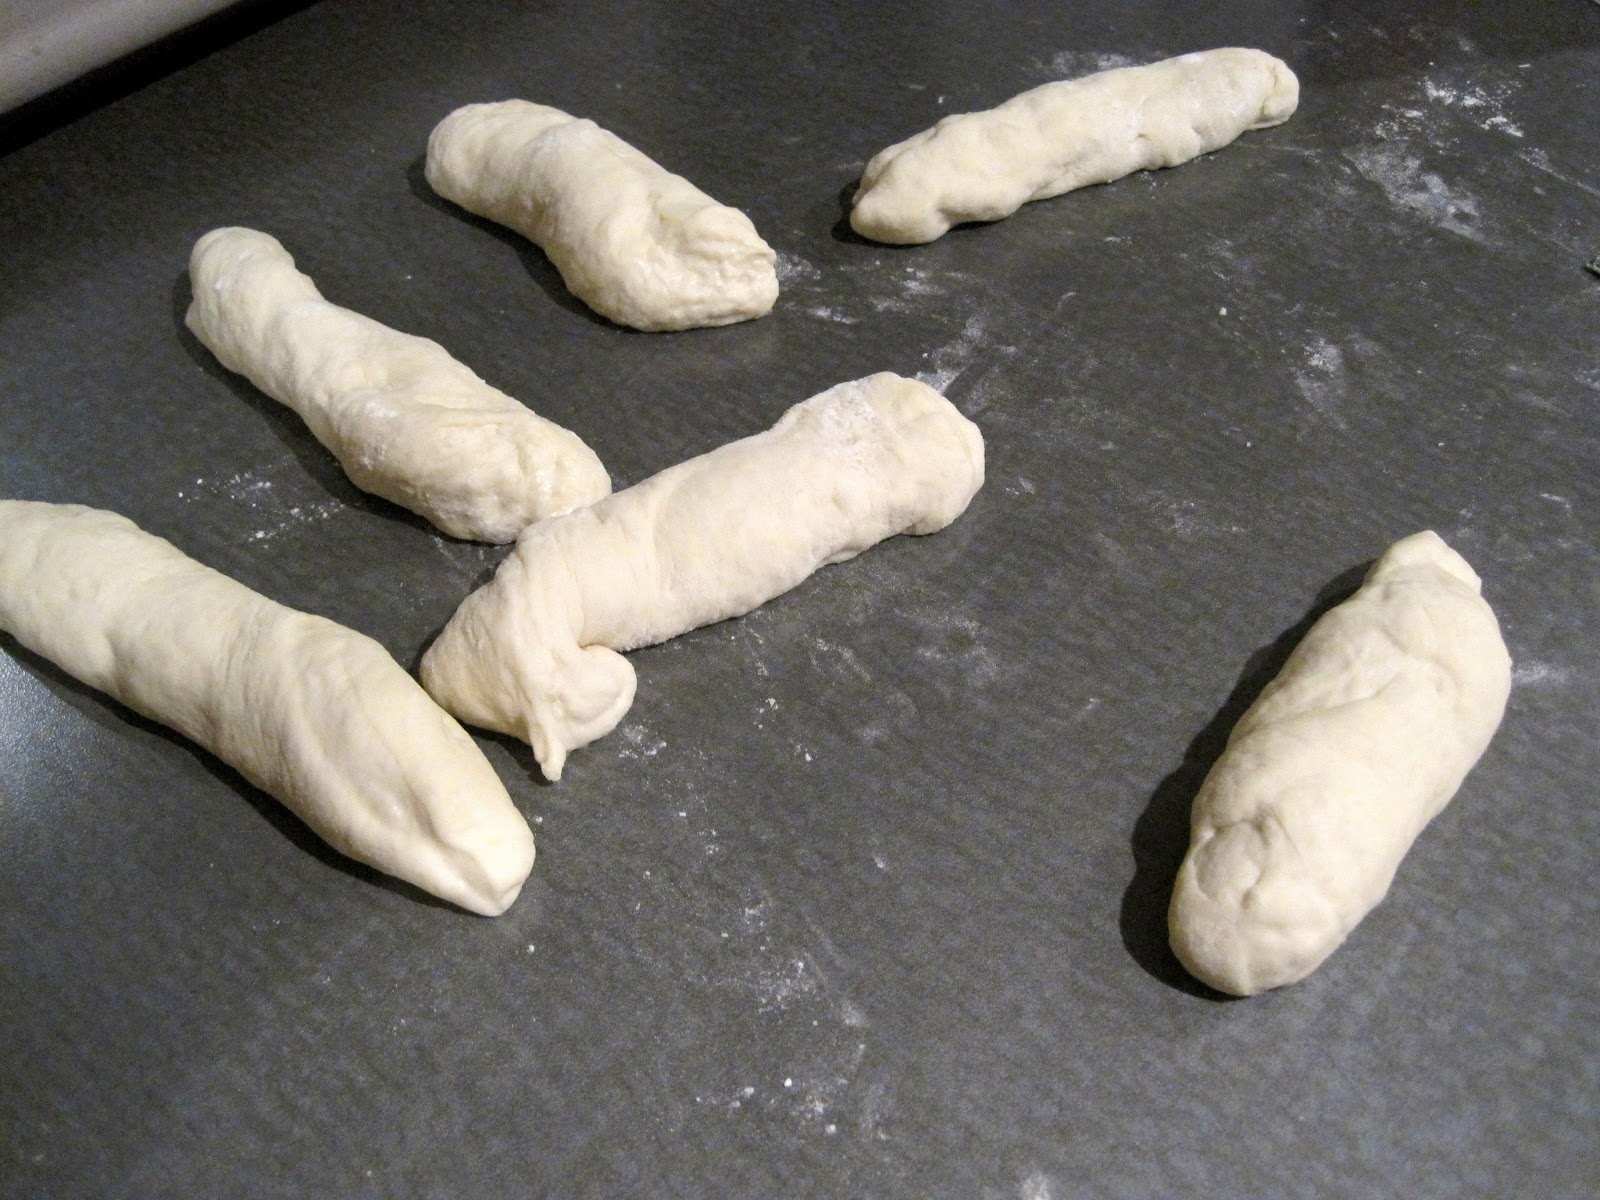
Next morning, kneed dough ball a bit, scale dough into 6 pieces about 90 g each.  Roll each into little log and let rest.
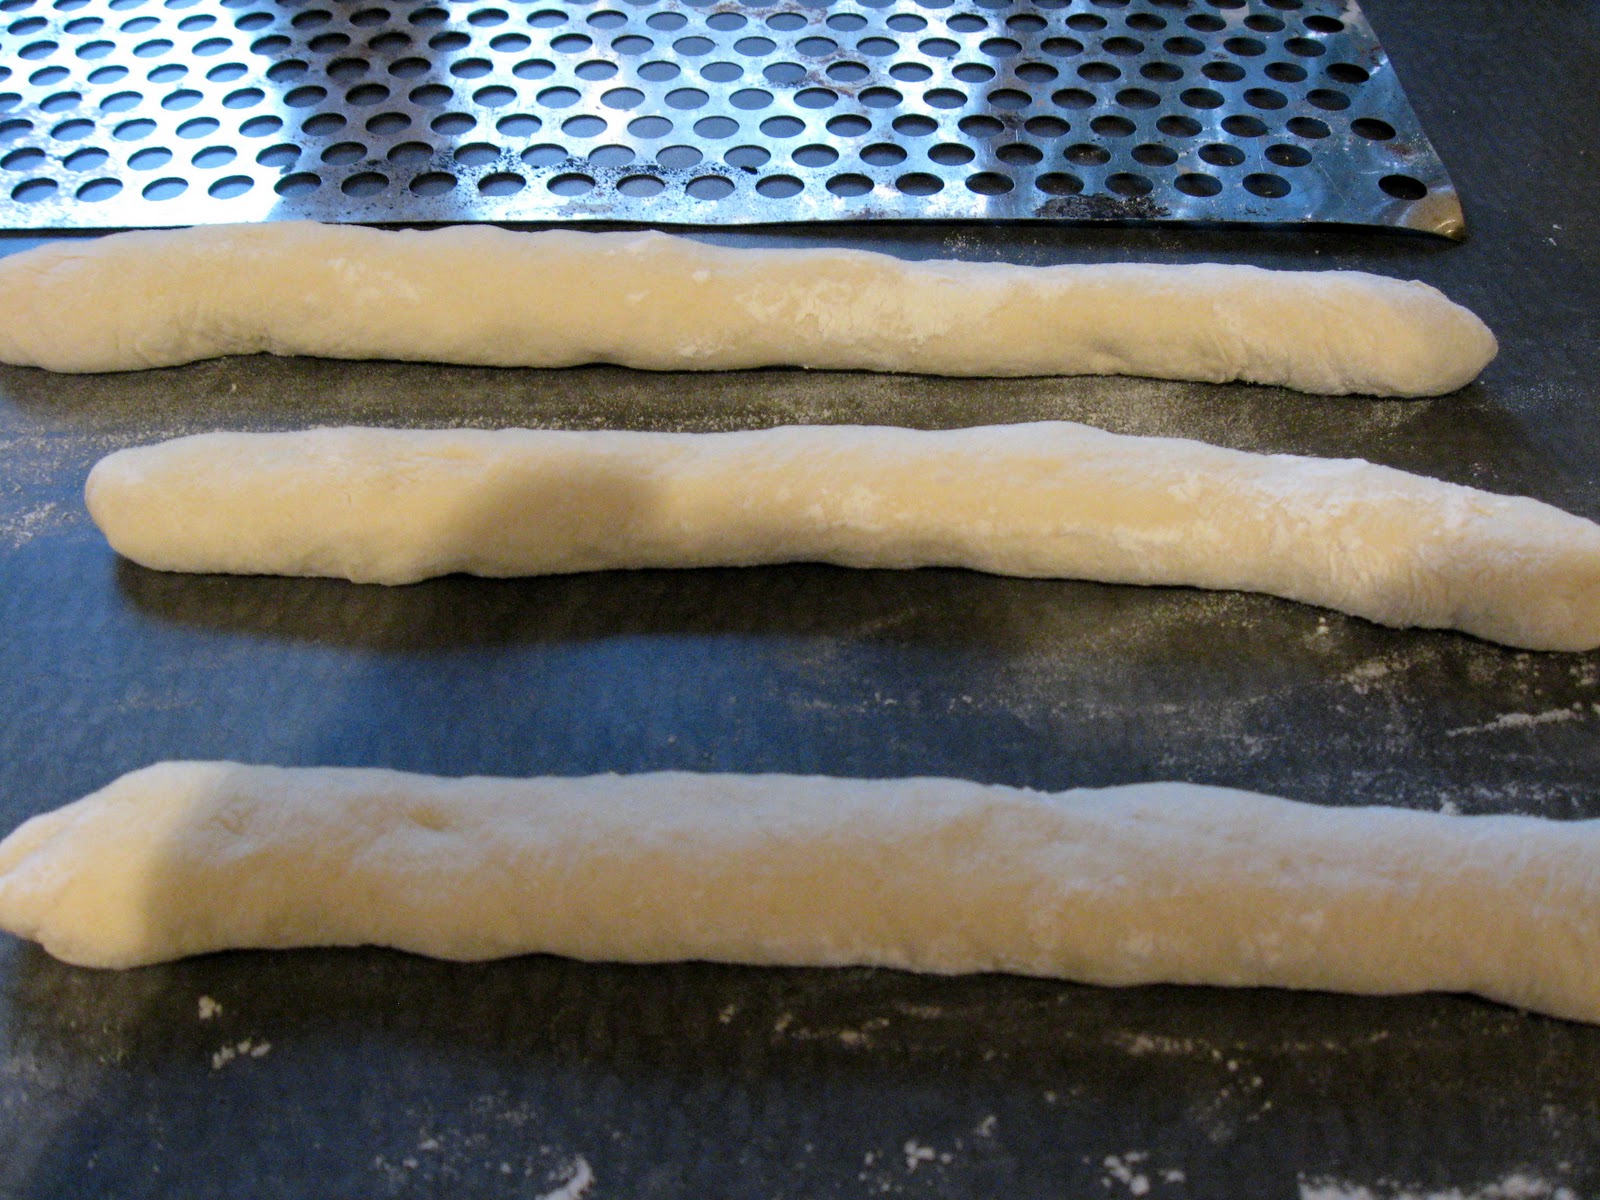
Roll each lump into ca. 18" rope.
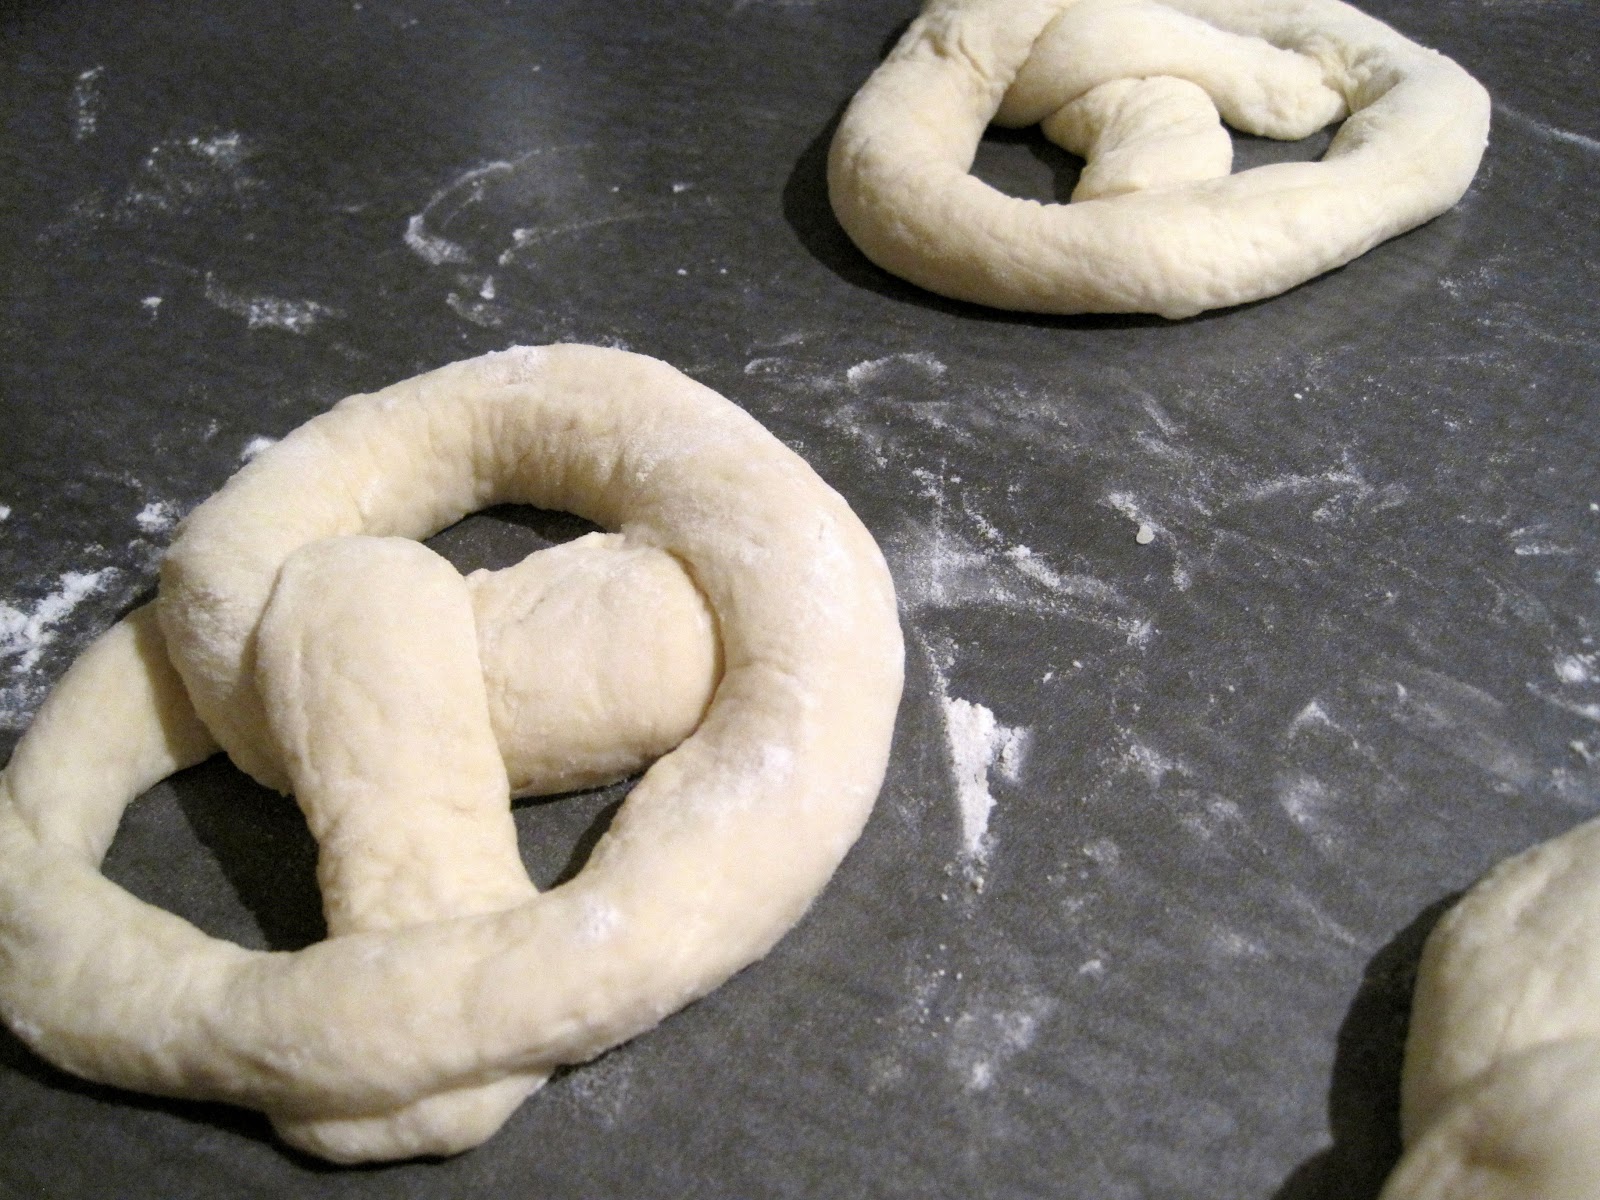
Twist the rope into one of these.  Find some kind of diagram on the net to teach you how.  Sprinkle with flour and let rest on the counter for about 10-15 minutes.
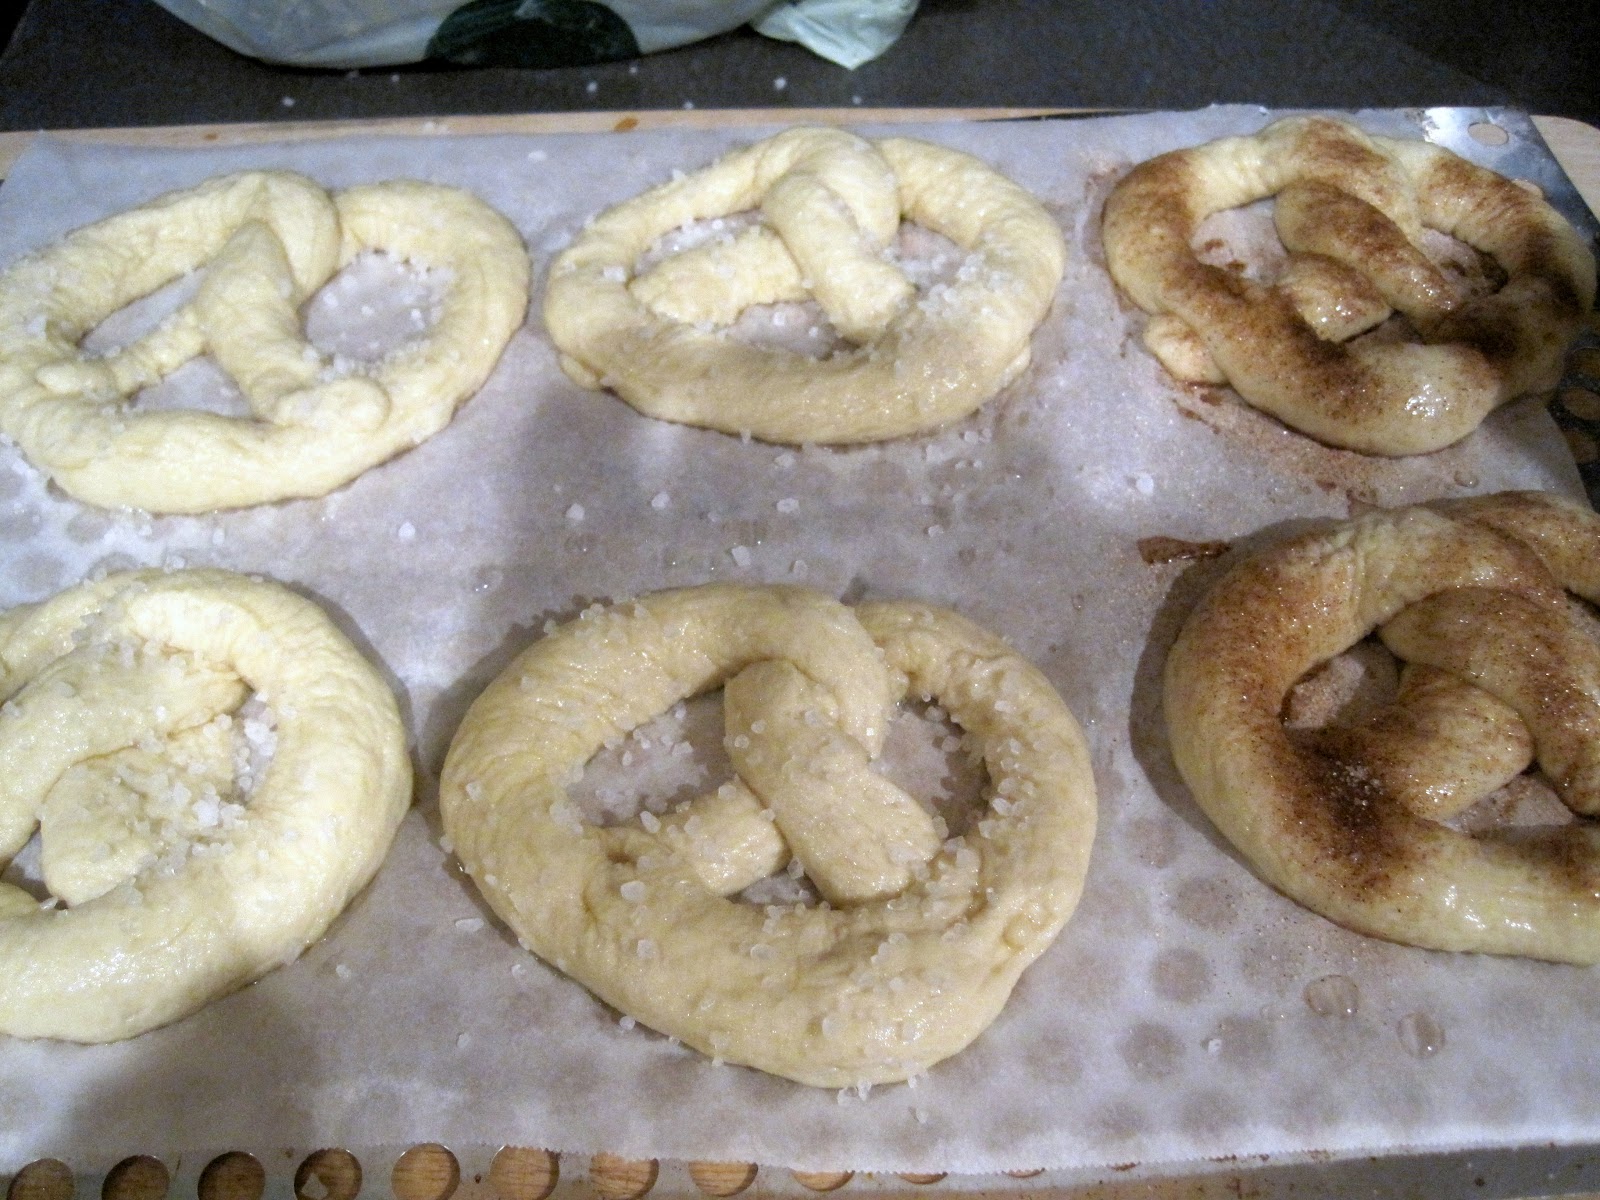
Darn, didn't get a shot of the last step.  Pour lye solution into a plastic bin [CAUTION: do this in sink, it will STAIN formica counters].  Dip the rested pretzels, couple at a time in the lye and let sit in lye about 15 seconds.  Remove from lye and set on parchment.  Sprinkle toppings onto wet pretzels.  Here is salt and cinnamon / sugar.
Place sheet in preheated 450F oven.
Remove when they look tasty (about 15-20 min).
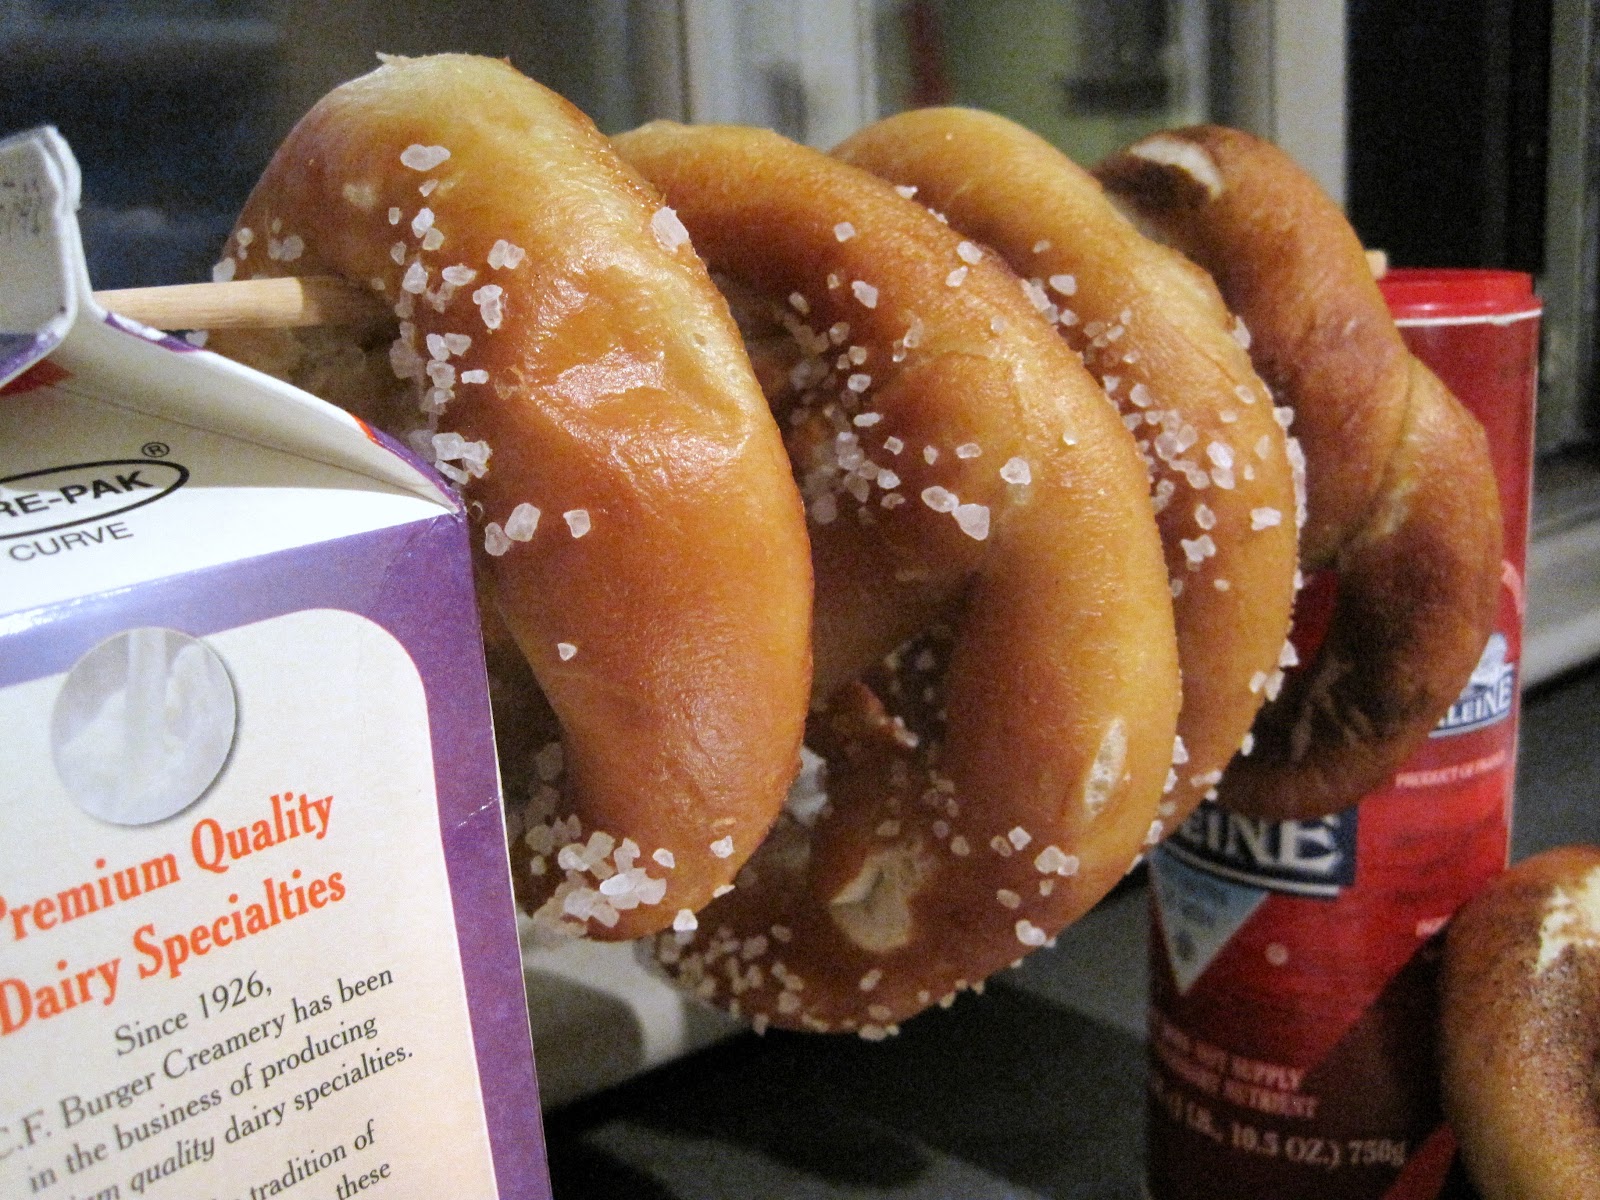
I hung them on a chopstick to cool.  
The cinnamon sugar were weird, the salt were sublime (this is Baleine coarse sea salt).
These are a new staple in our home.  Get the lye on Ebay and make 'em.  Lye's not bad to handle.

8.28.2010

Bread: School lunch edition

It's the new school year, and, another year of school lunches.

Frankie's bread preferences for school lunch aren't in sync with what I've given her.  She's currently in a PB&J phase and her bread of choice is the Giant Eagle "Italian."  It's a squishy white semolina loaf with, dare I say, a very nice flavor.

I'm no snob when it comes to bread.  I like my crusty artisan loaves and crackly baguettes, but I do love white squishy bread (and boloney and mustard).  However, white bread has always been an insurmountable challenge. I've never been able to reproduce it in my kitchen.  I dismissed it as an industrial process formulated with secret knowledge only Dick Cheney is privy to.

This morning, I studied all the labels in Giant Eagle's bread case and tried to identify the ingredients responsible for: volume, moisture retention, sweetness, texture and a preservative - although, if it's good, the preservative won't matter.  Any loaf, good or manufactured will last at least a couple days.  I was pleasantly surprised that I recognized most ingredients in the loaf she liked; my pursuit gained importance.  The toughest attribute to reproduce in a home kitchen is volume.  I've never been able to get that one.  Moisture retention can come from whole grains, even in a low concentration (bulgur, semolina).  Texture is usually tight, indicative of a fast straight dough process, also easy to reproduce.  Sweetness - also pretty easy, a handful of sweeteners are all you need to play with.

Formulating any new dough, I start with 600 grams grain : 400 grams liquid (my standard starting place = 67% hydration) and a notepad.

Recipe
water, 390 g, near boiling
white vinegar, 10 g
bulgur, medium grind, 10 g
semolina, fine smeed, 40 g
salt, 10 g
yeast, dried, 1 packet (contains ascorbic acid)
vegetable oil, 20 g
sugar, 10 g
dextrose, 10 g
unbleached white, Montana Sapphire, 560 g

Process particulars
Straight dough method.  Hot water and bulgur set until water cooled to 120°F.  Then added everything and spun it in a bread machine dough cycle for 7 minutes, dumped into a container to rise at room temperature for an hour.  Punched down and let rest for 20 minutes.  Shaped into a batard on a floured counter and covered for 20 minutes.  Slid whole thing onto my perforated stainless flat baking sheet.

Baking
Baked in preheated 425°F with 2 tablespoons water tossed in bottom for steam shot.  After 5 minutes, cooled oven to 400 and let cook 40 minutes.  After a few minutes, placed a loose foil tent over the top to prevent dark browning.  Pale is the kid's preference.

Removed from the oven, let cool an hour and sliced.
Giant Eagle                                              Mine

Conclusions
Texture inside looks spot on.
Crust: tougher and more crisp than store bought
Taste?  Kid will check it tonight at dinner.
Wife suggested cooler baking temperature and I think maybe a tad more shortening.
Any ideas?

Post mortem
Kid never got to taste it.  It was obviously not the squishy white bread I yearned to make.  I think the recipe was good, but the loaf was crustier, drier and didn't age well.  I'll be trying different baking methods and will report back if I get something closer.

8.24.2010

todo

My culinary todo list:
1.  Harvest my rapidly growing basil and keep drying it for use in all things ragu (this is kinda done/in progress and not new but cool to me).
2.  My mother just made us a free form Challah that was amazing.  It reminded me that one not always braid said bread just because.  A free form boule took on a beautiful newness.  I'll be making it regularly for the kid's lunches.  Thanks Ma.
3.  As the weather cools down, I'll be cranking up direct grilling, i.e., roasted roots.
4.  Hunting for some good cucumbers to try out some pickling recipes found on Twitter (@1kitchen1girl).
5.  More Firedome pizza!  No new mods, far from perfect, but, it's done.  Despite the dearth of posts, I've been trying lots on it and I think I've got it as good as it'll go - and I'm happy with it (almost).
6.  Been watching pretzel making vids on YouTube and I'm almost ready to break out the lye.  I can't wait!!
7.  School's starting and the largely European teachers of my girl's school are in for some treats.  Overnight baking and all.

Ambitious list, stay tuned.

Alton's vid on pretzels using NaHCO3, he wimps out on properly using lye.

7.27.2010

Baba Ghanouj on the Firedome (and some additional notes on the continuing saga of the Firedome development)


I'm happy with the use of this thing, but I need more experience.  A big problem I'm having is dome temps.  They're all over the place.  It may not be a problem, it just has to do with whether there is a live fire or if the fuel is smoldering.  

The objective I set out to acheive at the beginning of this project was evenness of cooking, crucial for a pizza.  With this rig, the only thing that will burn the bottom of a pizza is placing the fuel beneath the stone and not on the perimeter.  I've observed this several times.  

What keeps tugging at me is using wood for fuel.  After briquettes are started, this thing is pretty damn hot and new fuel catches fast - and burns fast.  Also, since so much of the perimeter is accessible with the hinged grate, removing the dome, charging fuel and regaining temps isn't such a big deal.  I do it routinely.  Now, I want to try to recharge with two logs on either side.  Once they catch, I'm curious about the temperature and the burn time.  So, that experiment's on tap.  I also have a few friends queued up who need some samples for tolerating my babbling about this thing.

7.20.2010

Applesauce for 1 (guest blogger Frankie)


I'm hitting some wickedly cool milestones this Summer.

A week ago, while at the RPAC pool at OSU swimming with my papa, I tossed my kickboard aside and swam across the pool, watched a bunch of Bieber vids on YouTube,  sticking a few serious handstands and roundoffs in gymnastics and kicking my papa's butt in Connect 4.   In the kitchen, I've been dabbling in vegetables, decorating cupcakes under the watchful eye of my pastry chef mom and, today, my very first culinary creation.  Uncooked apple sauce!  I made it up; yet another data point for nature clobbering nurture.

Applesauce for 1
Core and slice a medium Granny Smith apple (from OSU's farmer's market).  Take each slice of the apple and shred it using a fine grater.  Eat the residual skin (big vitamins).  Take the resulting very fine apple pulp, add a single level teaspoon of sugar, mix, and then (my secret), clean your hands and squeeze a few cherries letting the sweet/tart juice into the applesauce discarding the pit and skin.  Chill a bit in the fridge, top with maraschino cherry - serve with demitasse spoon.

7.14.2010

A crumbling meatloaf and wishlist

Summer, busy, really busy.

Prodded by the paying customers, Ross (hey man, go eat some Memphis bbq and stop reading blogs) suggested I post something to get those jars of jam below the fold.

Tonight was a special night, our dinner to commemorate Bastille Day.  This is our 10th anniversary of the day we landed in Columbus; it also marks another very special event.  Curious, aren't you?

I planned a meatloaf, a relatively rare and special dinner for us.  I usually add cracked wheat and then the usual suspects found in meatloaf (onion, fresh herbs, egg, a few bread crumbs, milk, some tomato puree, etc.) and then cook in the kettle.  It turned into a crumble - the whole wheat incorporation tastes great, gives a whole grain punch, but sometimes causes a less stable loaf.  Regardless, we had it with grilled asparagus and yellow squash.   Despite being a less than favorable texture, the smokiness was killer.

What's coming on weber_cam?
1. Eons ago, weber cam was intended to be a real webcam to watch my grill while I was in work (to check on it for safety's sake).  I'm contemplating this via ustream.tv to do some ribs for a weeknight.
2. More Firedome (Kate, I haven't forgotten you!).
3. Giada's limoncello recipe looks pretty easy and good, peeling the lemon looks like the tricky part.
4. Mac's merguez is killing me, gotta try it soon.  Merguez is heaven, I'll be scouting out some lamb shoulder at Mediterranean Food Imports for this.
5. Brining a pork shoulder?  This one I did.  I tried a 7 lb brined butt vs a 5 lb non-brined.  The 5-lber was actually better.  Brining provided negligible benefit.  I was surprised.  May try injection sometime.
6. Sweeet 'n sour pickled anything.

That's it for now ...

Enhanced by Zemanta