I used to resist frying bacon because of the mess and spattering oil that remained on the stove when finished. Then I considered the oven method. Scanning the Google top ten results, most people bake it in the oven beyond the flash point of lard, ca.400-450F, the most often prescribed temperature. The bacon sure does cook and fast at that temperature! And, if you're lucky enough to forget about it for a minute because the dog is peeing in the mudroom and you're trying to clean it before it soaks in to the floor tile, the smoke detectors go off and your oven is smokey and covered in spattered bacon grease.
I played with temps and finally ended with a nice slow, 250F. It cooks nice, there's a big window of doneness and it's just as good as anything on the stove. Slow down people. Smell the roses. Eat the bacon.
4.29.2013
bacon in the oven
4.24.2013
Gravity feed fuel? (a mini minion alternative) with UPDATE
Cooking low 'n slow with lump or briquettes poses a challenge of maintaining a low temperature (ca. 225F) with a wood/lump/briquette-fueled heat source for, ideally, an overnight session. A Weber Smokey Mountain handles this well by utilizing a really tight design allowing a controlled amount of air to give the long slow burn. Doing this in a simple 22.5" kettle, the most awesome and ubiquitous cooking instrument on earth, is trickier. Most use a the mini-minion method whereby a few lit pieces of fuel are placed atop a pile of unlit fuel and the kettle closed up with only a slight bit of airflow. Most of the time this works, sometimes we wake to a kettle that went cold in the middle of the night.
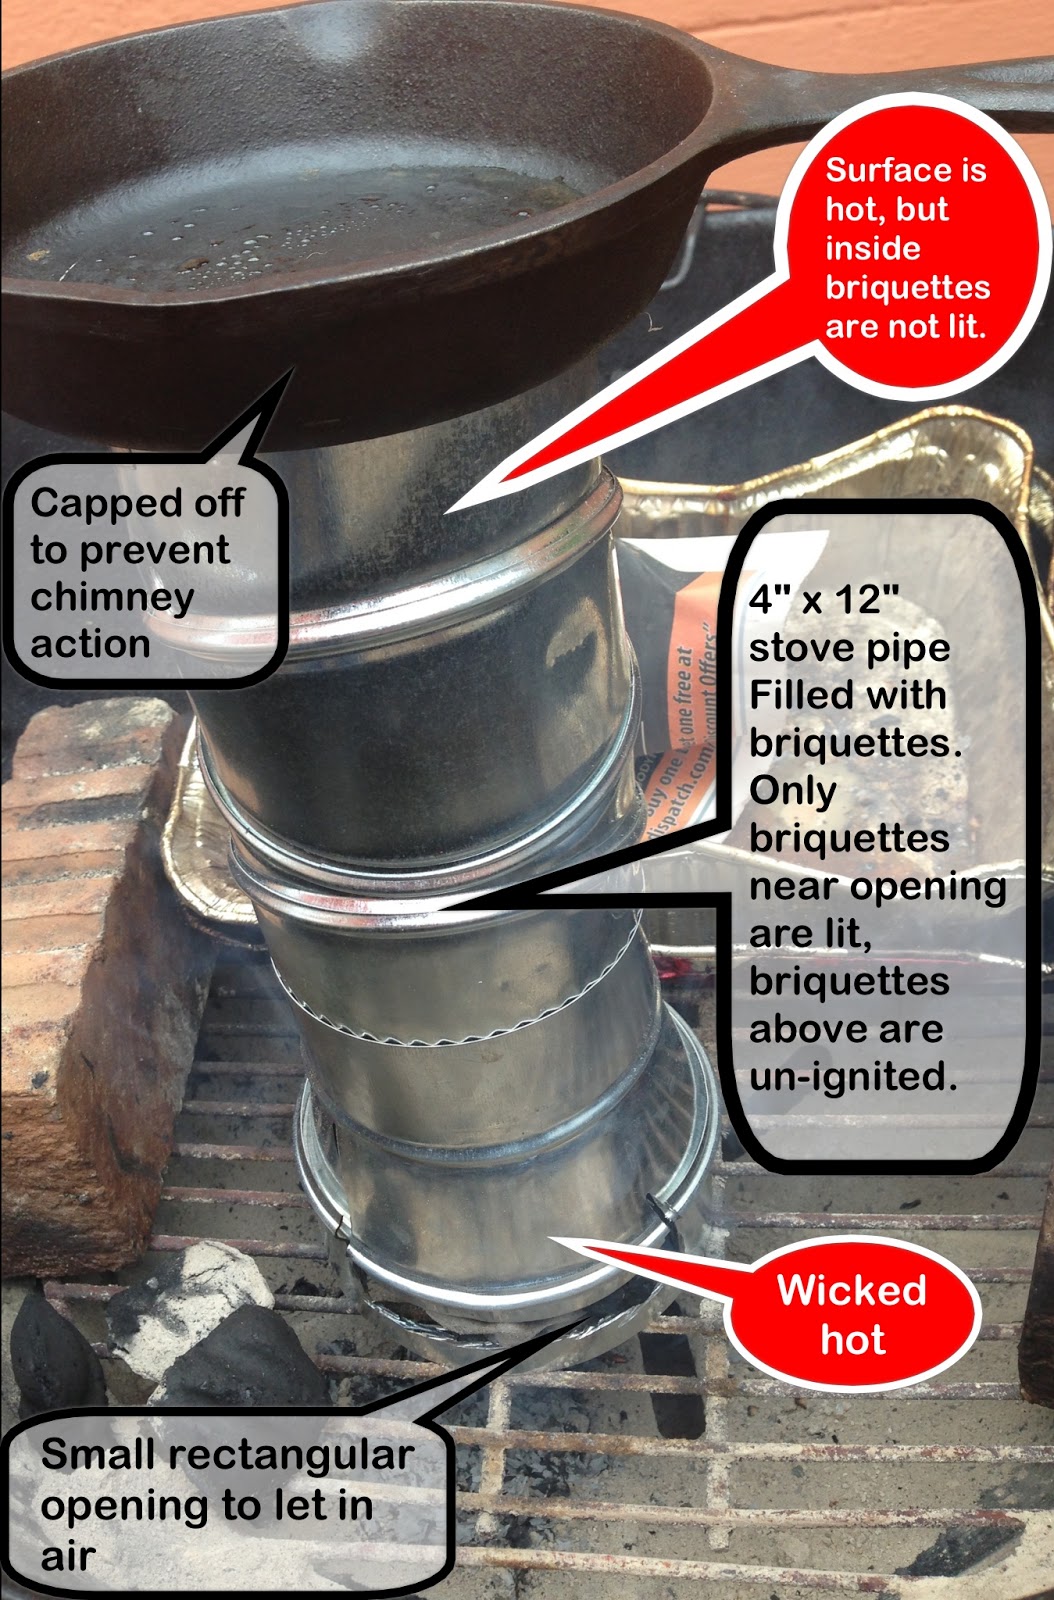
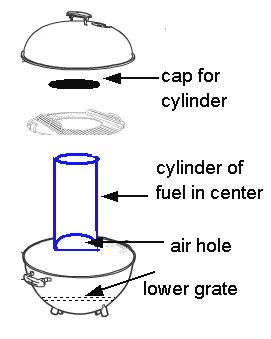
Another solution was brought to my attention recently. Stump's smokers are pretty awesome; at the heart of these brutish beasts is a gravity feed chamber in which a *covered* vertical chute of fuel permits perfect delivery of fuel. Load it up, let it go. The vertical chute has an opening at the bottom only. The only fuel that burns is as high as the air can get in, the rest of the fuel does not burn. This is in contrast to a open-top chimney many use to ignite a batch of fuel. The only problem with Stump's Smokers is they're about $2,000 (and 2,000 pounds) on the low end. I'm philosophically opposed to making pulled pork at that price and sought to find a cheaper alternative using this same elegant principle buried inside my faithful kettle.
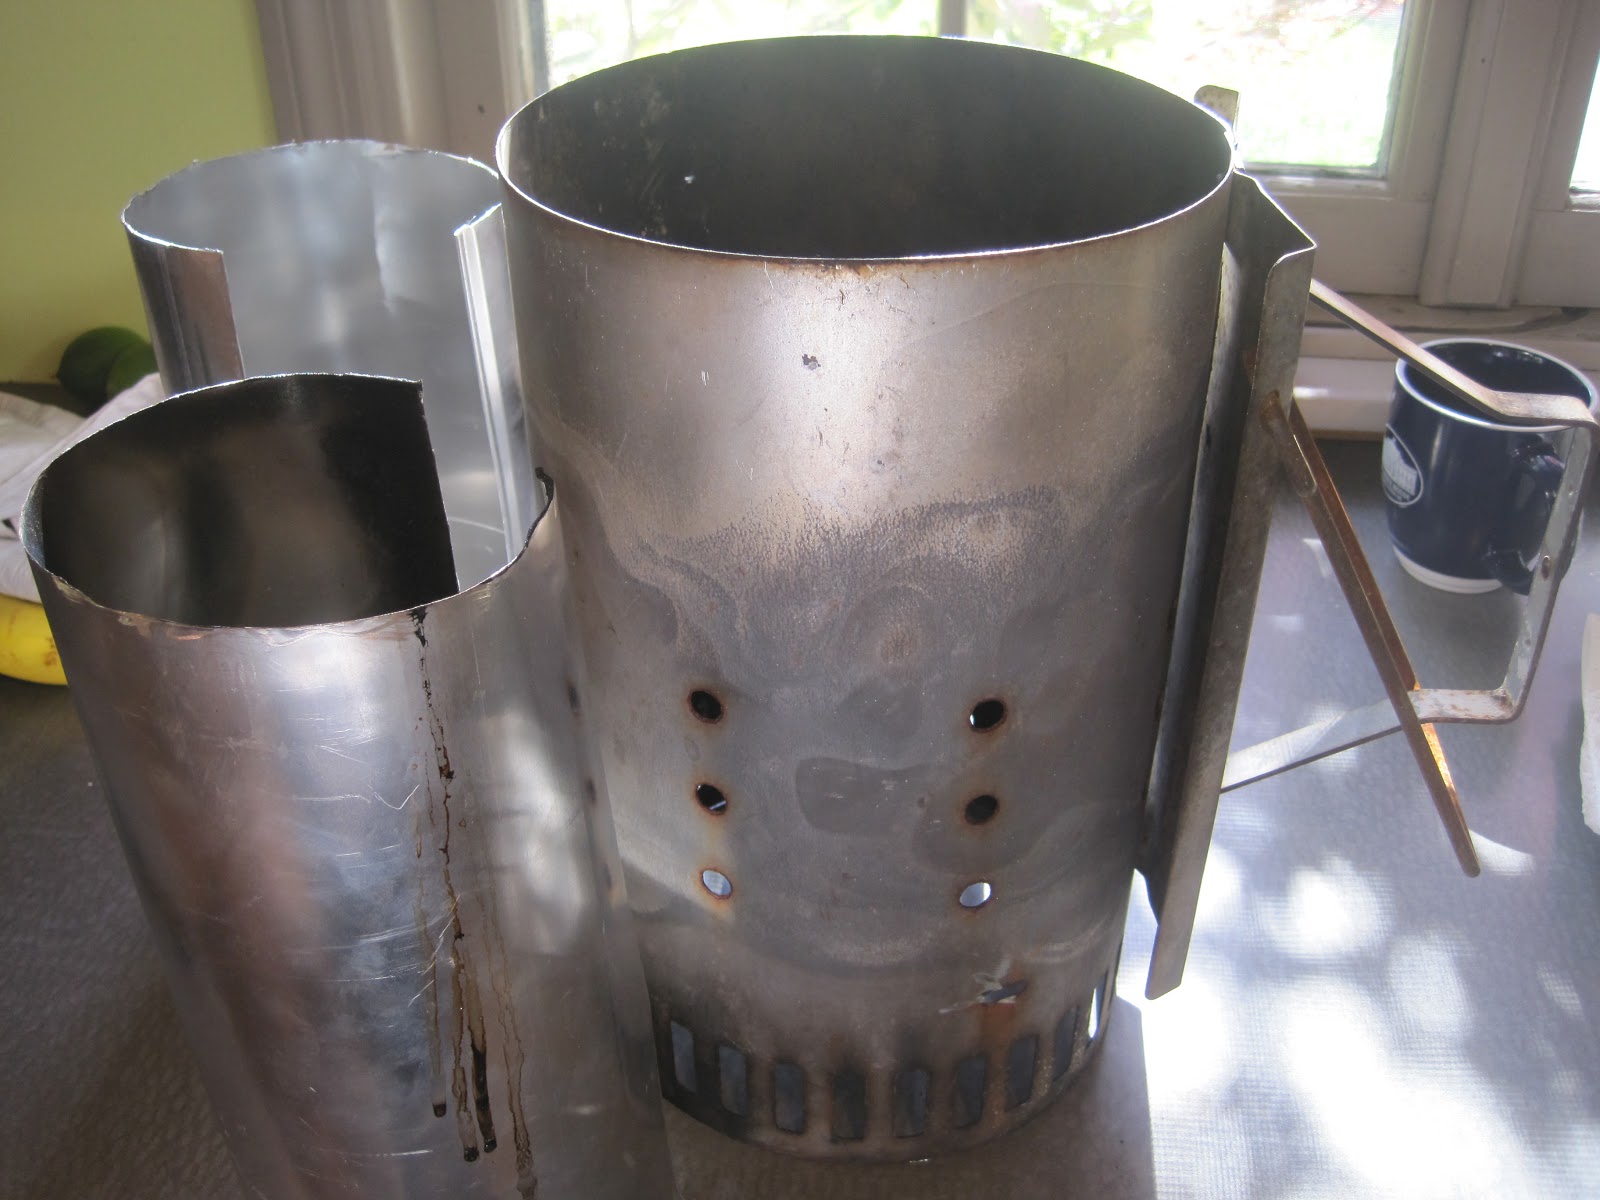
Depicted below is a hacked up piece of stove pipe, only 4" wide and 12" tall, to see if I could get a working preliminary model. This small rig took about 20 briquettes. This was placed in an uncovered kettle. The briquettes at the bottom burned for over 5 hours (then I went to bed)! More later as this develops ...


4.14.2013
Ginger beer?

White sugar 200 g
Ginger, finely sliced, 50 g
Munton's ale yeast
Dilution to OG 1.050, ca. 1 gal total volume
What's left? (updates posted)
Fermented to 1.012 or so
Added potassium sorbate to kill residual yeast
let clarify
Currently waiting for it to clarify.
add some sugar back to ca. 5% by weight
bottle and force carbonate in pet bottles with this.
Right now??
It's perking along, I'll put it on ustream soon (haha).
4.10.2013
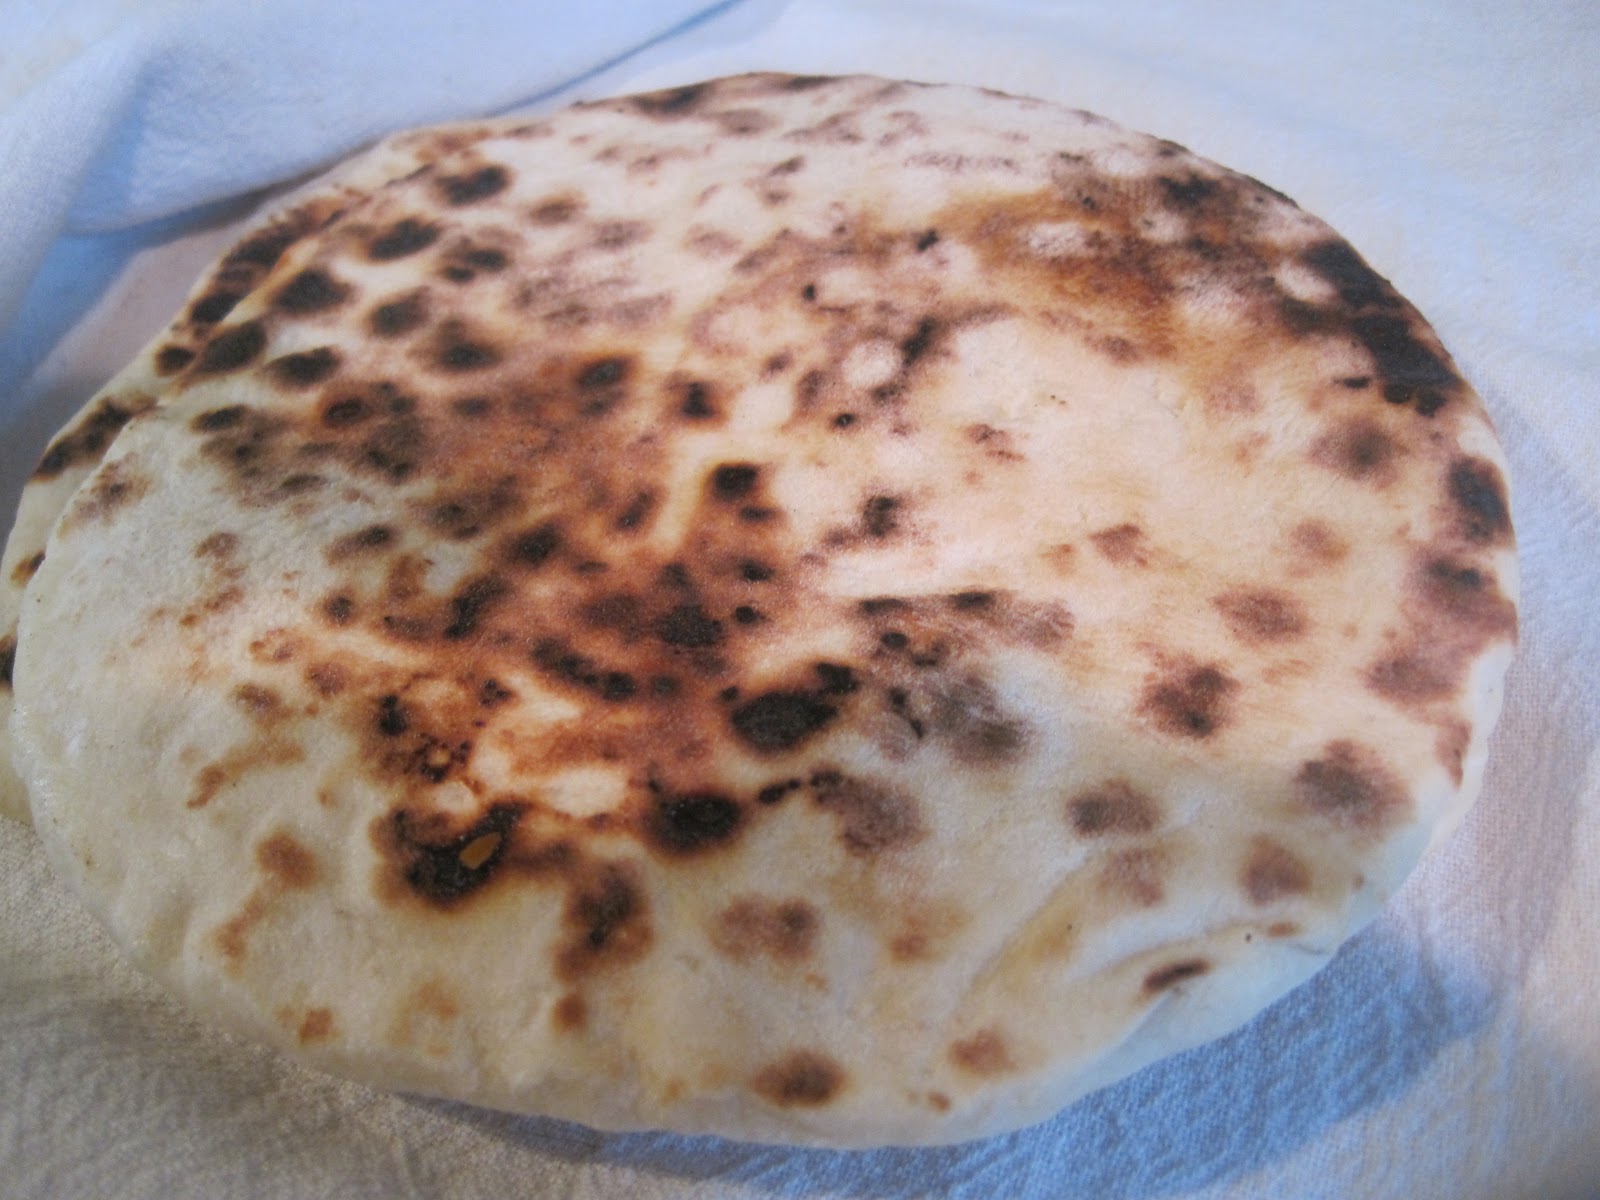
Pita / Naan
My recent prep of stovetop pita remains my favorite innovation in bread from our kitchen in a long time. The breads are soft, taste at least as good the 2nd day and are good clear into the 4th day. Frankie is especially fond of using them for pizza. In the initial runs, I used a minimal dough and made them super thin, about 40 grams each rolled to a 6-8" diameter circle. This thickness is pretty great for pizza and general consumption.
But the other night, we had some takeout from Aab (mmmmmm). I ate some of their naan and got to work on a variation of the recipe. Even though I don't have a tandoor, the combination of dry heat and flame makes what I perceive to be a bread that resembles naan, but the recipe needed a boost.
Here's what I got, a little heavier, a little thicker, richer texture: water (180 g), unbleached white (300 g), salt (5 g), yogurt (30 g), sugar (10 g), vegetable oil (10 g), yeast (Fleischmann's fast rise, 7g). Straight dough tossed together in the morning and let rise in fridge all day. If I thought more, I'd have used milk instead of water too (next time). The yogurt (full fat Dannon) gave a nice richness. I also rolled them thicker, about 80 grams and about 5-6" diameter. Same cooking method as stovetop pita. Enjoy. Frankie couldn't stop eating them.