1.28.2015

pizza, with crackly crust

Past couple weeks we've had the occasion to eat pizza at Tommy's Pizza and Subs on OSU's campus.  It's an interesting pizza, super thin crackly crust with layers of crackly goodness.  I think it's similar to Rubino's and Clintonville Pizza (some time ago, recently CP changed and their pizza is awful).  We observed, in the basement of Tommy's is a sheeter, I've also seen one in Cville Pizza, so I figured this had something to do with the texture of the crust.

If one searches for this crust style using terms like "thin," "crackly," etc. results are filled with various dough formulations that fall short.  There's more to it than thin.  I can roll a dough extremely thin, but then there's no life to it, it turns into a soft dead crust, no bubbles, no nothing.  There's crispiness and sometimes layers of crispiness.  Recalling my experience with dough for biscuits, if I fold it a couple times and bake I get a pretty good set of layers and some crispiness.  In an unlikely attempt, I tossed together a quick dough from quick rise flour, leavening from baking powder only - no yeast, tried to fold it, rolled it out thin - very hard to work with, it produced a terrible kind of cookie pizza crust.  It was pretty disgusting.

When I incorporated the word laminated into my search, several posts from pizzamaking.org popped up and the problem had been addressed.  Little did I know that laminating was not only a technique for croissants, but for lean doughs as well.  I recently read of a lamination procedure used on a relatively lean dough when reading about paratha vs naan, so it's definitely nothing new, but it was to me.  And what a great application of a powerful technique!

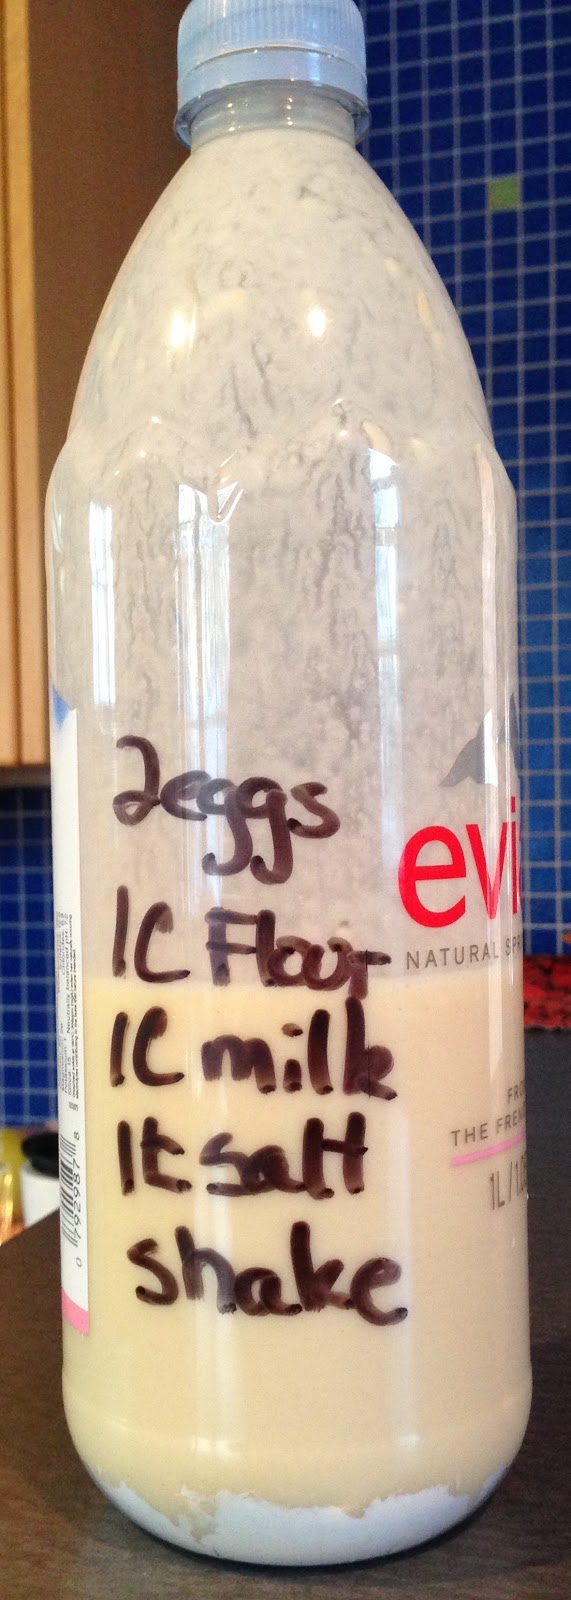
I happened to have some dough in the fridge, 2 days old.  I made it for my crusty mini banh mi rolls.  The dough consists of Gold Medal unbleached white flour 250 g, water 150 g, Fleischmann's instant active yeast 3g, salt 4g, crisco 4 g, just mix and knead and toss in fridge.
 Started with 124 g.

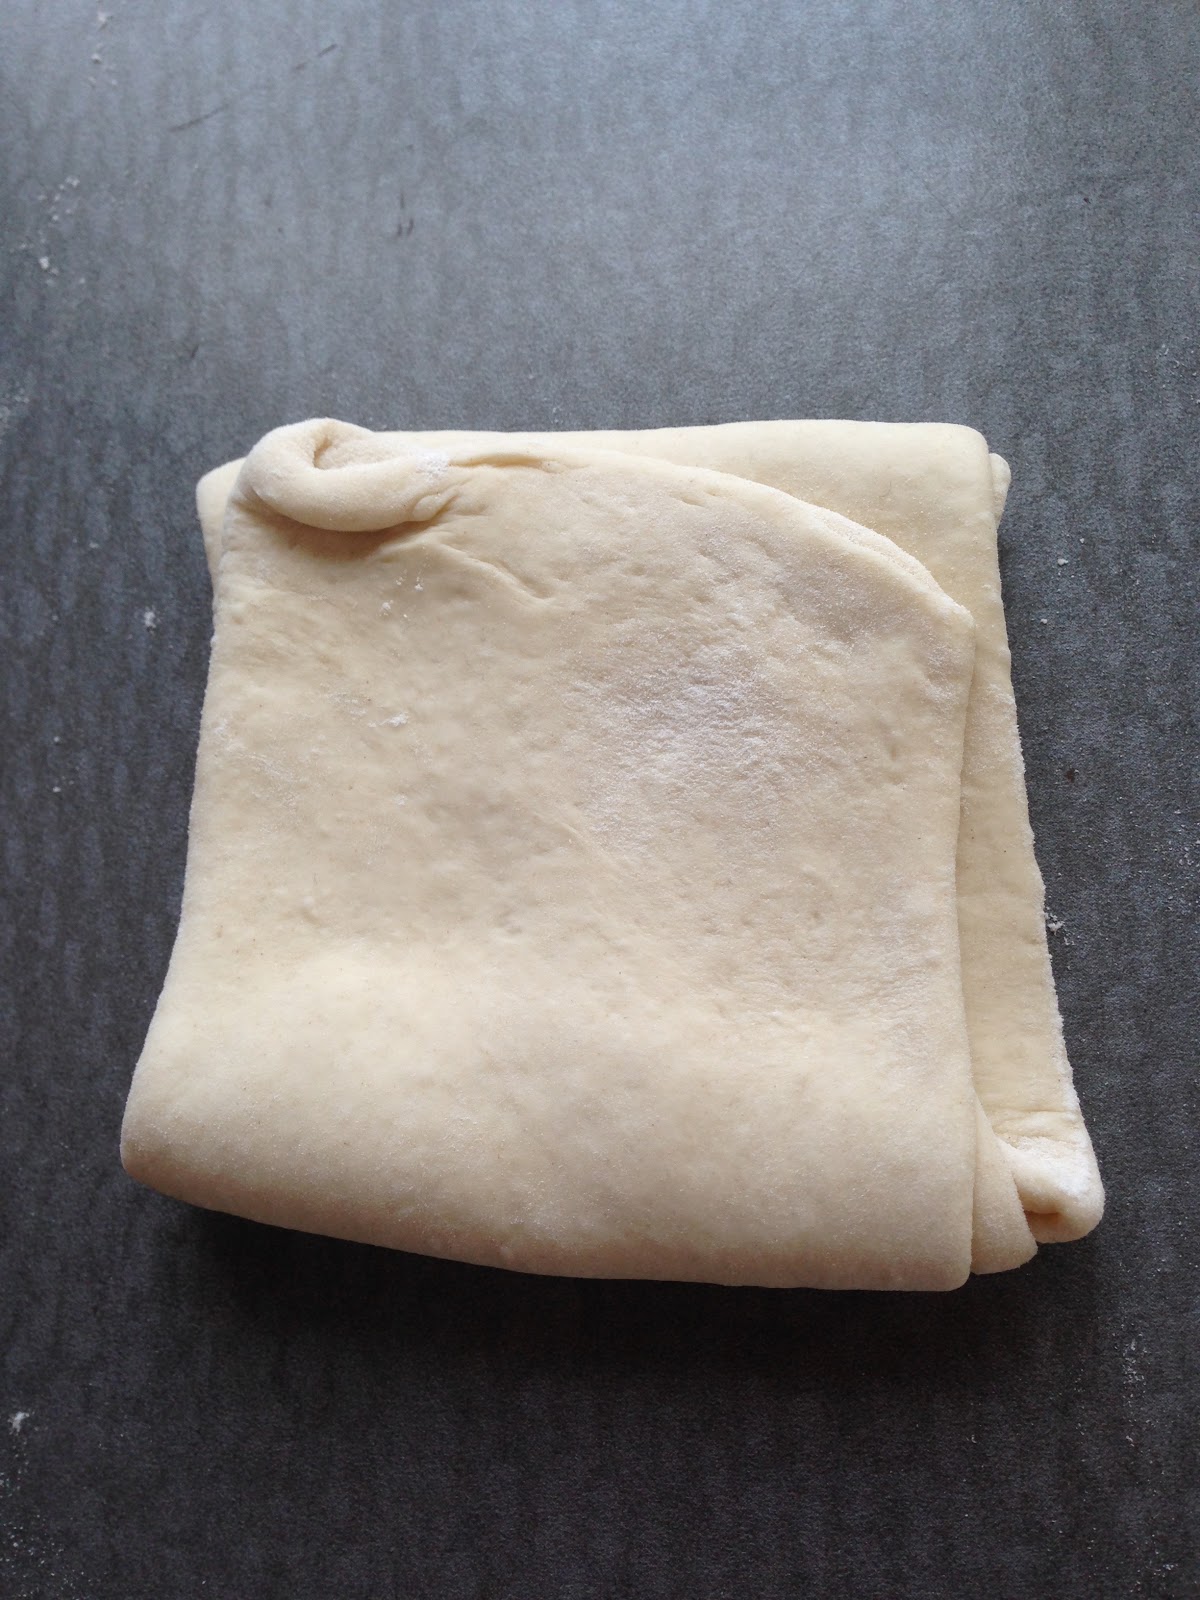
Rolled it out to a rectangle of about 12" x 9" and folded it in thirds.  This is a pretty dry dough and rolls easily.  I kept dusting it with flour.

Rolled it out thin and folded it into thirds again.  If this were croissants, this would be called the second turn.

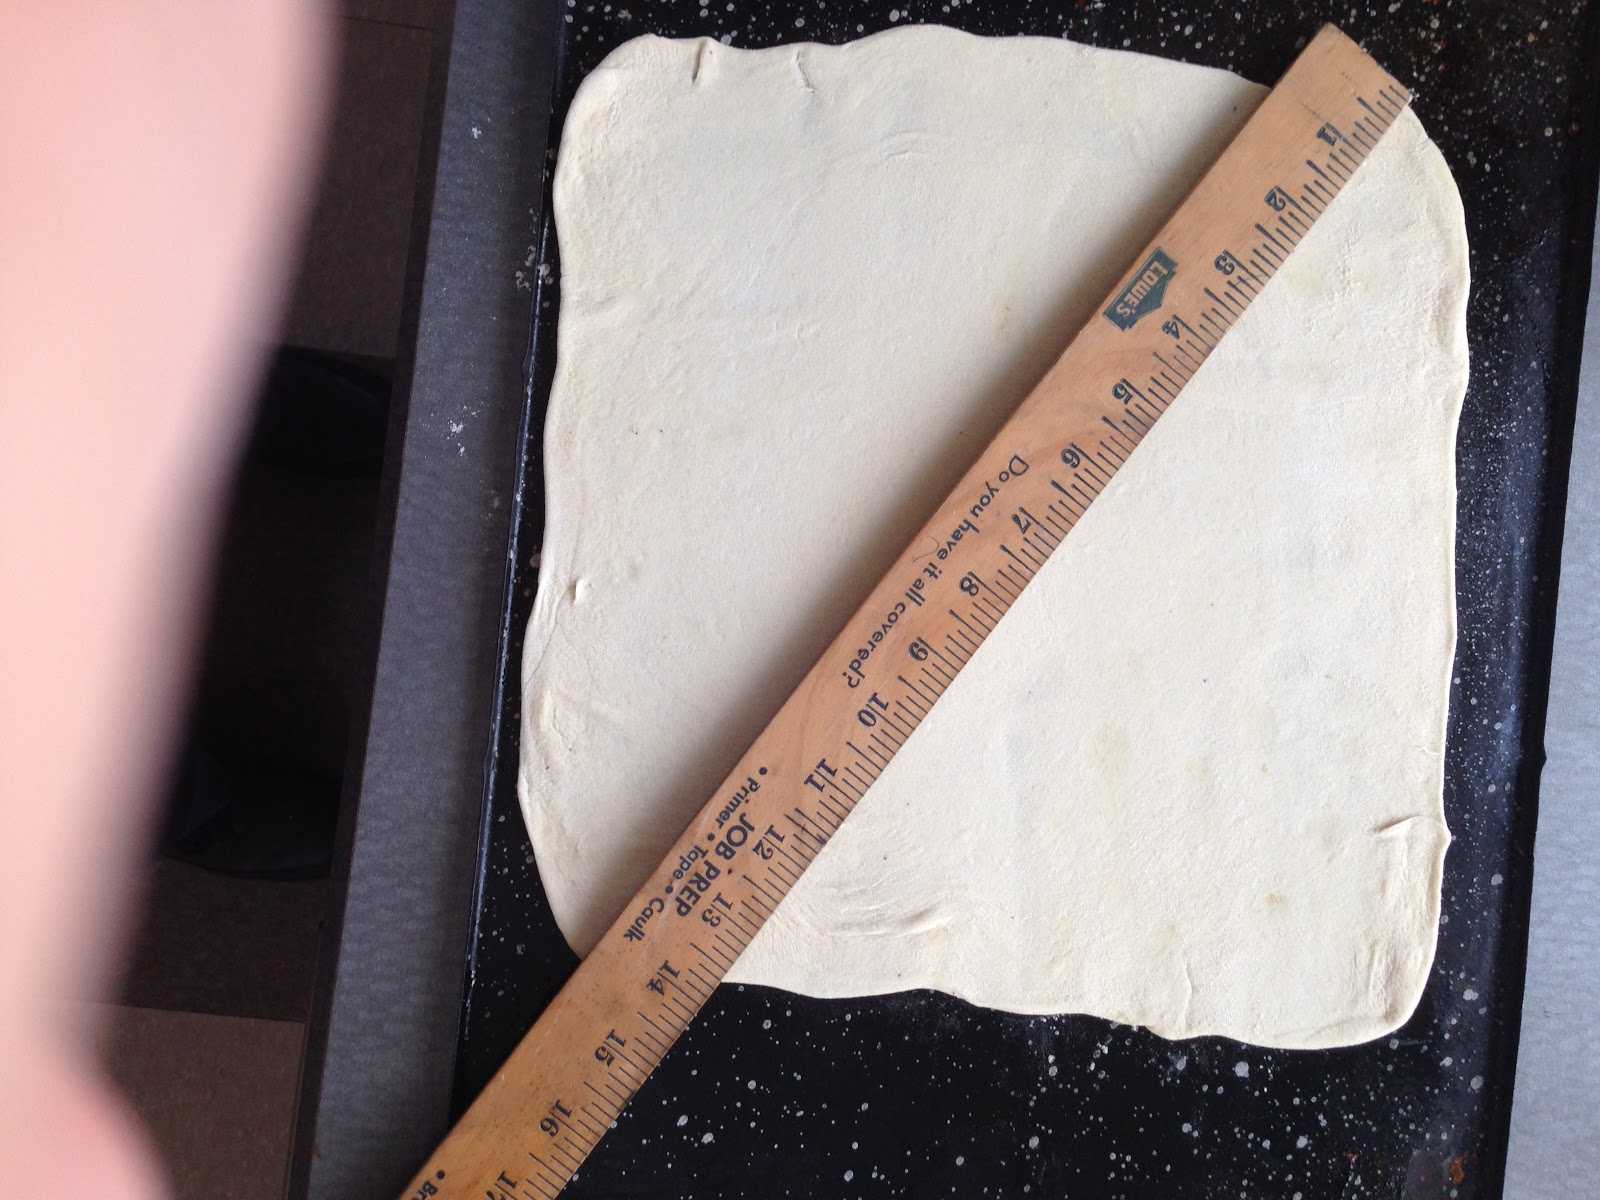
Then I rolled it to a 10" x 10" square, the thickness can then be given by a density: 1.25 g dough/sq inch.  This derived quantity is a better way to accurately describe thickness than trying to describe the actual thickness of the dough.  This compares to my usual of 220 g per 90 sq in round pie (11" diameter) or 2.4 g dough/sq in.

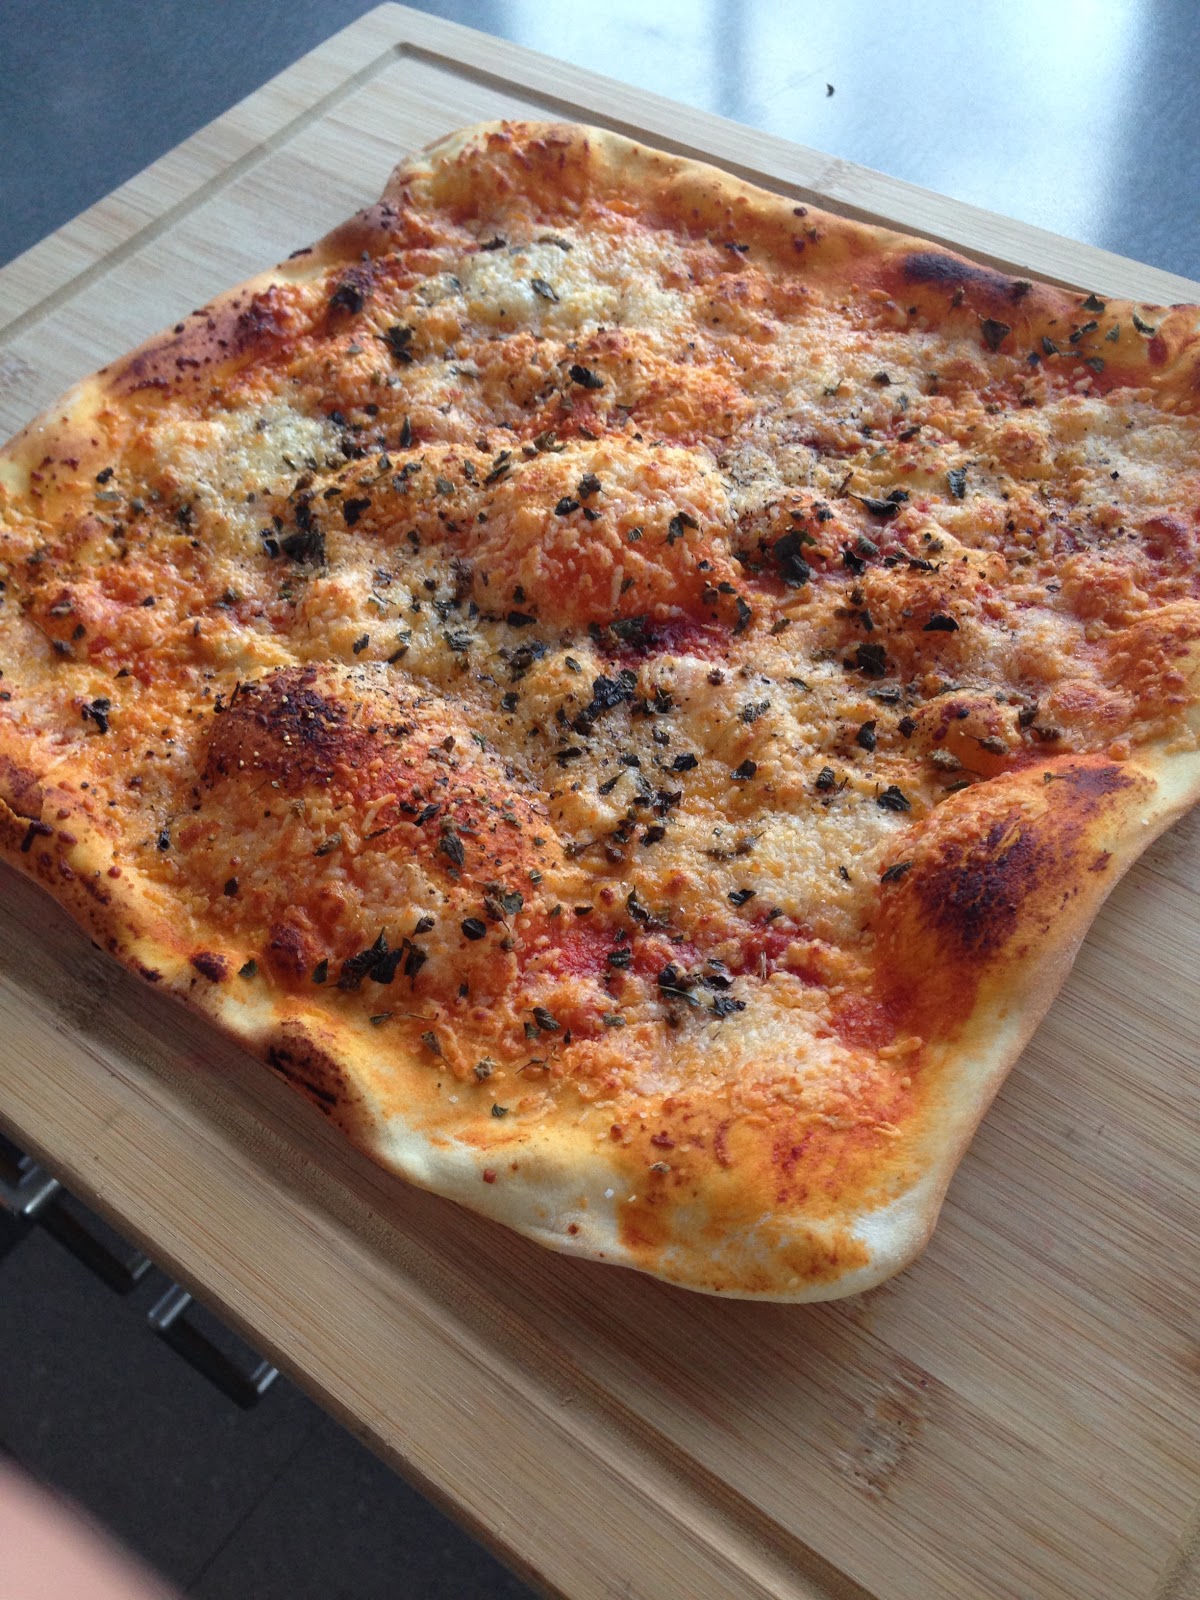
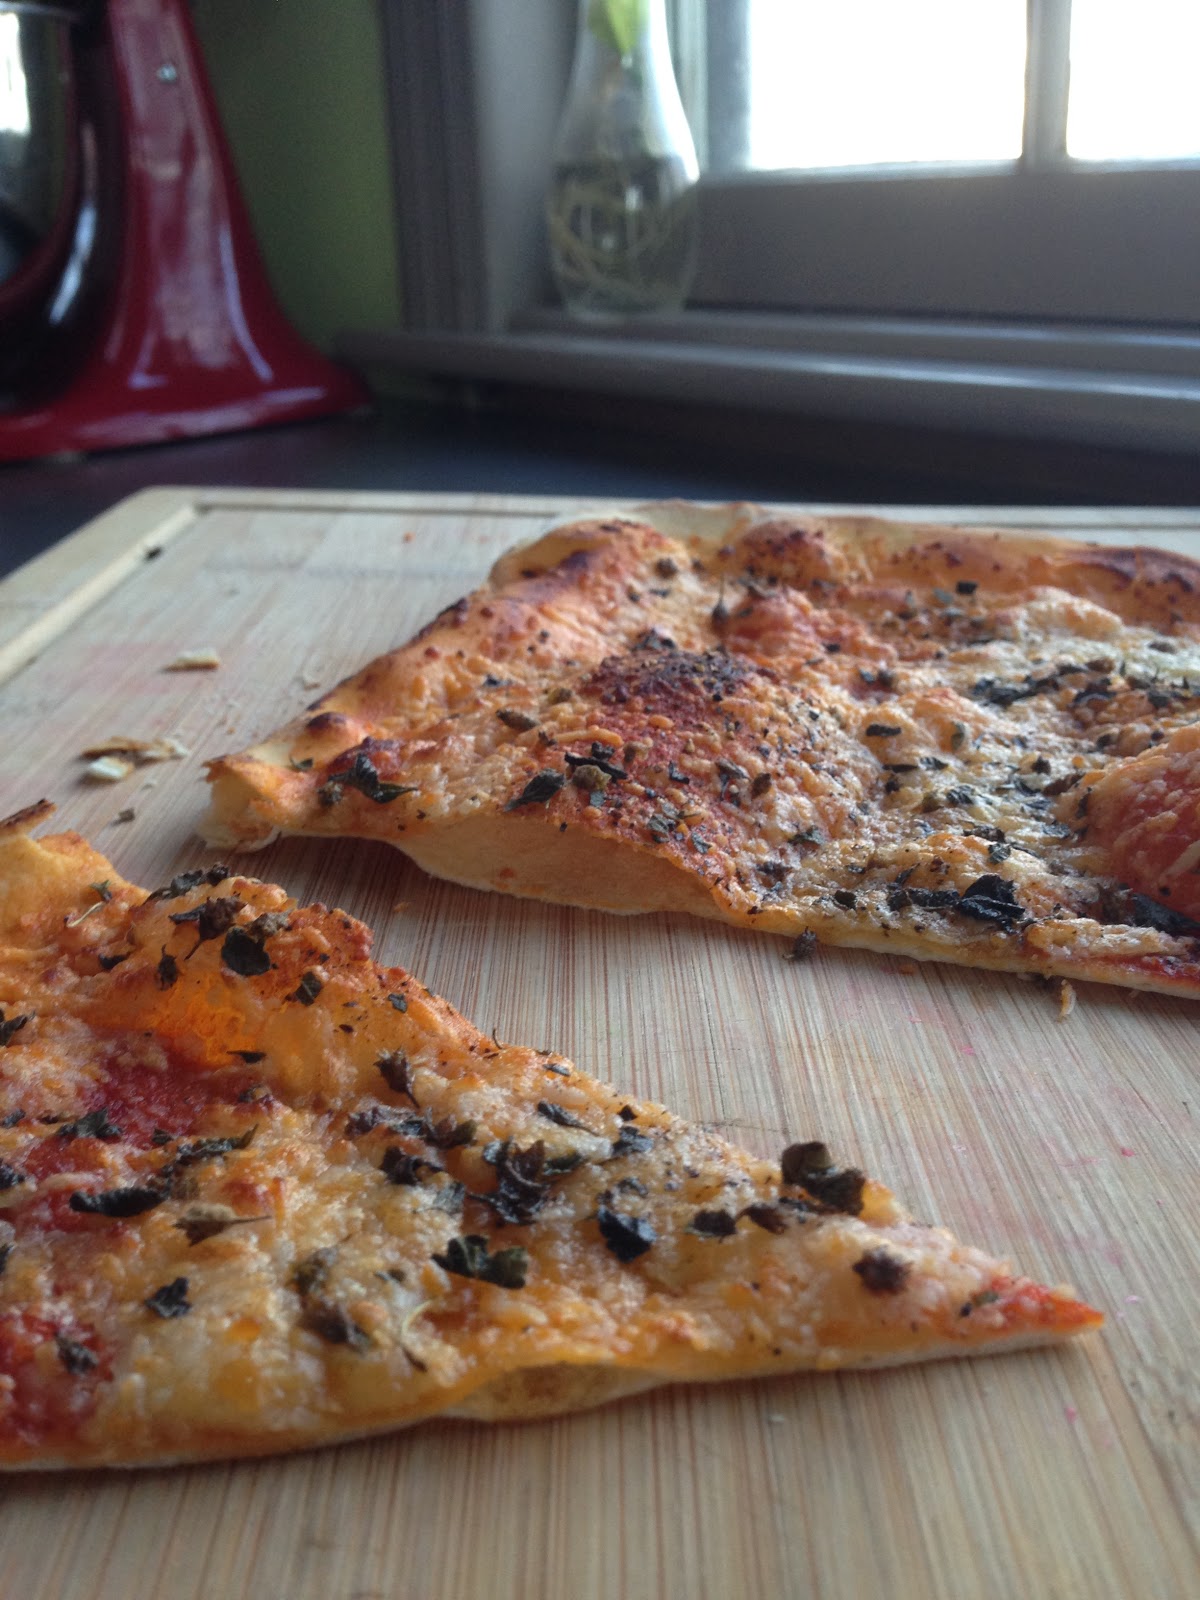
When I get a pizza idea but have no tomatoes on hand, I often just make a mush of olive oil and tomato paste and use that for my first coat, it's pretty nice.  Then I added mozz, oregano, olive oil, salt and coarse pepper.  The black enamel on steel sheet was coated with some oil and placed in a 500F oven, slightly above half way in the oven, to bake for about 15 minutes.  I did NOT dock the surface as is normally done with cracker crusts, I prefer the bubbles.

Boom! Lots of bubbles, super thin crisp crust.  As it cooled it became a little more crisp.

Appetizer time!

1.10.2015

popovers (yet again)

Popovers - 3 ingredients (not including salt).  This is a food challenge I dream of.  Last time I spun out of control in pursuit of this ethereal delicacy it was for a friendsgiving in 2012.  Despite some good batches, I still realized too much of the dreaded post bake popover collapse.

I was inspired to resurrect this battle after an episode of @GuyFieri's TripleD (I happen to be Guy's only fan in the world, I watch marathon sessions of TripleD Friday nights).  A cook in a diner made gruyere and pepper popovers that looked fantastic and demonstrated a prep in which I gleaned some key information.  
  • Ingredients - (good consensus) eggs 100 g, flour 135 g, milk 120 g, salt 3 g, mix, lumps allowed. This produces a pourable batter.  I placed my ingredients in a used water bottle and shook it to mix.  This diner chef stated all ingredients need to be at room temperature.  This is what I thought might be 1 key piece of information.  Given that eggs and milk are stored in the fridge, I wondered if past attempts utilized a room temp batter.  This time, I mixed the batter and decided to wait until it was at room temp, hours if necessary - I figured the worst that could happen is it could start to ferment and/or I'd get nil rise.
  • Pan - popover pan, I use this one - same as the one in TripleD.
  • Preheating - preheat pan to baking temp, 375F. 
  • Lube - The chef on TripleD spray-lubed the preheated pan.  I added a tablespoon of vegetable oil into the bottom of each cup prior to adding the batter.
  • Baking - Removed preheated pan from the oven, lubed each cup and poured in batter.  I noticed the diner chef took her time, filled each cup with batter and then added a few chunks of cheese to the top of the batter followed by cracked pepper.  I was surprised there was no rush to get the hot pan back in the oven.  I did the same, pouring the batter into the middle of the pool of vegetable oil in the bottom of each cup (this oils the cup as it fills with batter).  I only made 3 at a time and used a tablespoon of reggiano instead of gruyere and a bunch of coarse cracked pepper (crushed on my cutting board).  I took my time and placed the filled pan back in the 375F oven.
  • Baking time - 45 minutes to an hour!!  I can't recall seeing any temp/time profile like this, I figured they'd burn.  But no, both runs went well.  
That's it!  Mix ingredients, shake well, let batter sit at least until it hits room temp - I used mine with good results at 3 hours and 9 hours aged.  Pour into prepared pan (preheated to 375) to fill cups to 3/4 full, top (or not) with cheese, bake in 375F oven for 50 minutes.  Remove from oven, gently pull them out of their baking cups, eat immediately.

Added all ingredients using a funnel to this 1L HDPE bottle and shook it vigorously.

After 375 for 50 minutes.  These were the parmesan/pepper popovers.  Added ingredients become embedded into the surface of the popped cap of the popover.  

Characteristic steamy light interior, exterior firm, slightly crunchy/crisp.  These were made with the batter aged at 3 hours.

Eventually, at 9 hours aged, my batter started to look separated and runny.  I decided to try it anyway, preheated the pan and prepared for another run.  I filled the popover cups and topped them with some finely diced apples I sauteed in butter and sugar.  The popovers were just as lofty as before and didn't collapse a bit upon exit from the oven.  

I consider popovers a finished project and now look forward to building different fillings into them, e.g., pour batter, add topping, pour more batter, bake and see if I can get the filling tucked inside rather than embedded on top.  Maybe I'll even tuck a meatball inside - but I fear the results.  If it works I might die from euphoria.  I might wait for that one.

Buy a popover pan and make these.  

/drops mic