Taking an idea from Ideas in Food I got some raw peanuts from Crestview Market, shelled a bunch, added some Marzetti's honey mustard dressing and salt and baked them at 170°F overnight.

Before

After, yum.
Taking an idea from Ideas in Food I got some raw peanuts from Crestview Market, shelled a bunch, added some Marzetti's honey mustard dressing and salt and baked them at 170°F overnight.
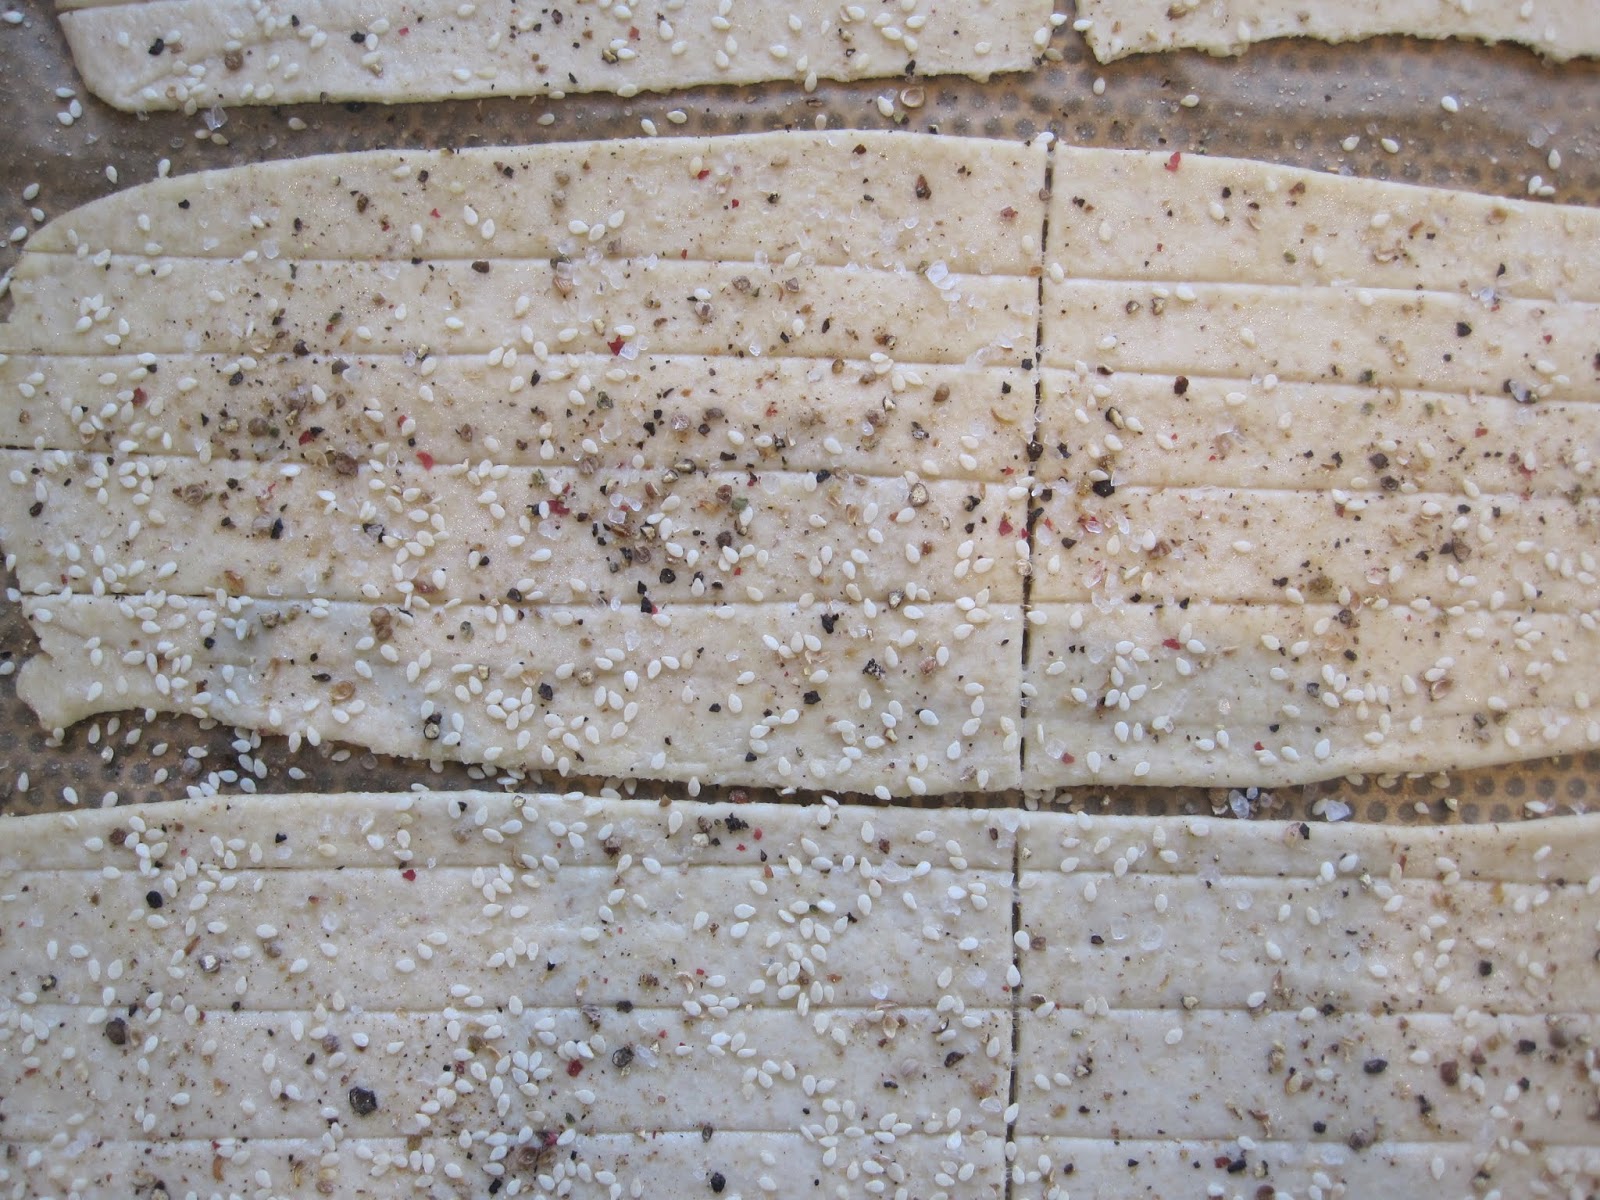
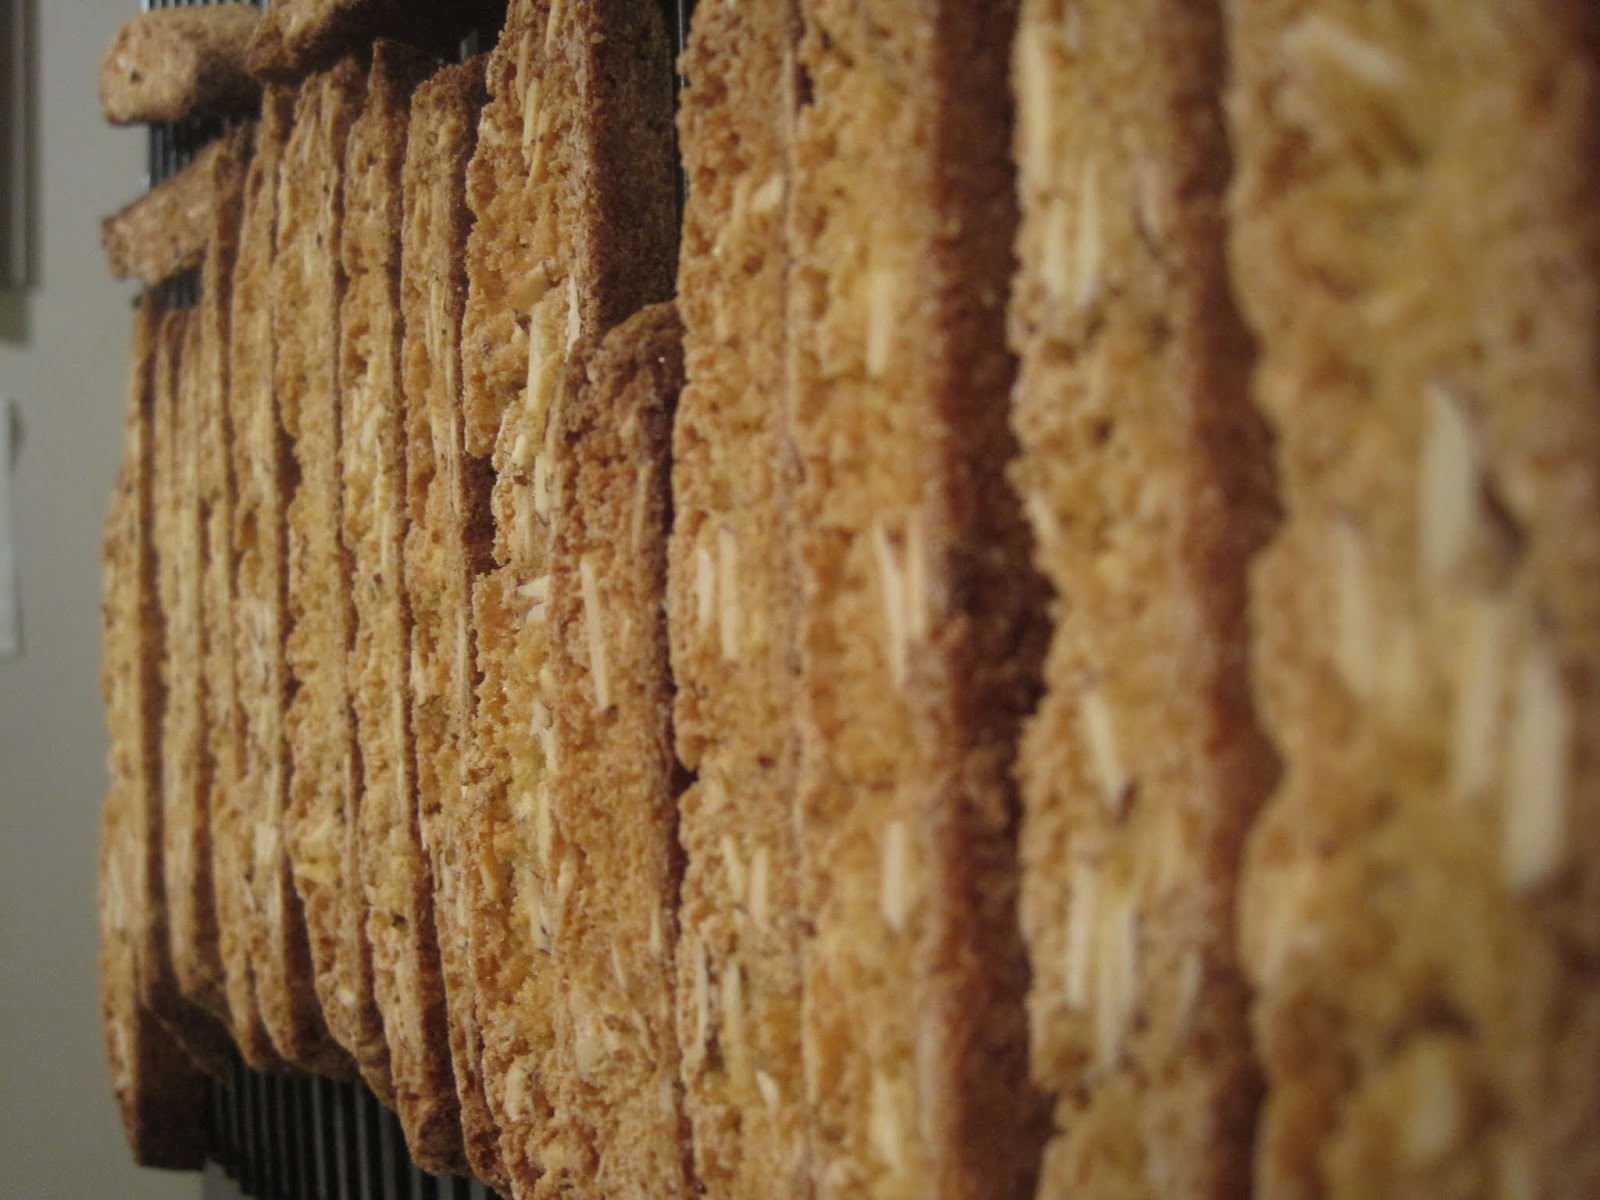
The past several days, a few text-type ear worms got to me and inspired this preparation of crackers. It's good and it's general, have fun with it.
My ear worms
1. @Twixlen got Kitchen Aid dough roller attachments.
2. @Hungry_Woolf, when she was an innocent young blogger, used said rollers to make crackers.
3. My health-crazed most recent favorite writer, Martha Rose Shulman disclosed a cracker recipe as my jumping off point.
Dough
water, 100 g
vegetable oil, 30 g
salt, 3 g
atta flour (a fine whole wheat flour commonly found in Indian markets), 120 g
unbleached white flour, 80 g
Mix and wrap in plastic and let sit in fridge over night. This is a dry dough, not slack; this should be dry enough to make it through the rollers without sticking. The dough is unleavened, yet, when baked gives a tender and crisp cracker.
Procedure
Cut dough in thirds and flatten each into a squat, disc and run through rollers on the widest setting. Keep shaping and reshaping and run through rollers repeatedly until you get a nice long rectangular shape; finish it by running through the next thinner roller setting.
See video below for a typical piece of dough, this takes a little practice to get a feel for the reshaping:

The past week our smoker's been going full tilt. A handful of
briquettes, some chunks of wood and a (slightly modified) kettle grill
can do anything...


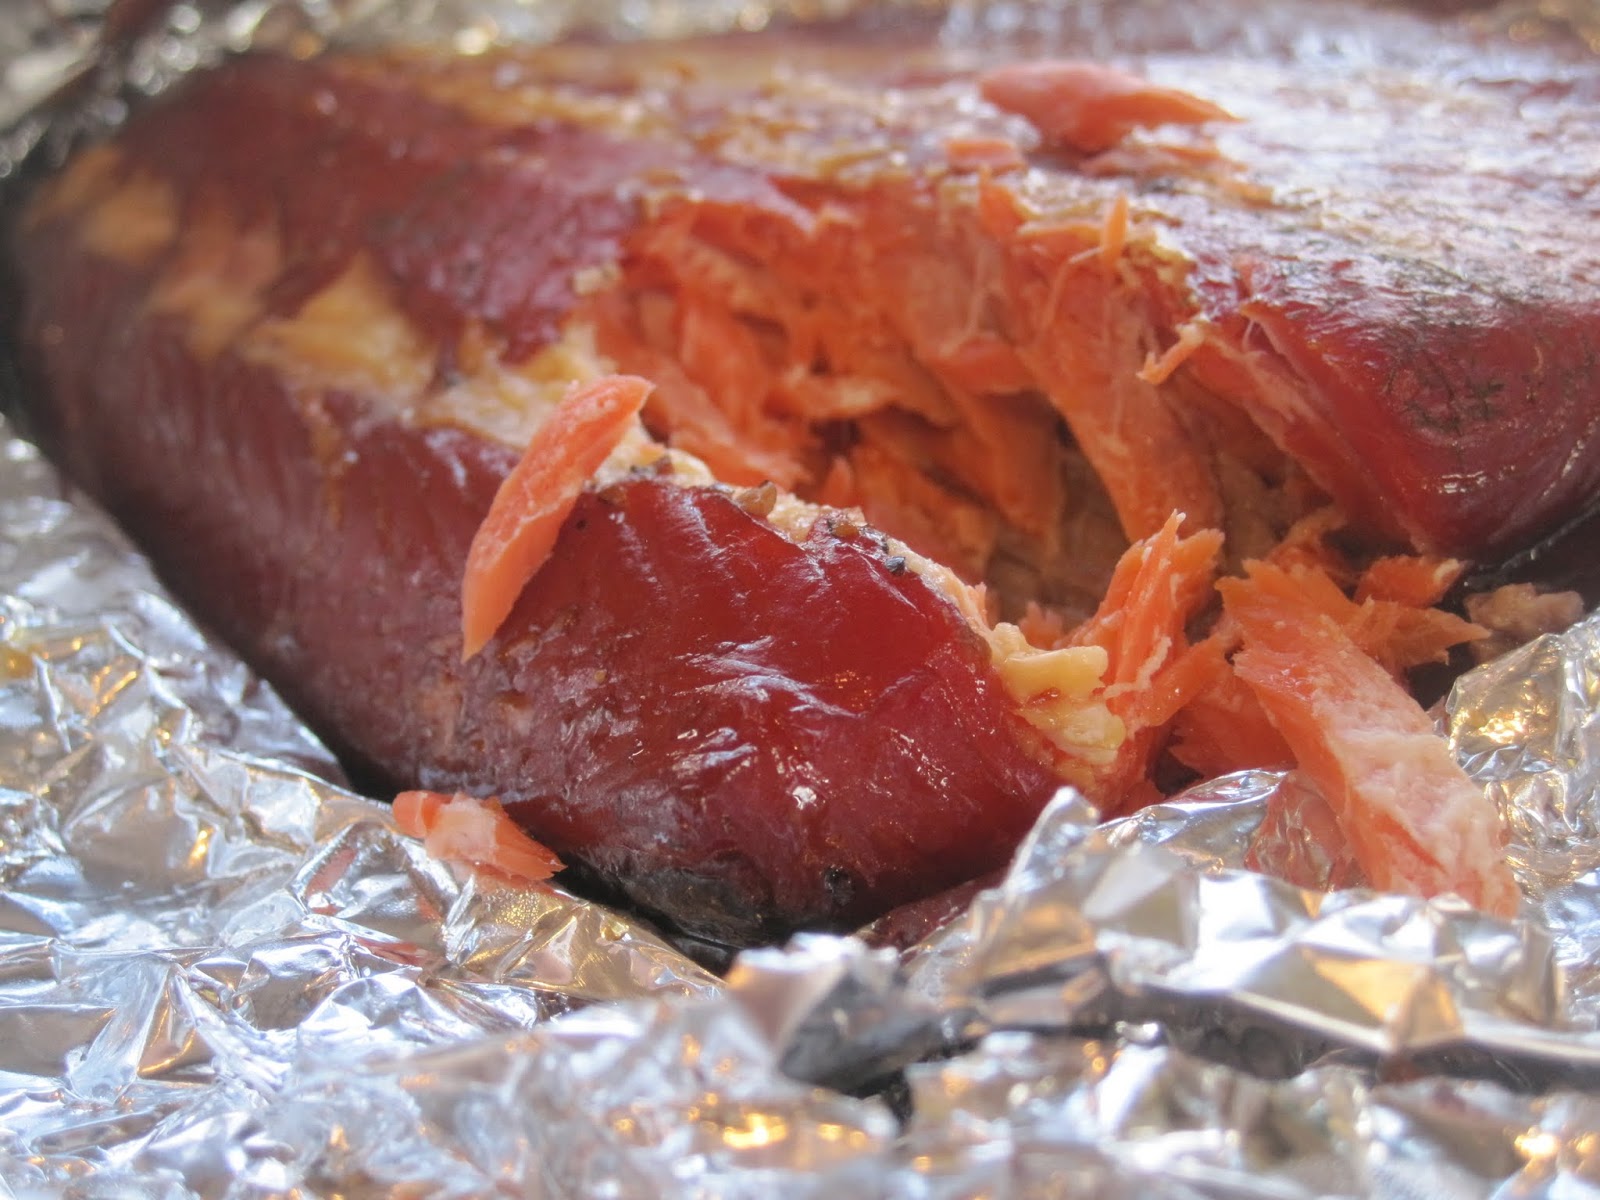
I bookmarked a prep from one of my favorite blogs Menu In Progress long ago on smoking almonds and finally got to try it. All I did was coat them with a trace of olive oil, shook some salt on them and tossed them in the grill using indirect heat and only about 10-20 briquettes (and water bath). I also used some traeger cherry pellets and maintained about 225-250F for a couple hours. On cooling, the slick oily appearance disappeared; the almonds were crisp and smoky. The only problem, they won't last long. I think I might even try sugar and salt next time.

When you do venture to popovers, your muffin tins gotta be clean, really clean. Hot pan, add oil, no stick - I think Jeff Smith (Frugal Gourmet) said that whenever he cooked on cast iron. It's true. Once you learn to clean a pan, you may never have to buy a new one again, the thrift store is overflowing with them. I use a circulating rough wire brush on my drill and go nuts, the pan can take it.
Before / After - this is a real case, out of our cupboard this morning.
 |
| click to embiggen, it's pretty impressive |
When baking something infrequently, I need to practice a little before game day. The staff here at weber_cam love popovers, so I thought we'd make some in the near future and decided to practice a bit. Their preparation is often described with a batter, e.g., egg (50 g), flour (60 g), milk (120 g) and salt (3g), some add butter too (melted, 6 g), whisk, let sit at least a half hour and pour into preheated and lubed muffin tins at a high temp for 20 minutes and finish off with a low temp for 20 min to harden the surface, so they won't cave in. Incidentally, this prep is everywhere, the earliest I've seen is in Better Homes and Gardens, but I'm pretty sure it's as old as the oven itself.
I HATE preps with two temperatures. Nothing is more irritating in a busy kitchen and no more likely to fail than two temperatures during a 40 min window. I tried these at 410F (instead of 425/375) for the whole cook time, worked pretty nice. No cave-ins at the end. The batter described above makes about 4-5, and I lubed the muffin tin with a small pat of butter.

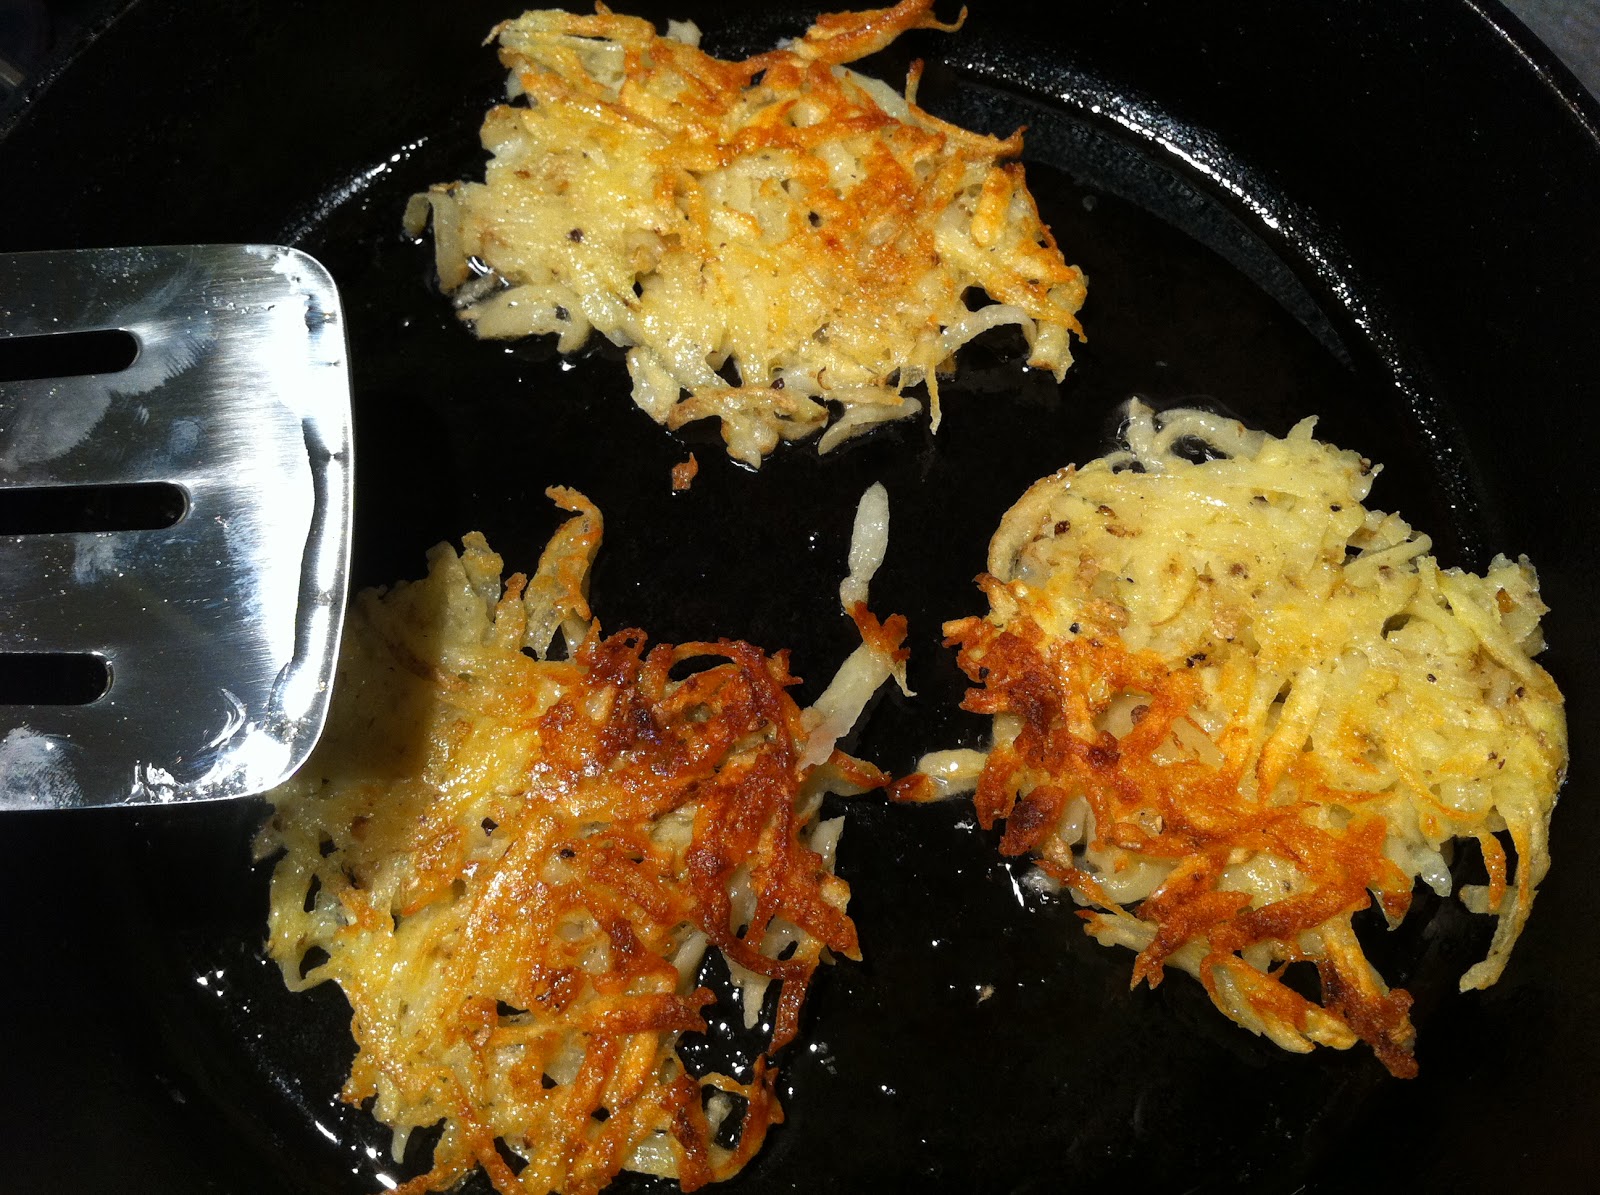
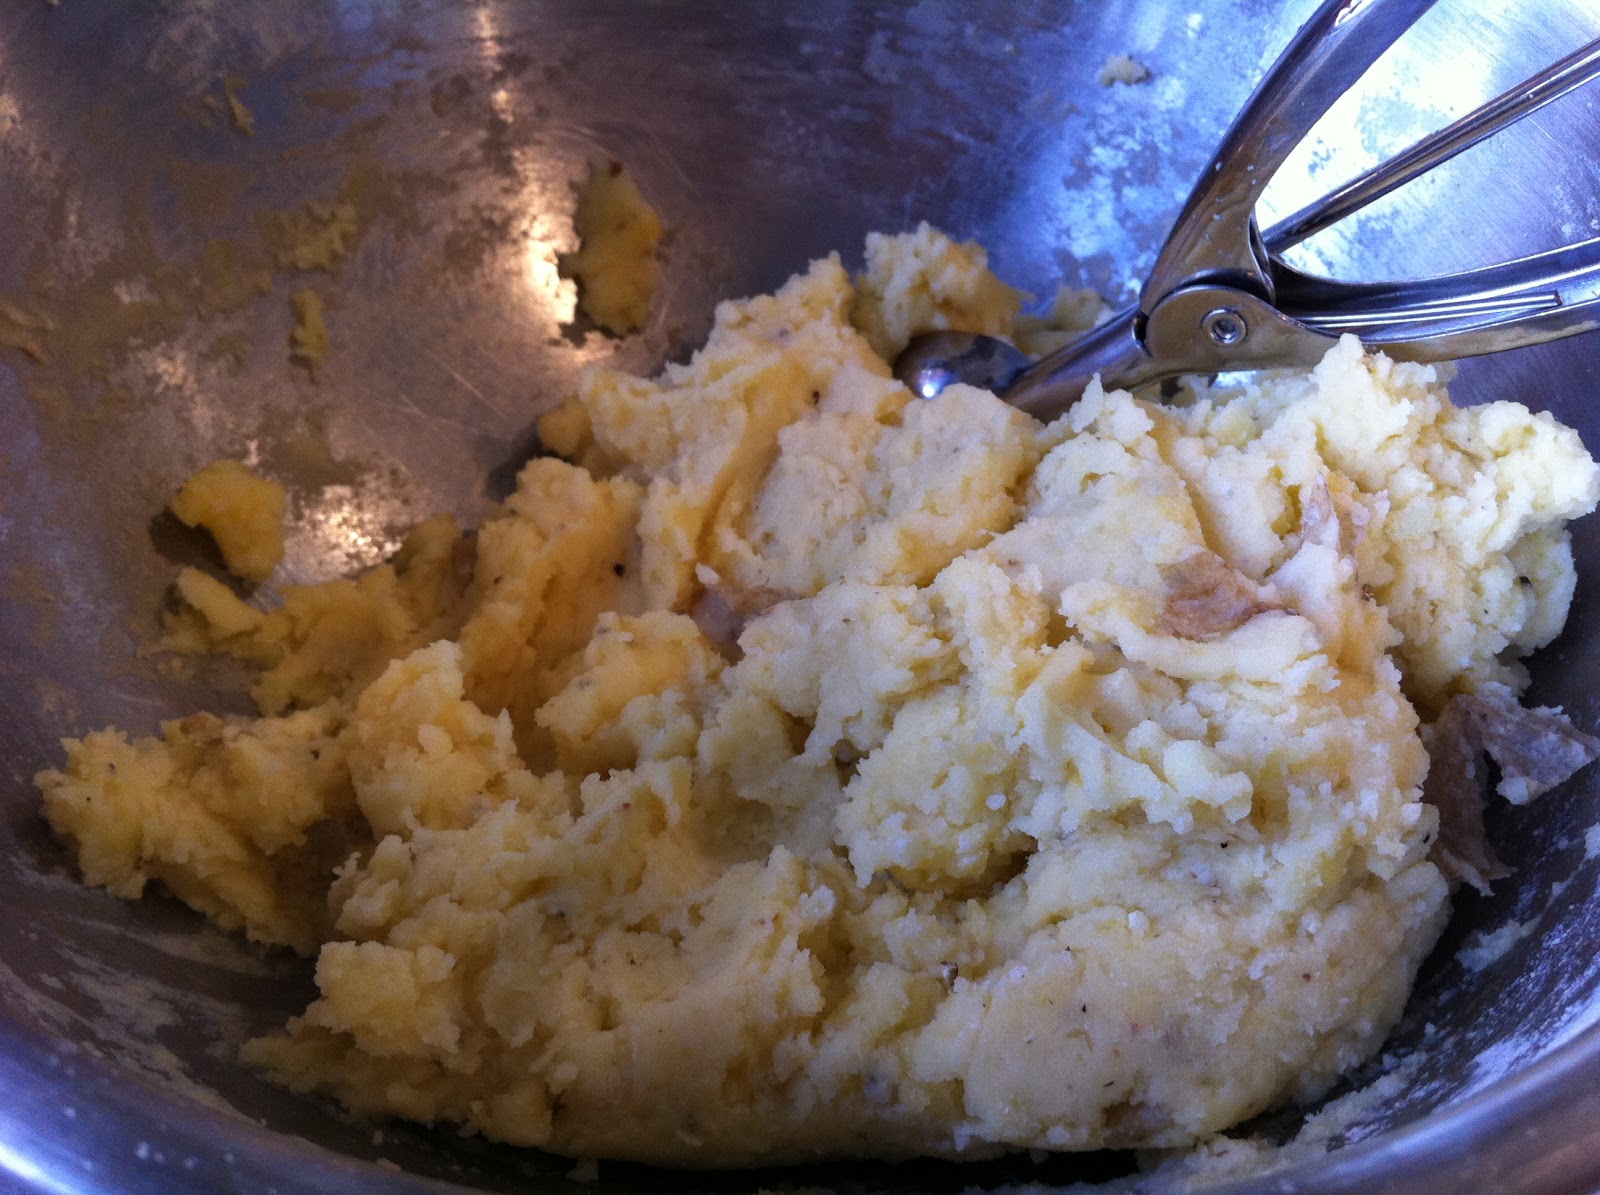
If history has taught us anything, the latke and tater tot share a great deal: ingredients, process and cooking. Cooking the potato before mixing, processing and frying is too much, like nuggets of mashed potato. When shredded raw potato is used in my latke with sparing amounts of flour and egg, a nice - almost rösti is obtained. In both cases texture is off. In the tater tot, too smooth, in the latke, a little lacking, closer to a hash brown, still missing the soft potato-ey inside.
What seems logical for the potato pancake/nugget/courgette/fritter is something between cooked and raw. Partially cooking a potato is tricky, most methods are trade secrets of Ore Ida. That almighty potato god has specialized equipment and may even possess genetically modified animals who poop partially cooked, skinless potatoes. We cannot compete with such a force, we can only try to find a tasty facsimile.
Last night, another step closer, this application directed to tater tots. I shredded Yukon Gold potatoes (w skin) to a coarse shred, put the shreds in a potato ricer to squeeze out the moisture; observed is a starchy liquid pouring from the shreds, it's cool to watch. I let the suspension down the drain, but it's common to let it settle, decant the water and use the sedimentary starch (for gluten free). The shreds were then chopped a bit so the long shreds wouldn't ruin the appearance of my tots.


After my first attempt at tater tots, I looked around to see if there was agreement on tater tot recipe and process (Food Network, Smitten Kitchen, NYTimes, Bittman, @foodlab). Thanks to my attention span being that of middle schooler, I found consensus, for latkes. The gist: raw potato (1 lb), shredded and squeezed of its residual moisture, shredded onion (ca 1/2 small), 1-4 T flour, 1 egg, salt and pepper, and a trace of baking powder. Mix lightly and fry patty in oil..
I played with this for several mornings in a row. I'd shred a potato (yukon or russet) rinse the shreds, then press them in a potato ricer, add the other stuff and then fry. Usually the texture was off, if they were thick pancakes, the inside was gluey, maybe too much egg and/or flour. And why did I rinse them before pressing? That part isn't in a single prep, nixed that.
While my attempts were hardly exhaustive or even systematic, I had a nice run and decided to scribble it down here as a starting place. It's pretty much identical to Smitten Kitchen's only I recorded more precise measurement and used a potato ricer to squeeze the potato/onion shreds. Unlike SmittenKitchen's prep, this more tedious version should earn me a trickle of traffic and virtually zero comments (oh, why can't I be one of the popular bloggers, he wept).
1. 1 medium russet potato and 1 small chunk of onion, shredded
2. squeeze the mixture in a potato ricer, take 100 g of that mixture
3. add raw scrambled egg, 10 g
4. flour, 5 g
5. salt and pepper - too tough to weigh on this scale, when bigger, ca 1/2 - 1% salt by weight of the total food mass
6. baking powder, trace - again too small to weigh, when bigger amount, ca. 2 g / 150 grams starch
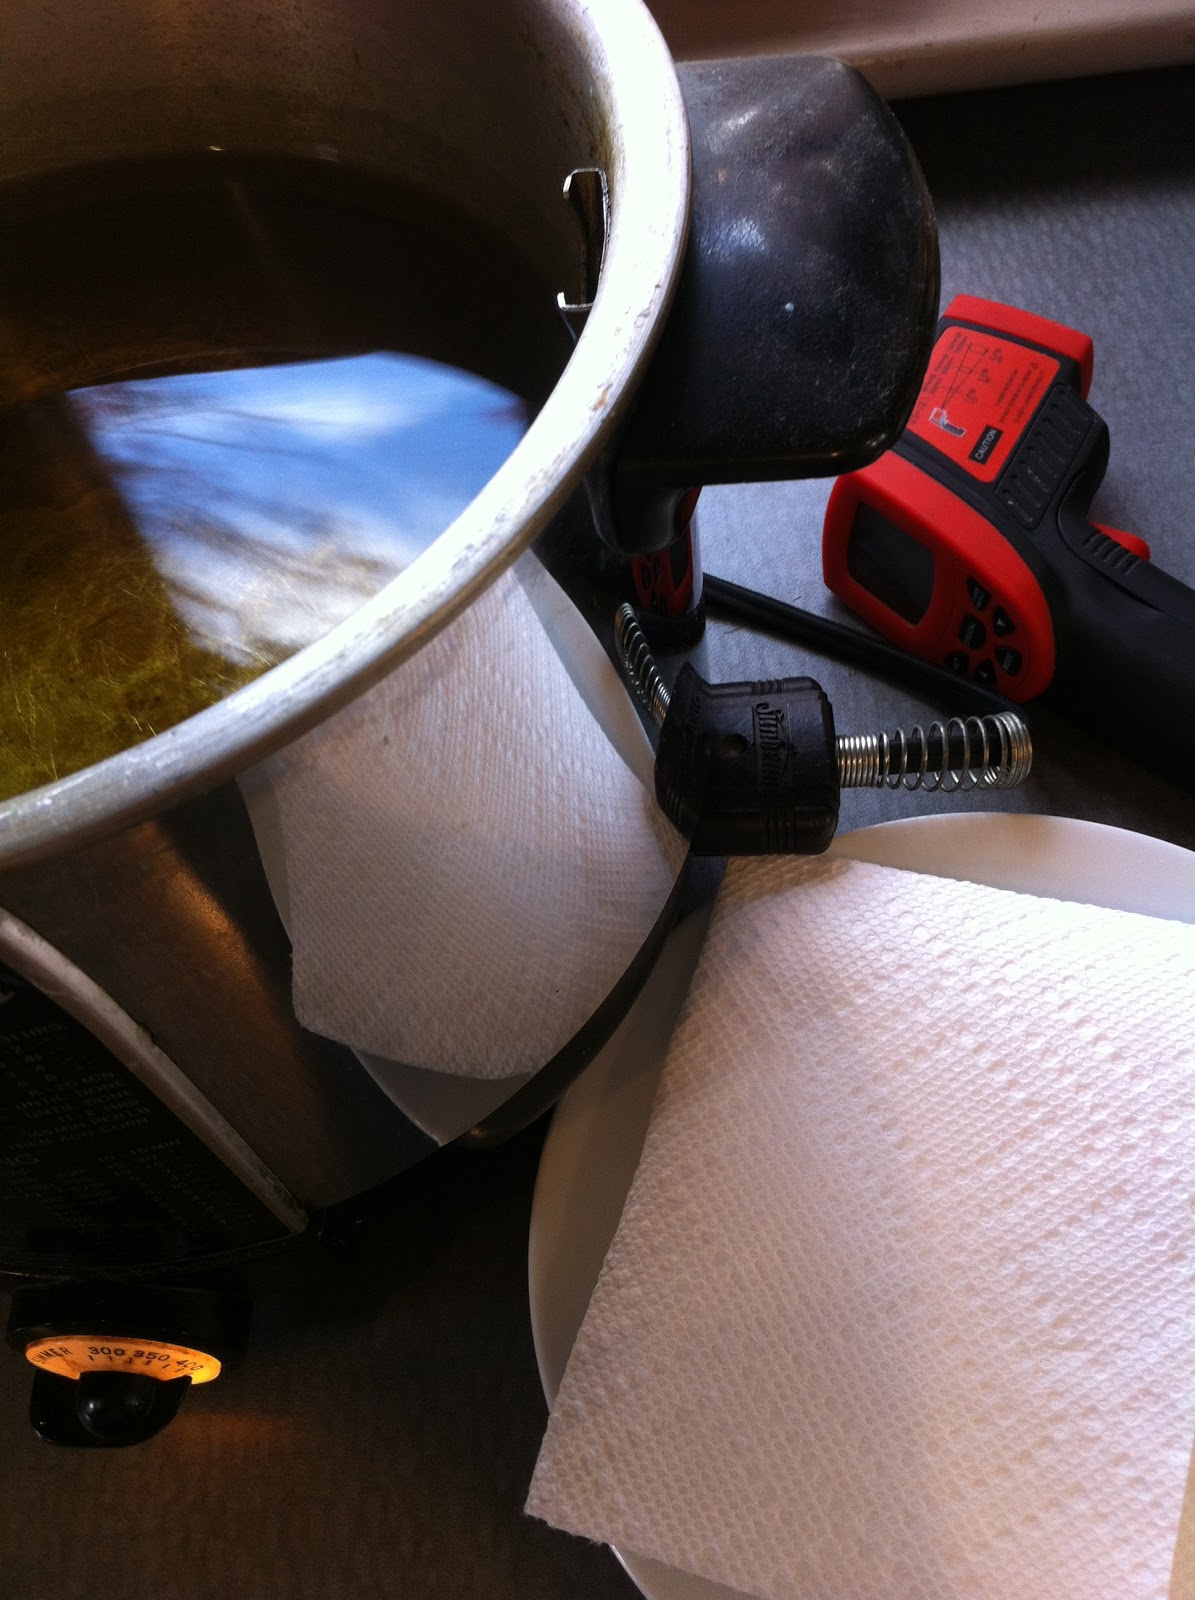
Mix lightly and plop pancakes into hot veg oil on cast iron, oil near smoking, ca. 350+F at the surface of the preheated oil (determine this with your IR thermometer gun - and get one if you don't have one), I flatten em when they hit the pan, gently. Flip after a while.
I've been buying and organizing spices in anticipation of preparing Indian cuisine. I think my chappathi are adequate (I need to build on a good starch) and I now need to proceed to some recipes from The Spiced Life. I'm not sure if Laura is Indian, I think not.*
The
problem with native Indian authors, and it's not their intention, is
their familiarity with the cuisine. They can't help cut corners on the
lengthy preparation or list of spices, too often suggesting an untested
substitution. Perhaps they fear the reader will be intimidated of the
world of spices essential to Indian cuisine; consequently, a chana
masala can result in an Italian-themed, tomatoey, saucy chickpea dish.
Contrary
to that, @TheSpicedLife describes preparations with great intention.
There are rare suggestions for substitution which results in
instructions that the non-native among us - striving for authenticity
and new flavors, will not fall into a rut of using the same 5 spices
& herbs.
I'll probably start with: A Pumpkin and Chickpea Curry, Greens in Kheema and this vegetable curry. There are many more recipes I can't wait to try (not just Indian!). Thanks Laura and wish me luck, I'm going in.
* Staff at webercam.com have confirmed @TheSpicedLife is not an Indian native.
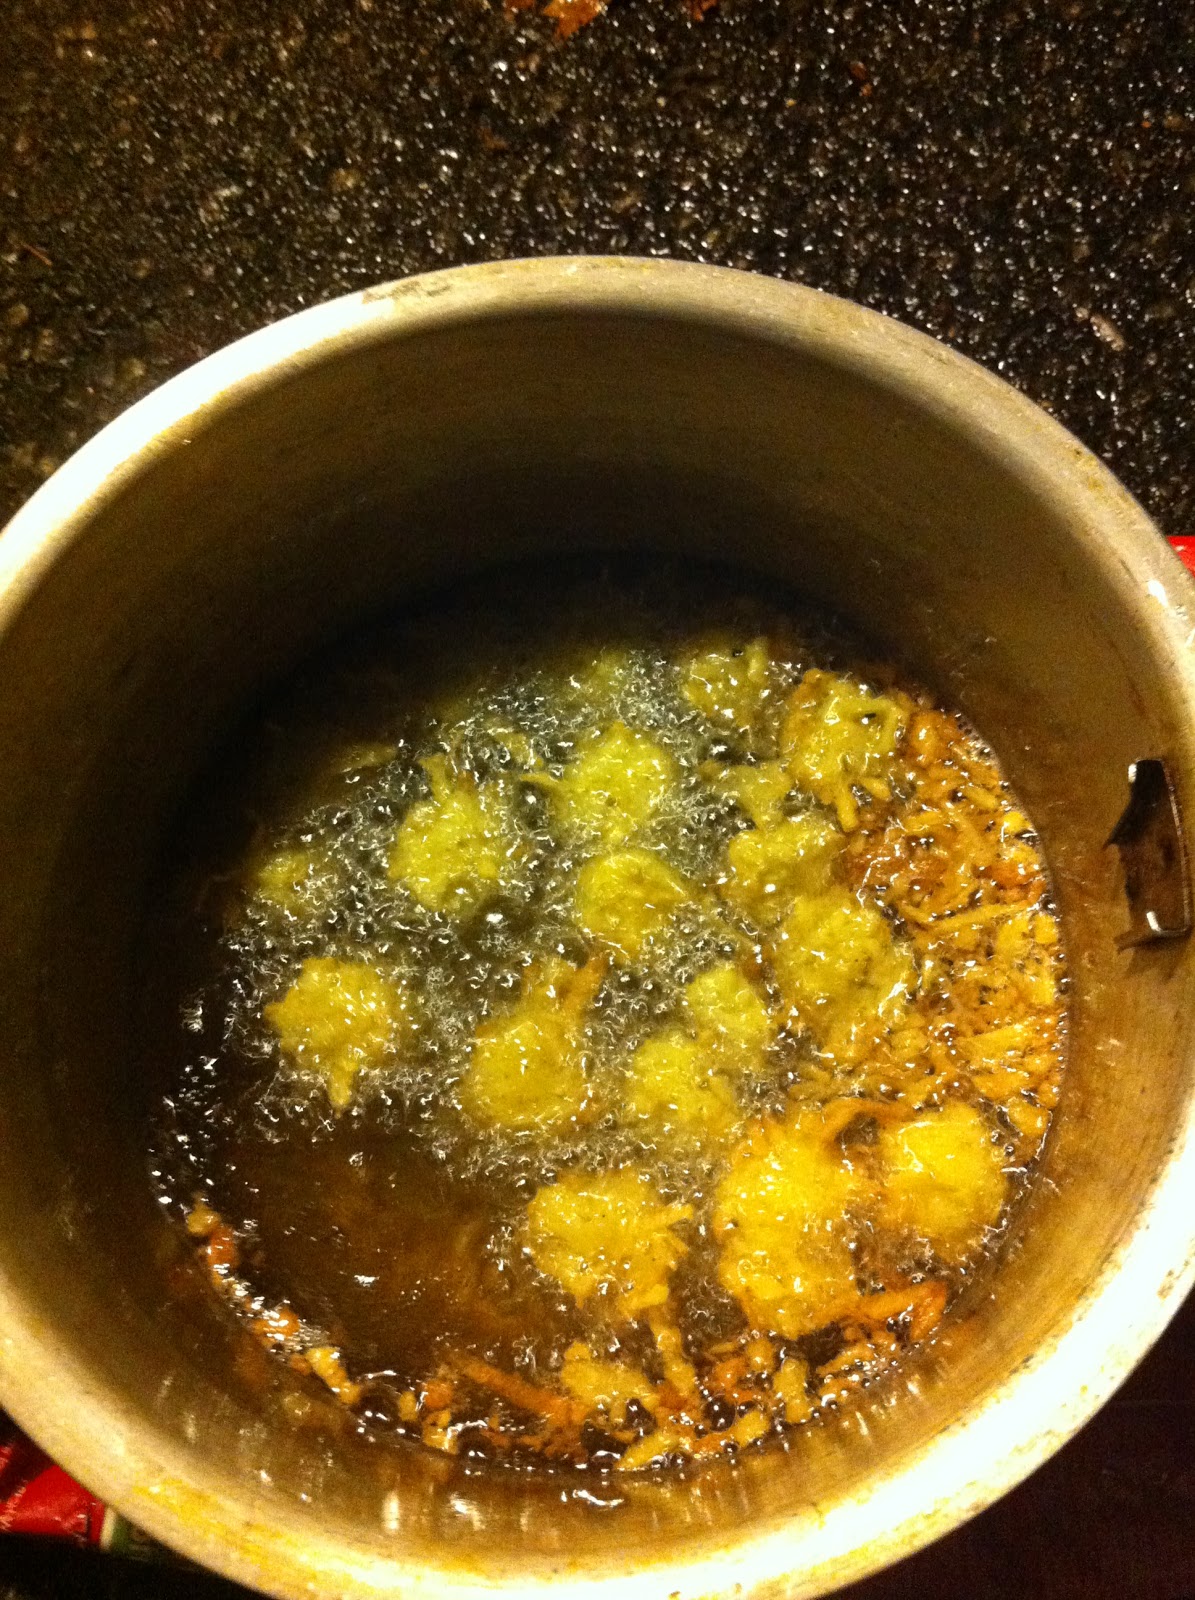
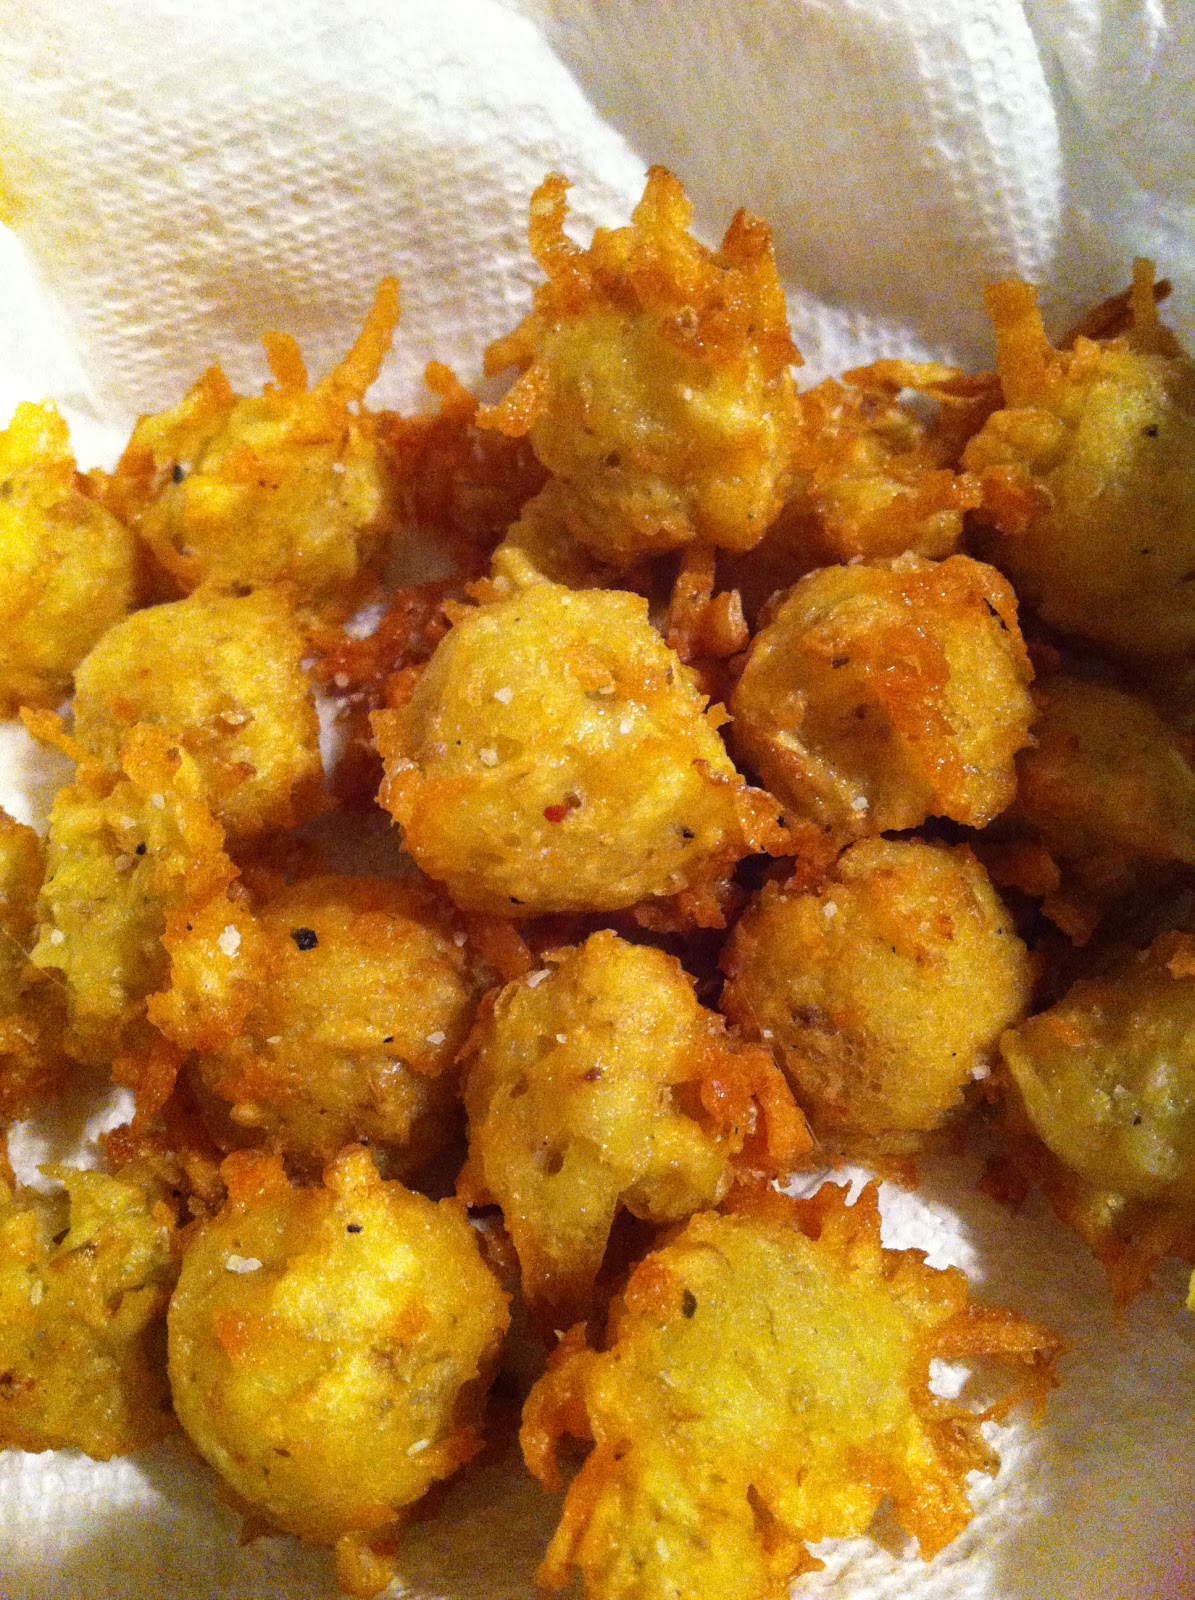
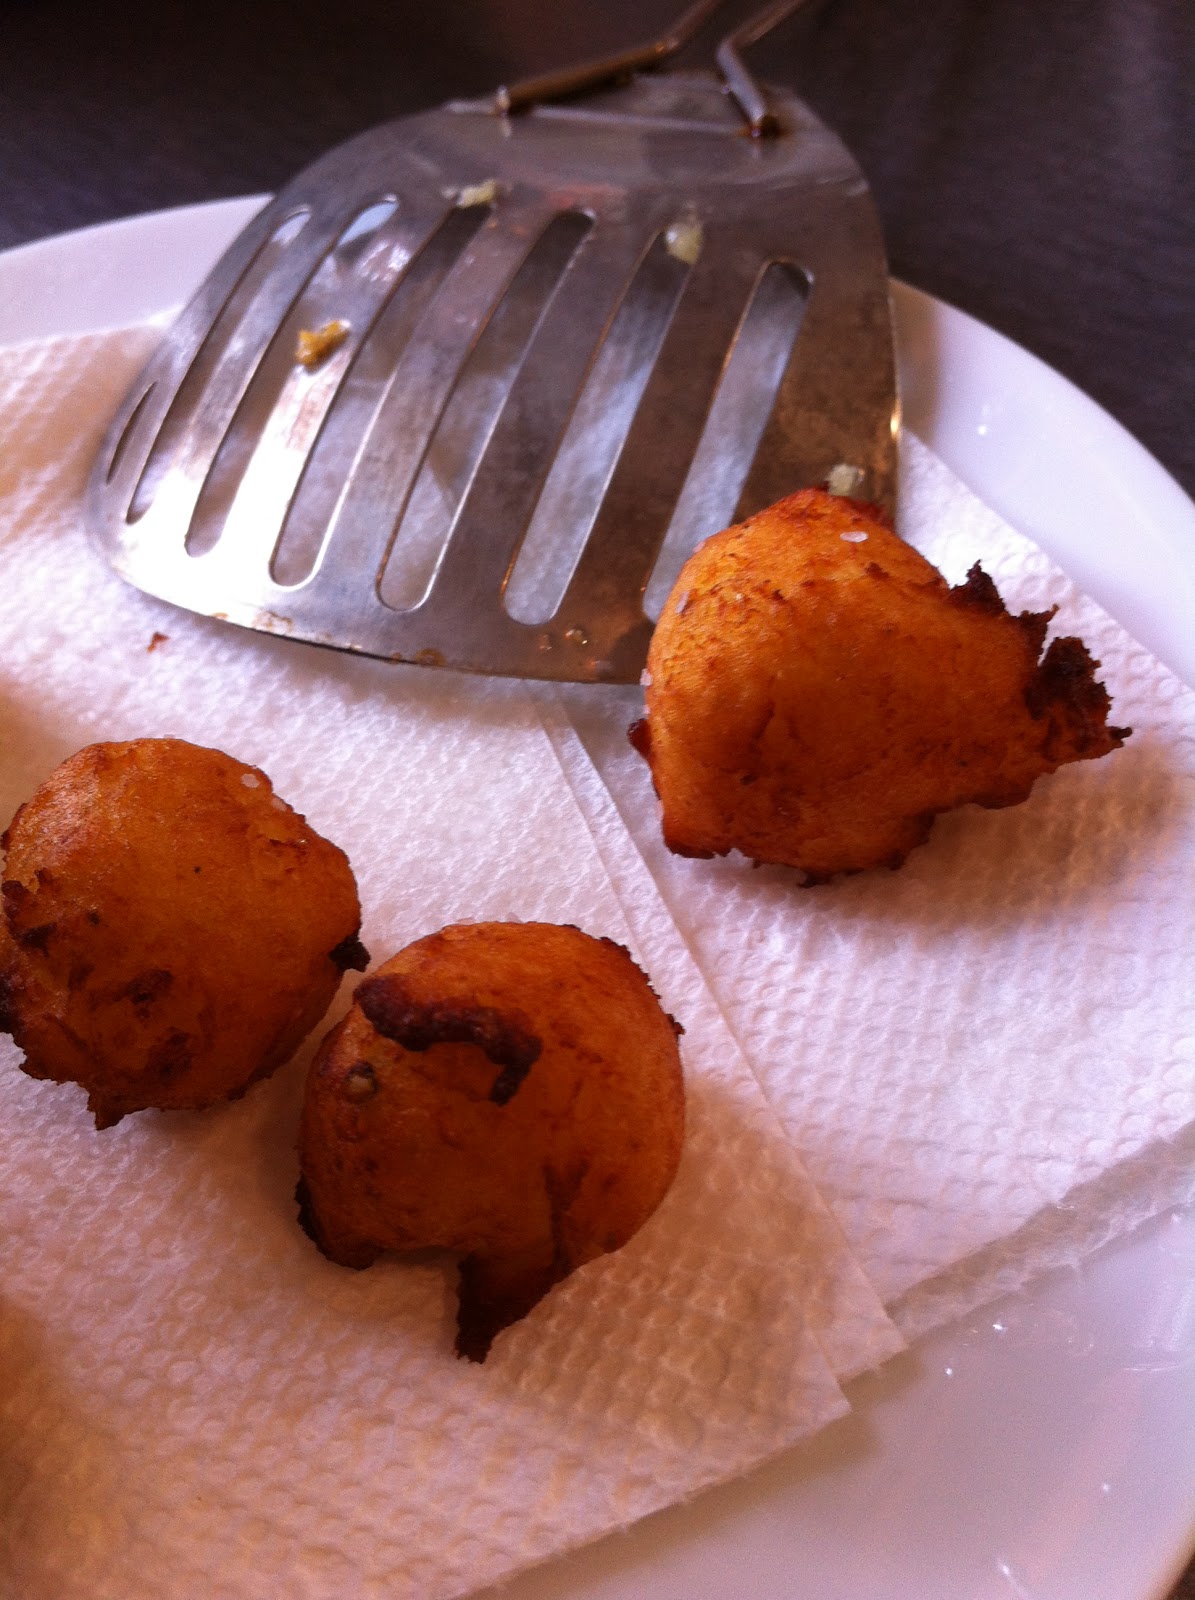
And now we take a break from the epic latest Firedome post to bring you my attempt at tater tots (didn't work, but I'm close). I didn't read a thing, I just made this up as I thought it should be, a more substantial potato than a russet, egg, salt, flour, deep fry, essentially a deep fried gnocchi, right?
Anyway, I did just that:
yukon golds, skin on, steamed and riced, fully cooked 550 g
salt, 5 g
flour, 75 g
egg, 1, shaken not stirred
pepper, coarse cracked white
mixed all and deep fried just as falafel are using a #60 scoop, some action shots ...
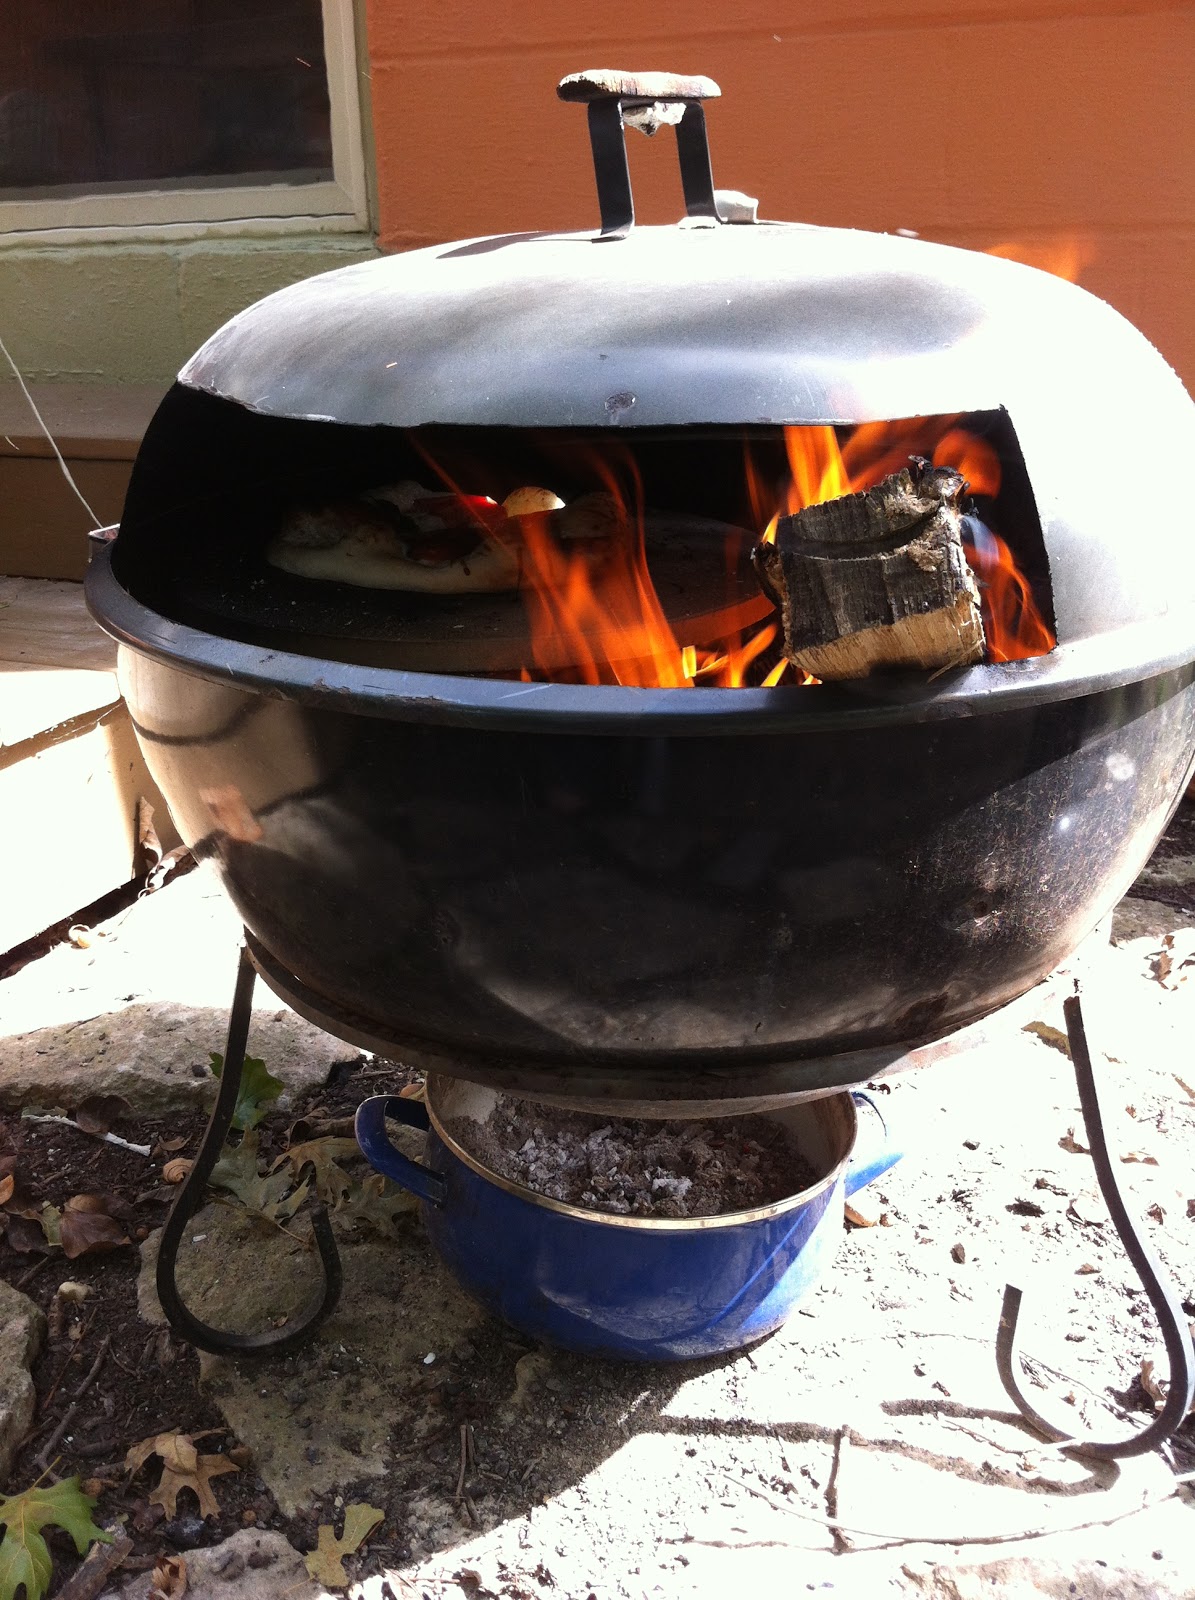
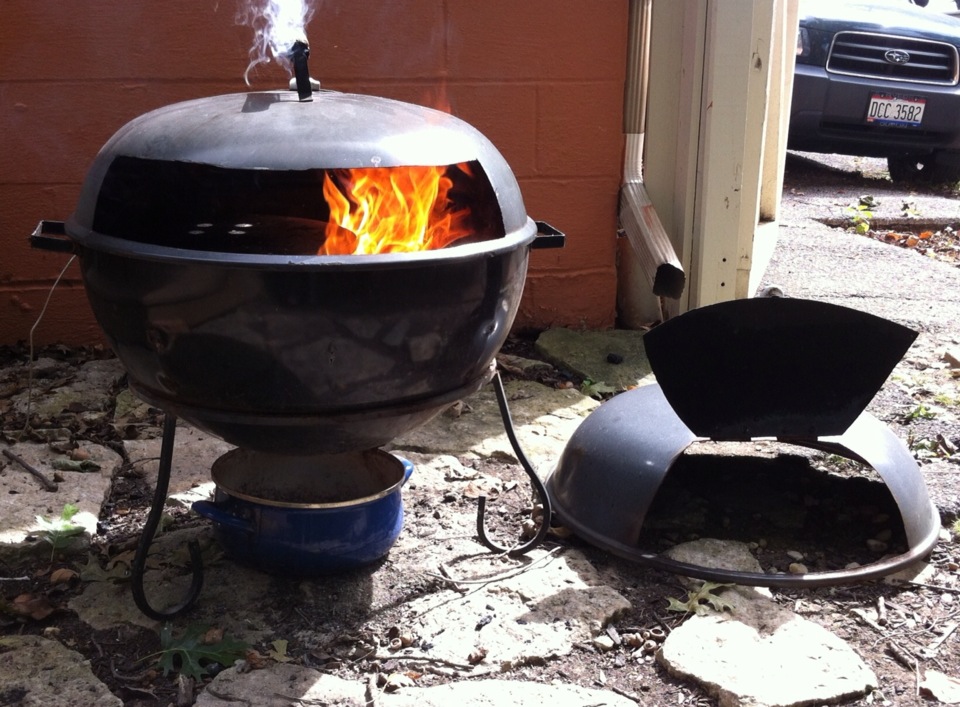
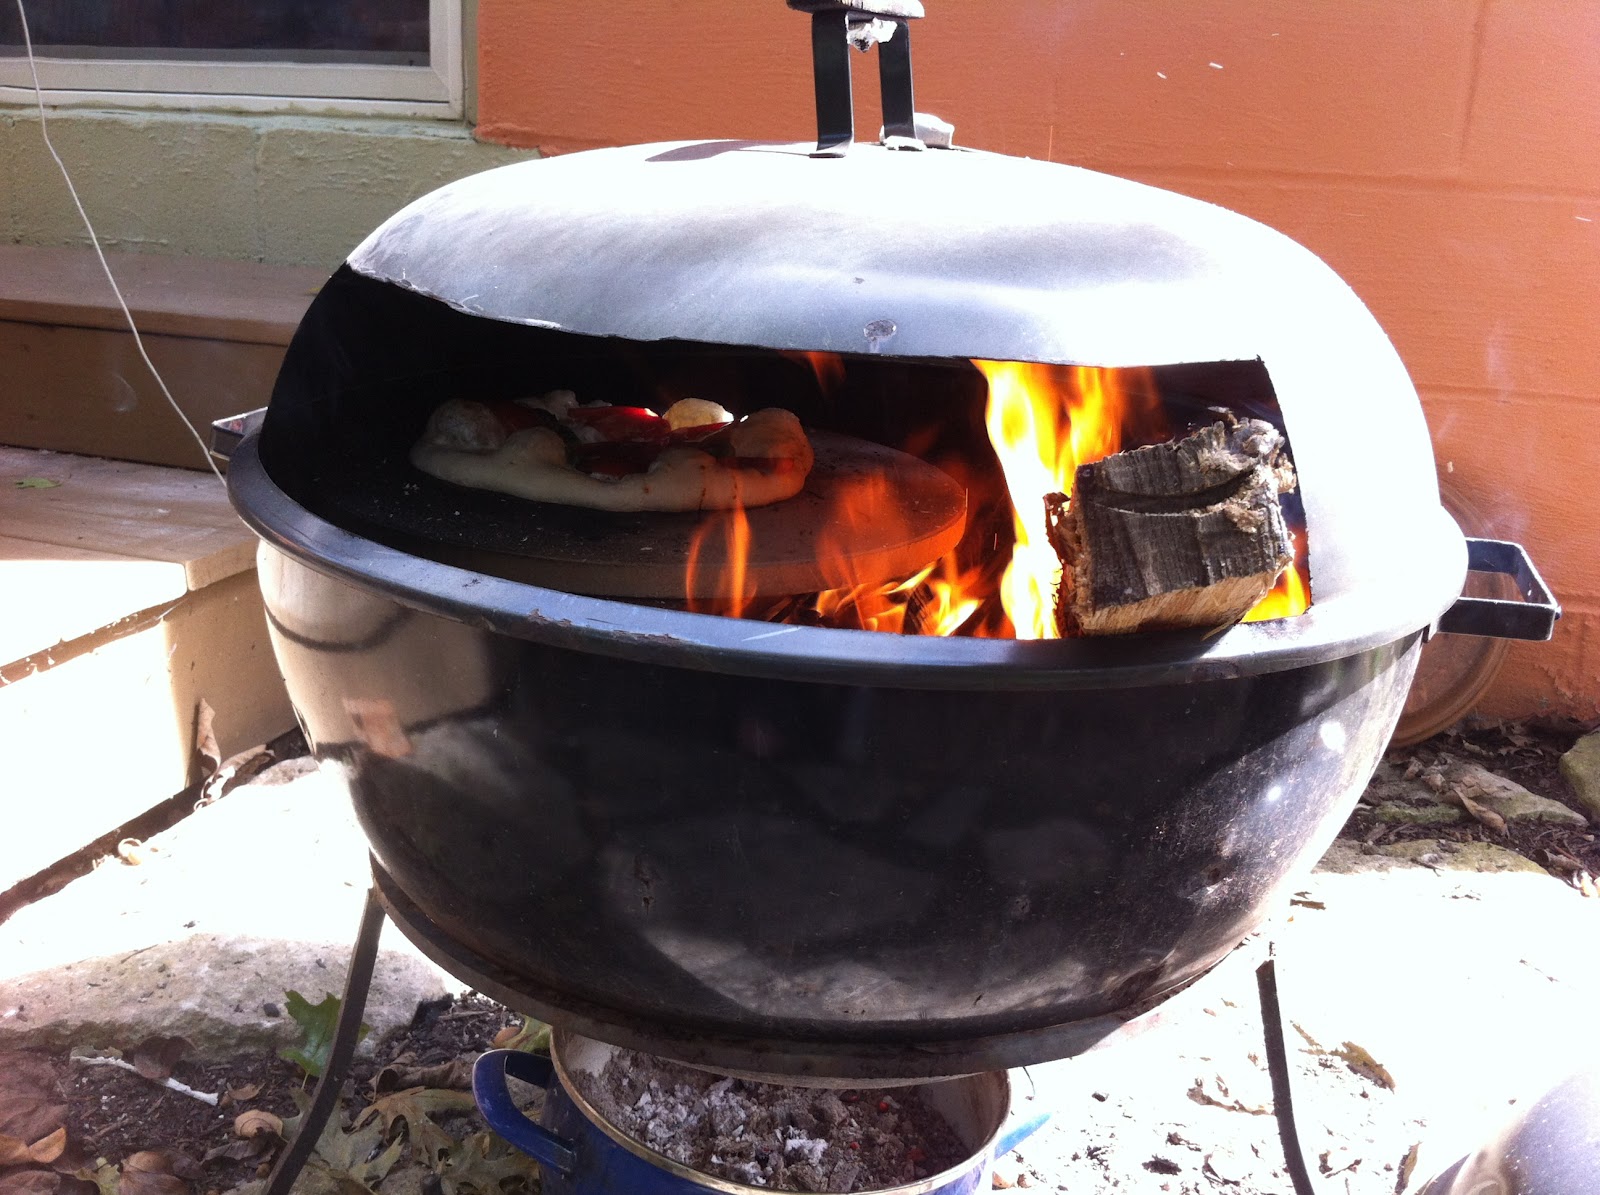
This is the culmination of a great deal of work making a Weber 22.5" kettle grill into a wood burning pizza oven that will rival any professional oven.
My friend Dave from Baltimore will wince in pain with each step of this handiwork you are about to see. {Dave, the end justifies the means. It will even look cool when finished, trust me.} I'm posting the steps as I go, sometimes I get busy, so this may take a long time to finish, but I hoped it would help to see the progress as it happens.
Other Firedome posts in the series will be listed at the bottom of this post.
 |
| Find grill in trash (thanks Paul, Kate and Jim for your contributions!) Pull off those legs, won't need them. <soapbox>Weber, that little tripod of legs on the grill is the suckiest part of the best kettle in the world.</soapbox> |
 |
| Be safe |
 |
| Sketch circle in lower hemisphere to cut out. First remove any sliding vents. |
 |
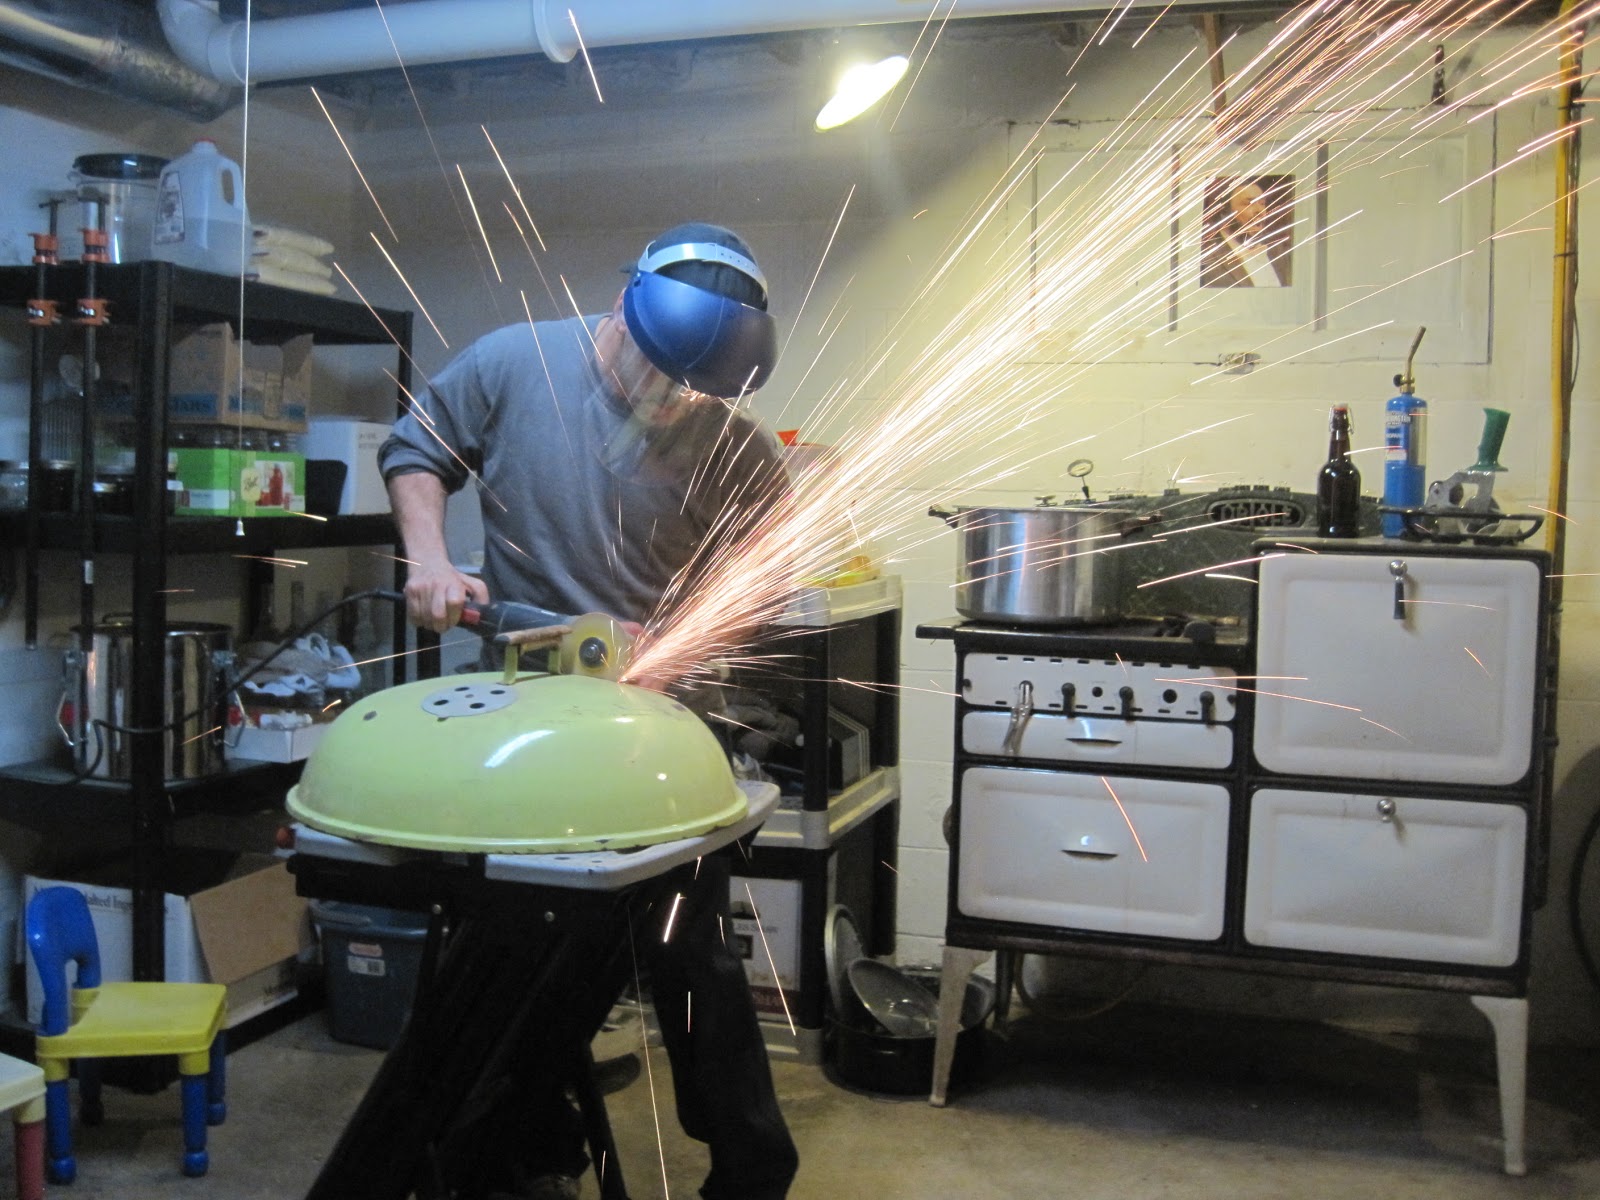
| Once vents are removed cut a gaping hole in the bottom with angle grinder. It's tough cutting a circle with an angle ginder, so mine looks terrible, don't worry, it'll cook good pizza and no one will see this part anyway. Ideally, I should have had a nice circle and circumscribed a polygon and it would've looked nicer, but - you know, it's me, the opposite of a perfectionist, I want the pizza. |
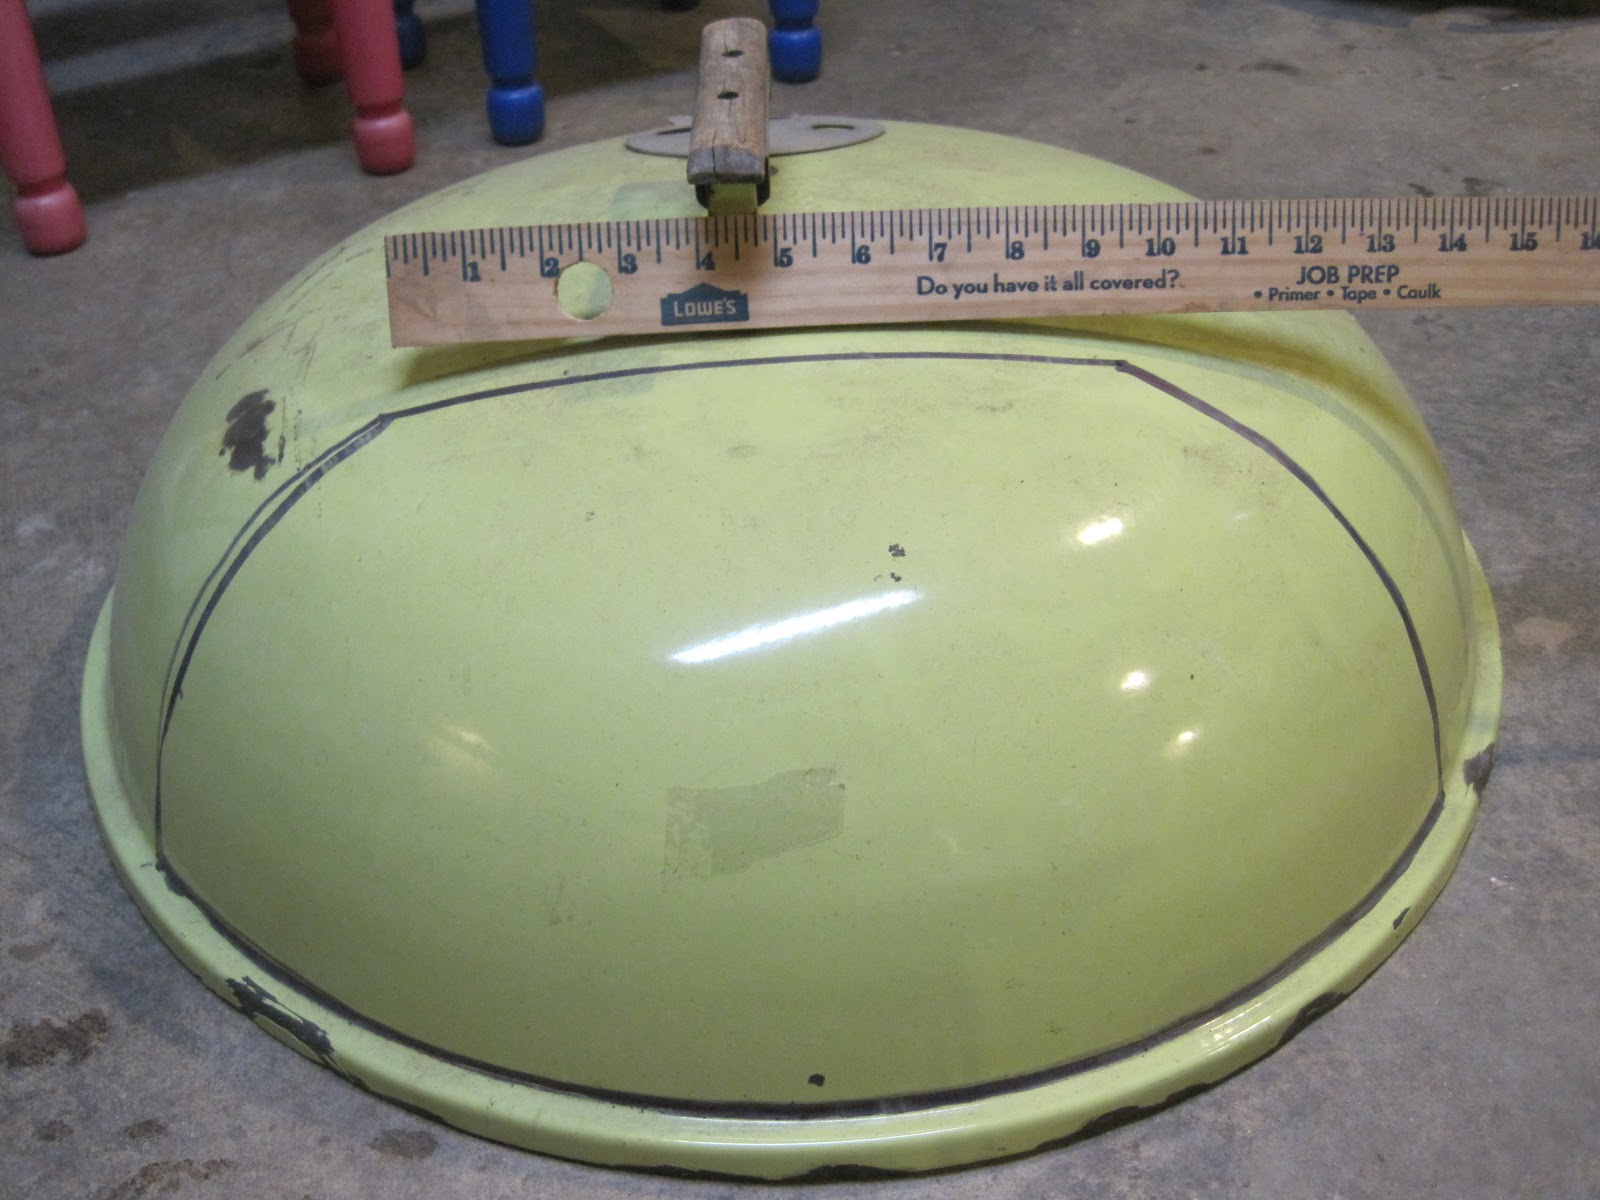 |
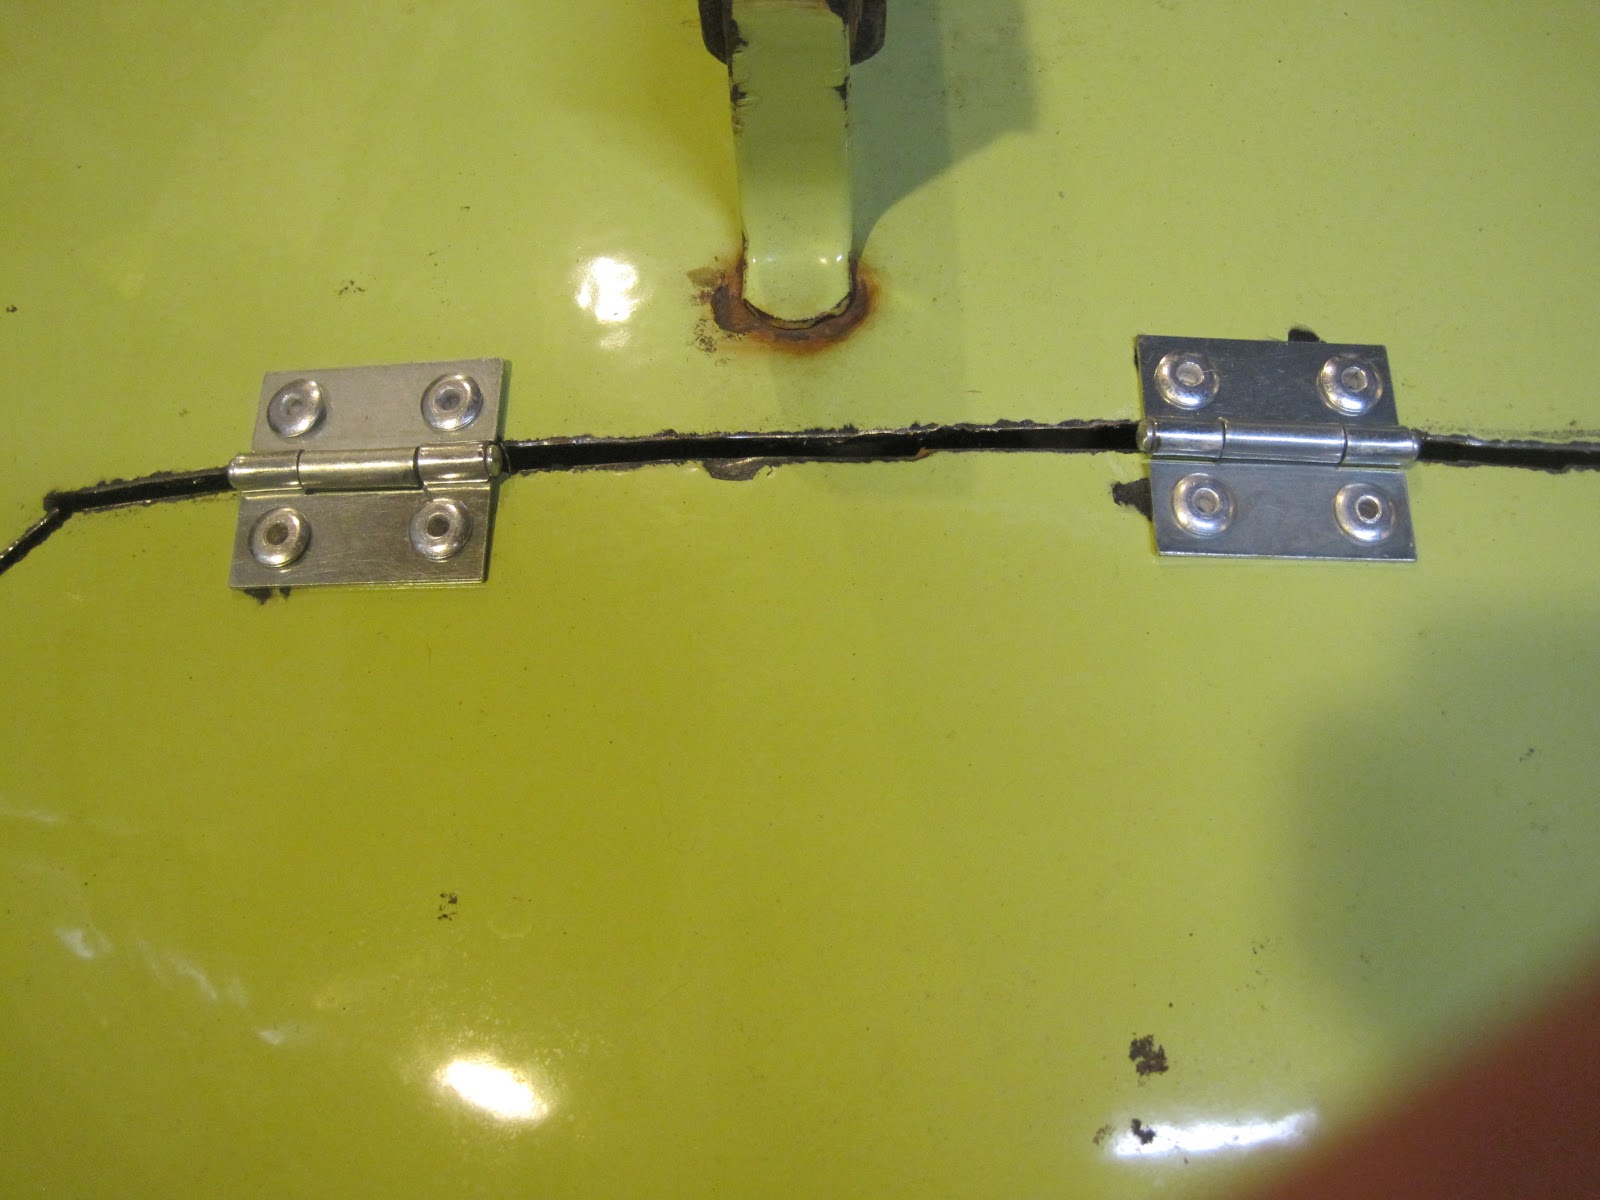
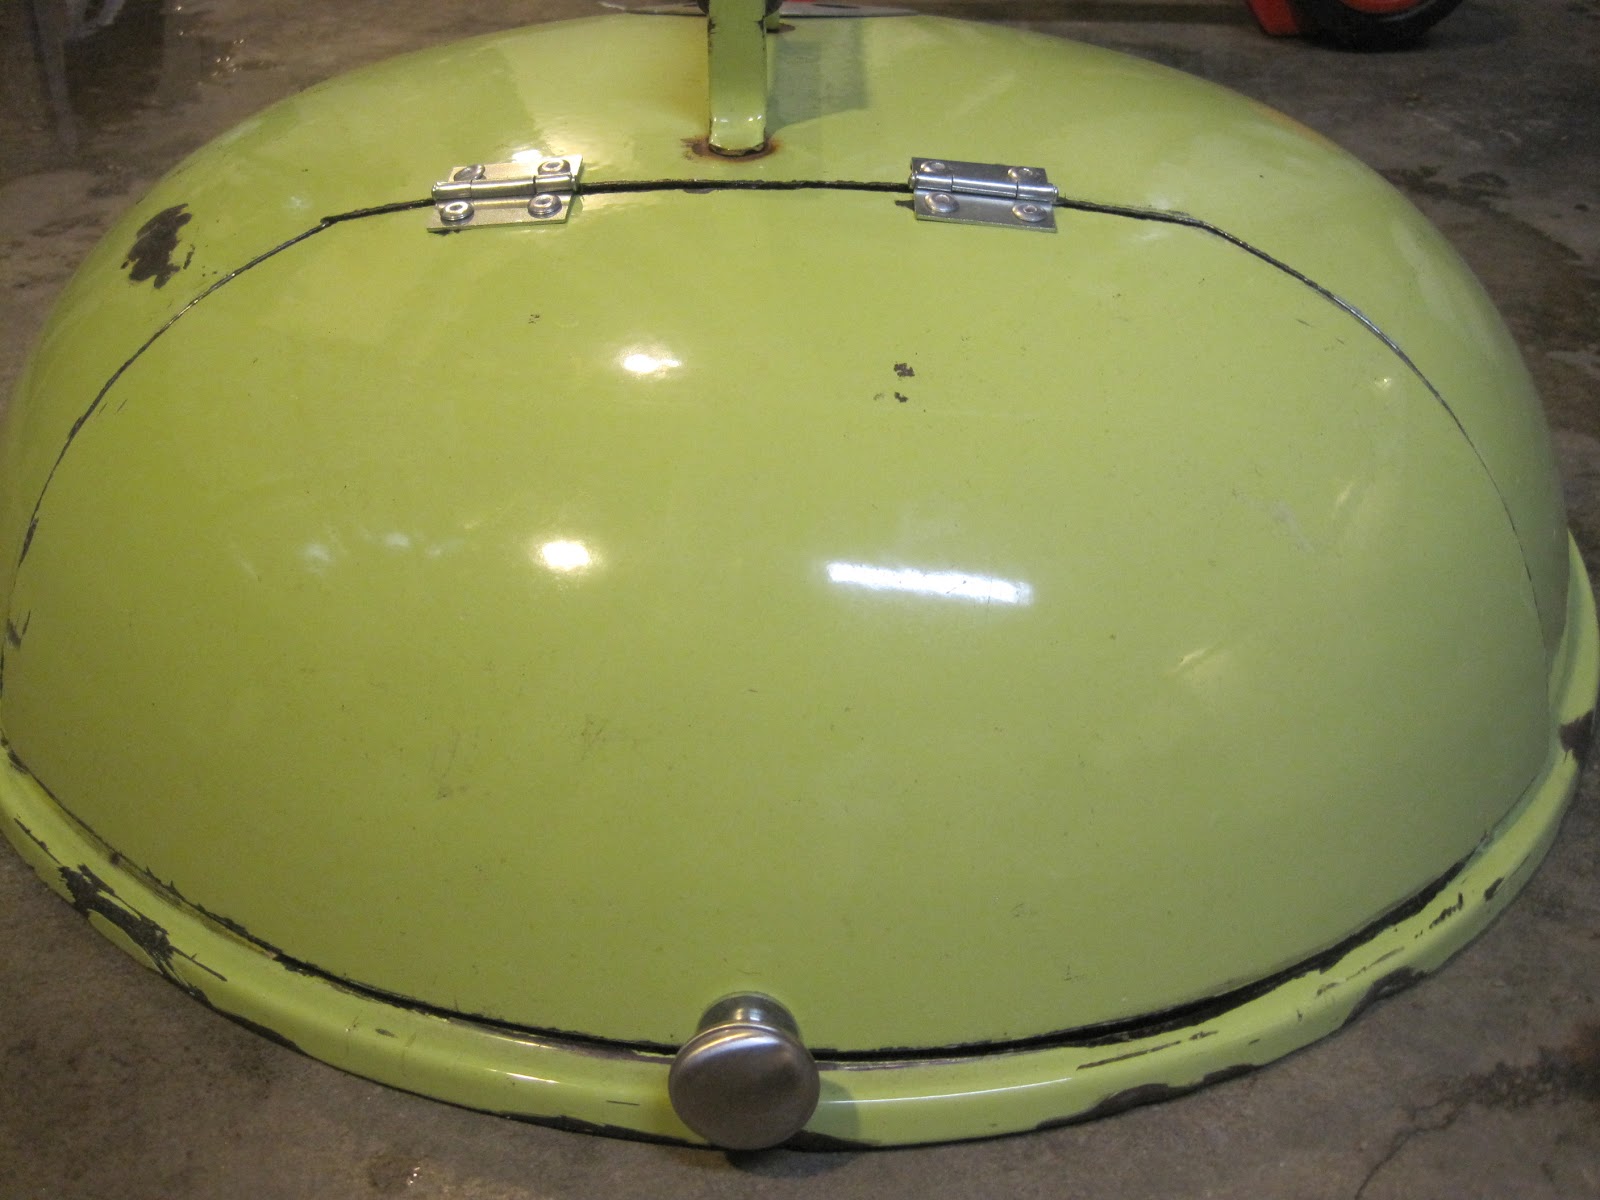
| Draw this shape on the top half. This is going to be the door. It's a trapezoid shape about 10" at the top and 20" along the bottom. The flange will stay intact. The top 10" line is about 1" away from the handle. I pretty much eyeballed this, it's a tough piece to navigate with a ruler. |
 |
| First we'll drill the holes that will hold the hinges. |
 |
| These are 1.5" zinc coated hinges, they will rust immediately but will last years anyway. Lay the center of the hinges along that line. |
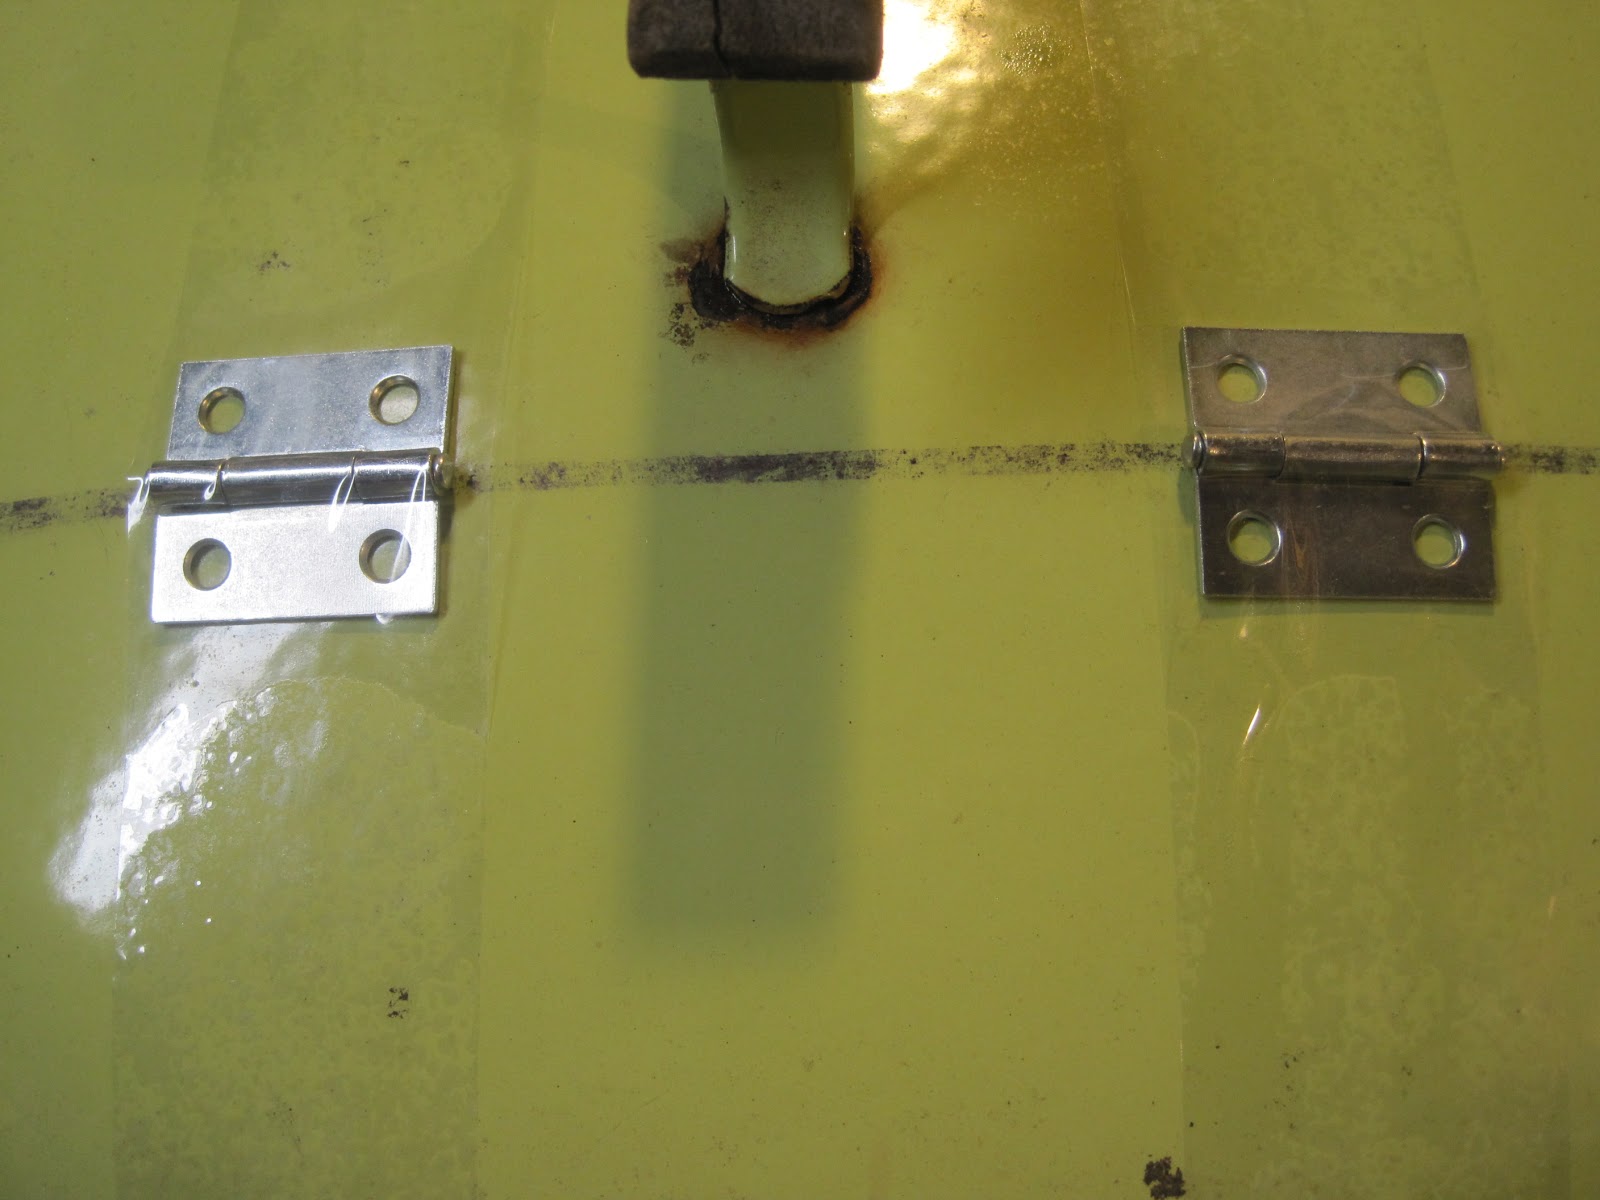 |
| Tape down the hinges with clear or duct tape. |
 |
| This tape will enable you to make a punch on the surface of the dome so the drill won't travel when drilling the necessary 8 holes. |
 |
| I (ab)used a philips head screw driver and hammer to make a punch on the surface. Do this on all of the holes, remove the tape and drill out the holes with a 1/4" bit. |
 |
| Making the surface punch with the screwdriver shattered the porcelainized surface, it'll rust, don't worry, this job isn't about aesthetics. |
 |
| It doesn't look it from the image, but the holes align nicely with the hinge if you make the punches carefully. DO NOT ATTACH THE HINGE YET. We're going to cut that line first, THEN attach the hinge, having the holes in place before the dome is structurally compromised is easier. |
 |
| On the other side (the underside of the dome), buff the holes to remove burrs, they'll get in the way when securing the hinge with hardware (rivet or machine screw). |
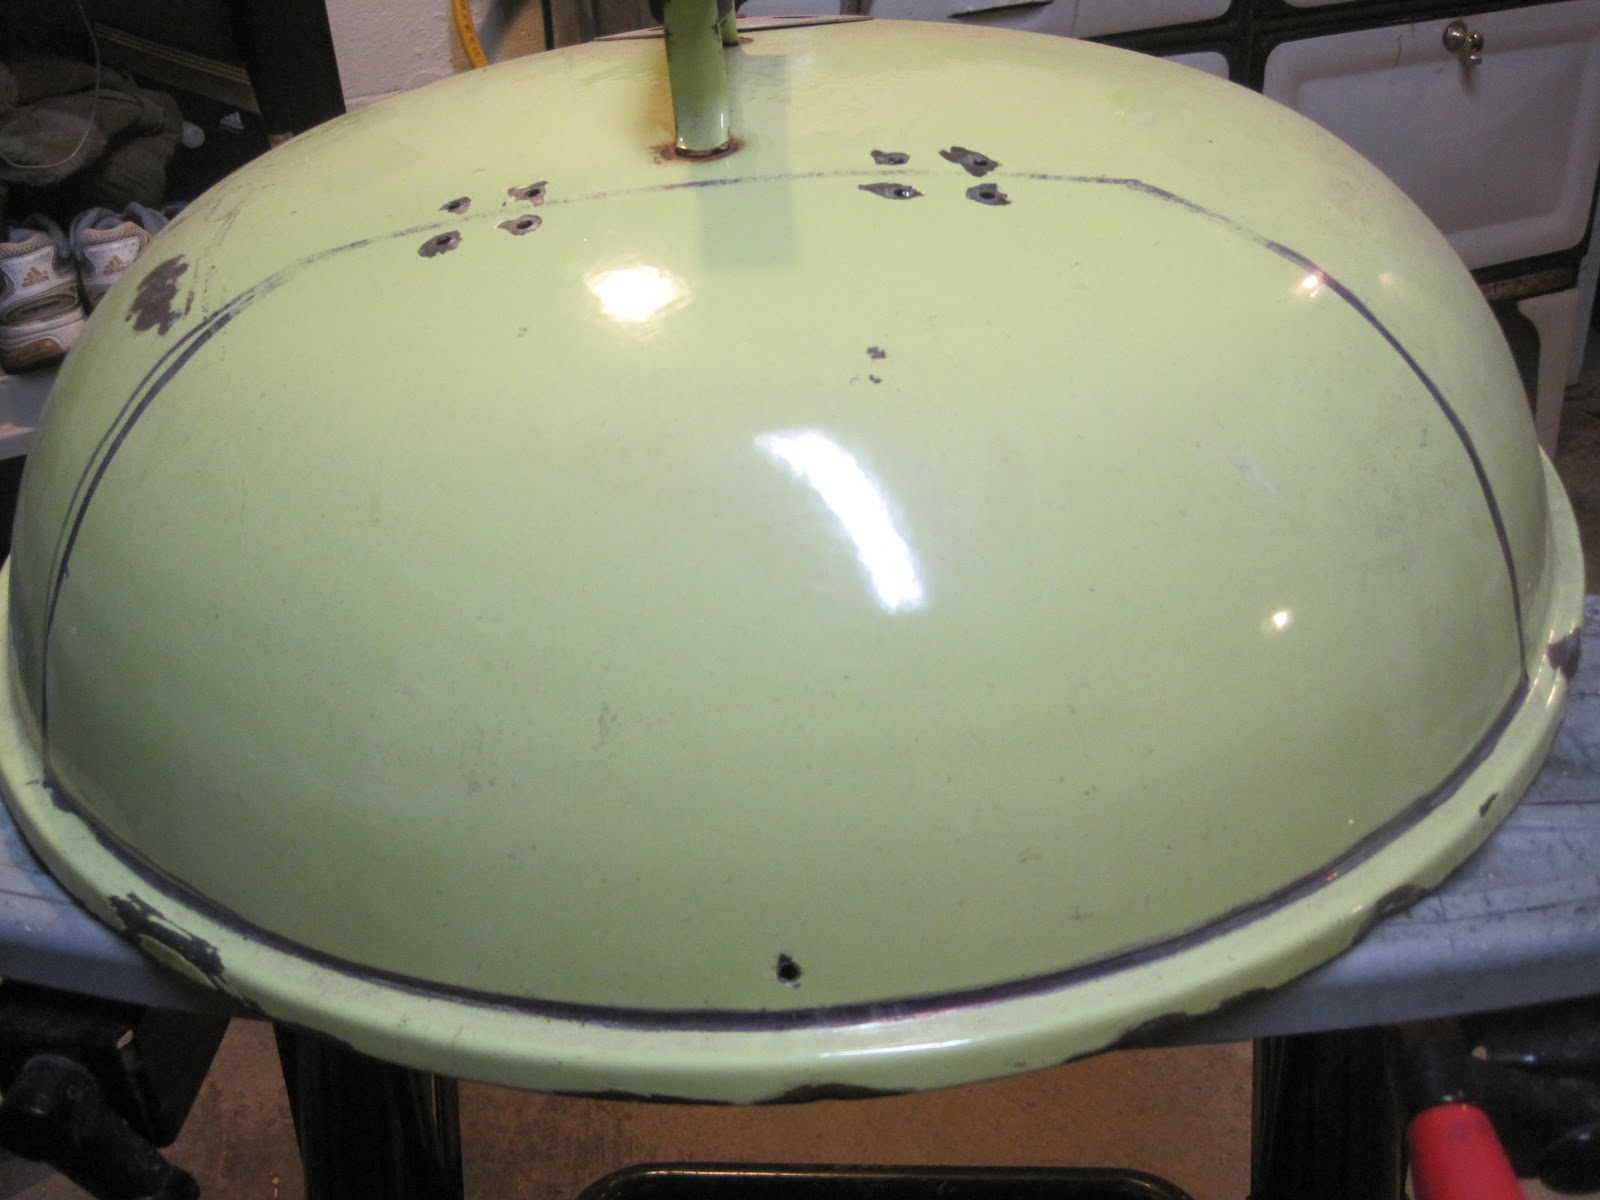 |
| Drill the little hole in the center of the lower line of the trapezoid, just above the flange. Later, we'll put a knob here to use to raise and lower the door. |
 |
| The money shot. You may worship me now. Cut the top line of the trapezoid. |
 |
| Those pairs of holes drilled now straddle the cut. Put the hinge on and secure it. |


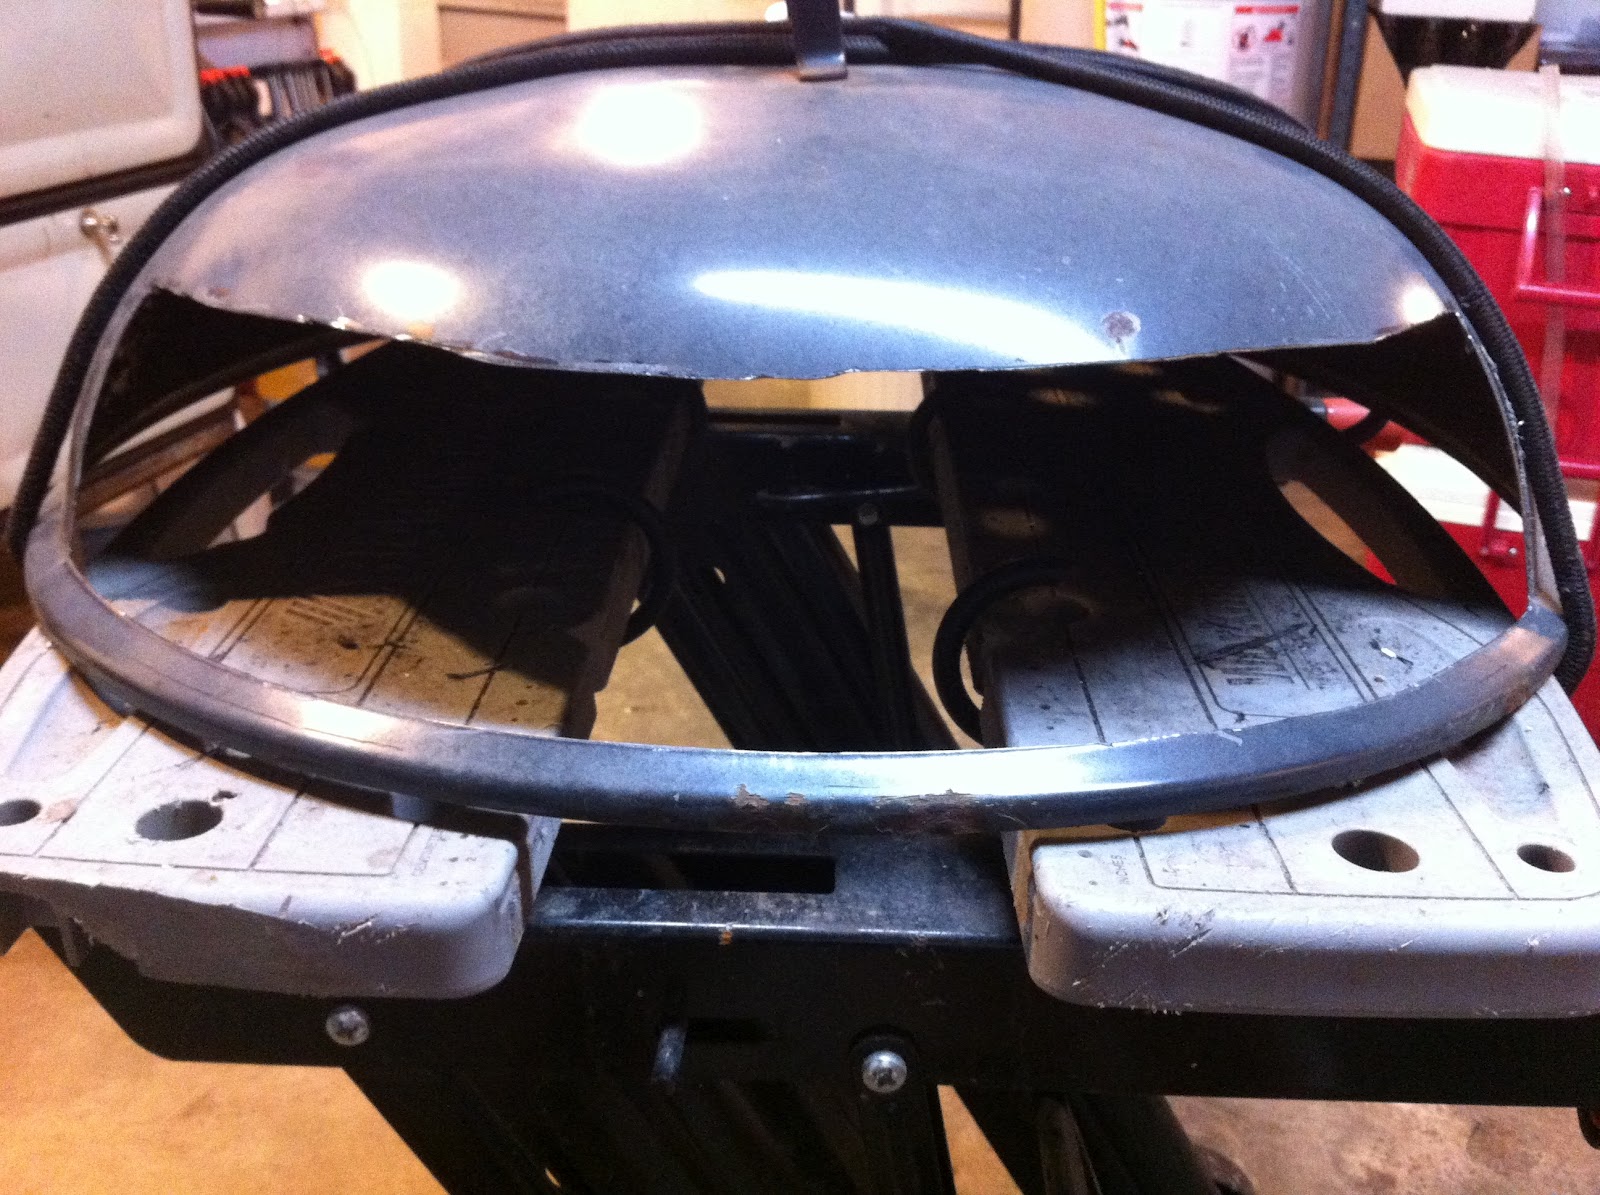
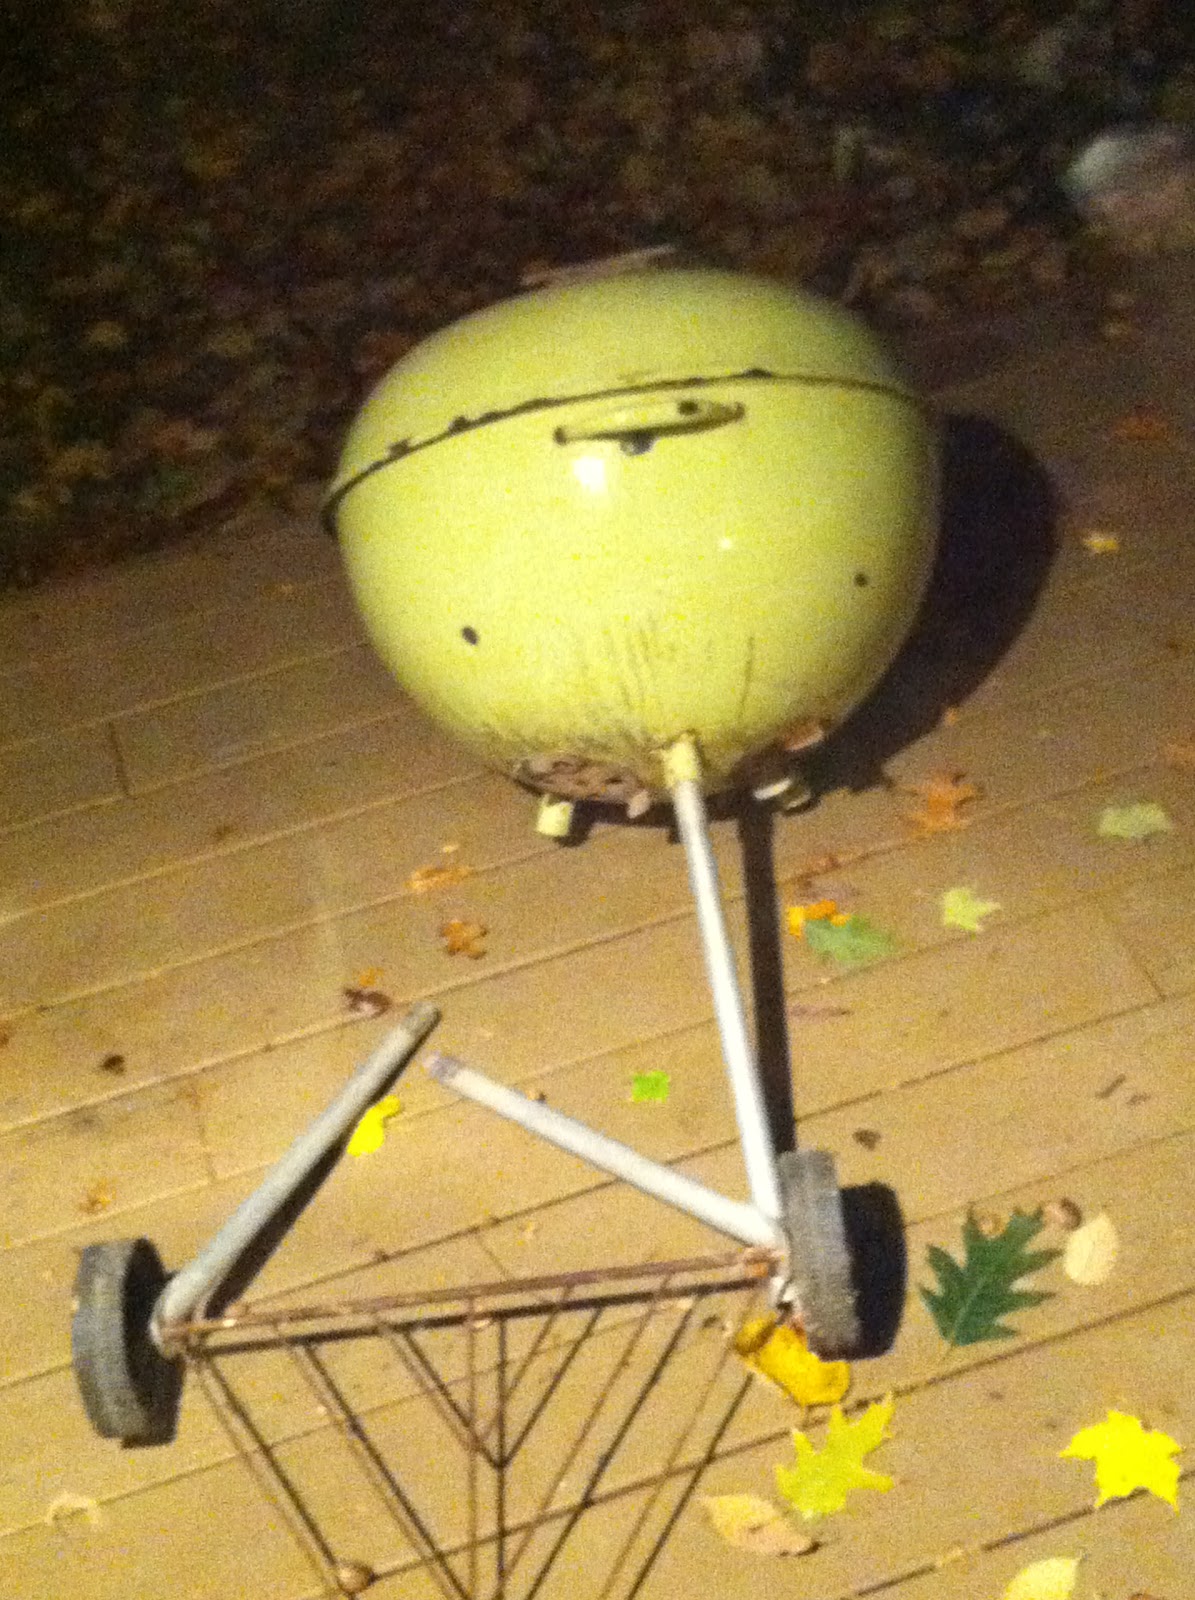
Common in physical science research and publishing is to squeak out a bunch of brief discoveries in the course of a project called communications. These tidbits are then assembled in a "full paper." In that time-honored tradition of exhaustively tedious republication of the same thing, I will put together one more Firedome post.
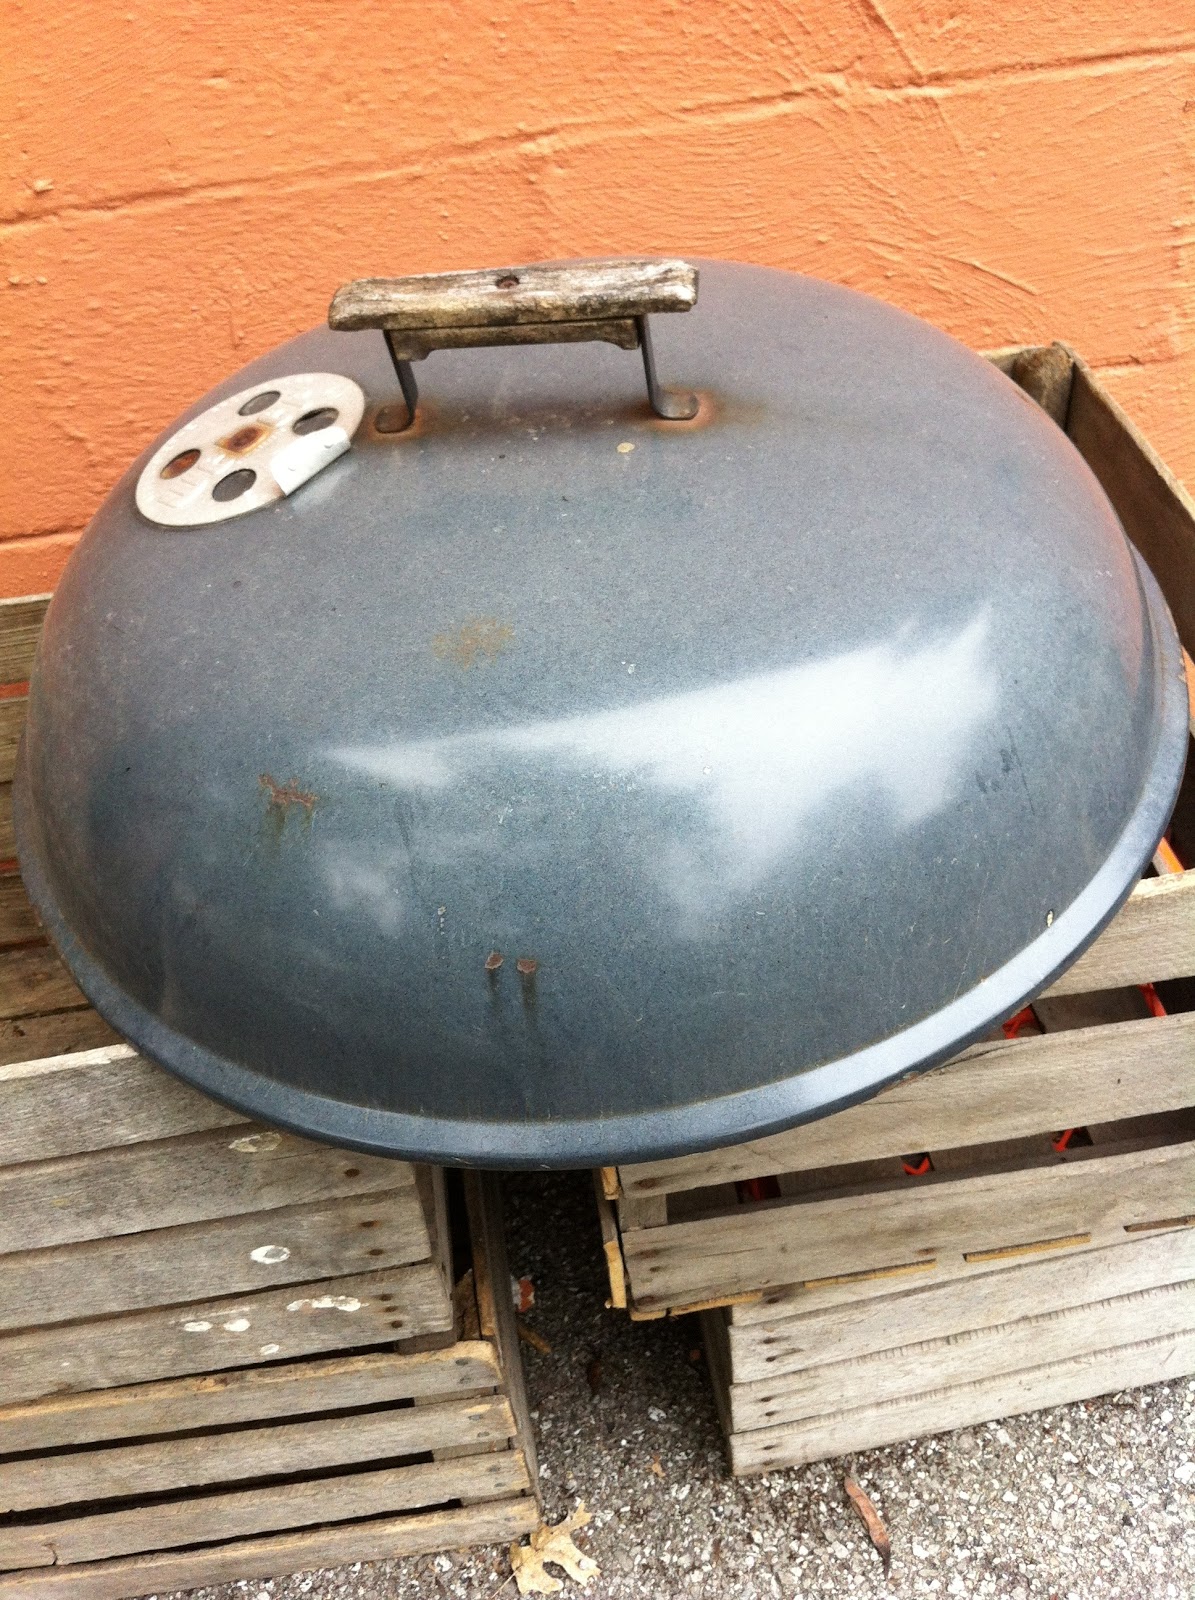
The victim? During the wind storm last night, this arrived on my deck. It's a classic Weber 22.5" kettle grill. I'll cut this baby up guided by observations of my best runs thus far. This will be a guide for anyone wanting to risk their life to make the perfect pizza - an effort I find deeply satisfying. Check back once in a while to see the final post.
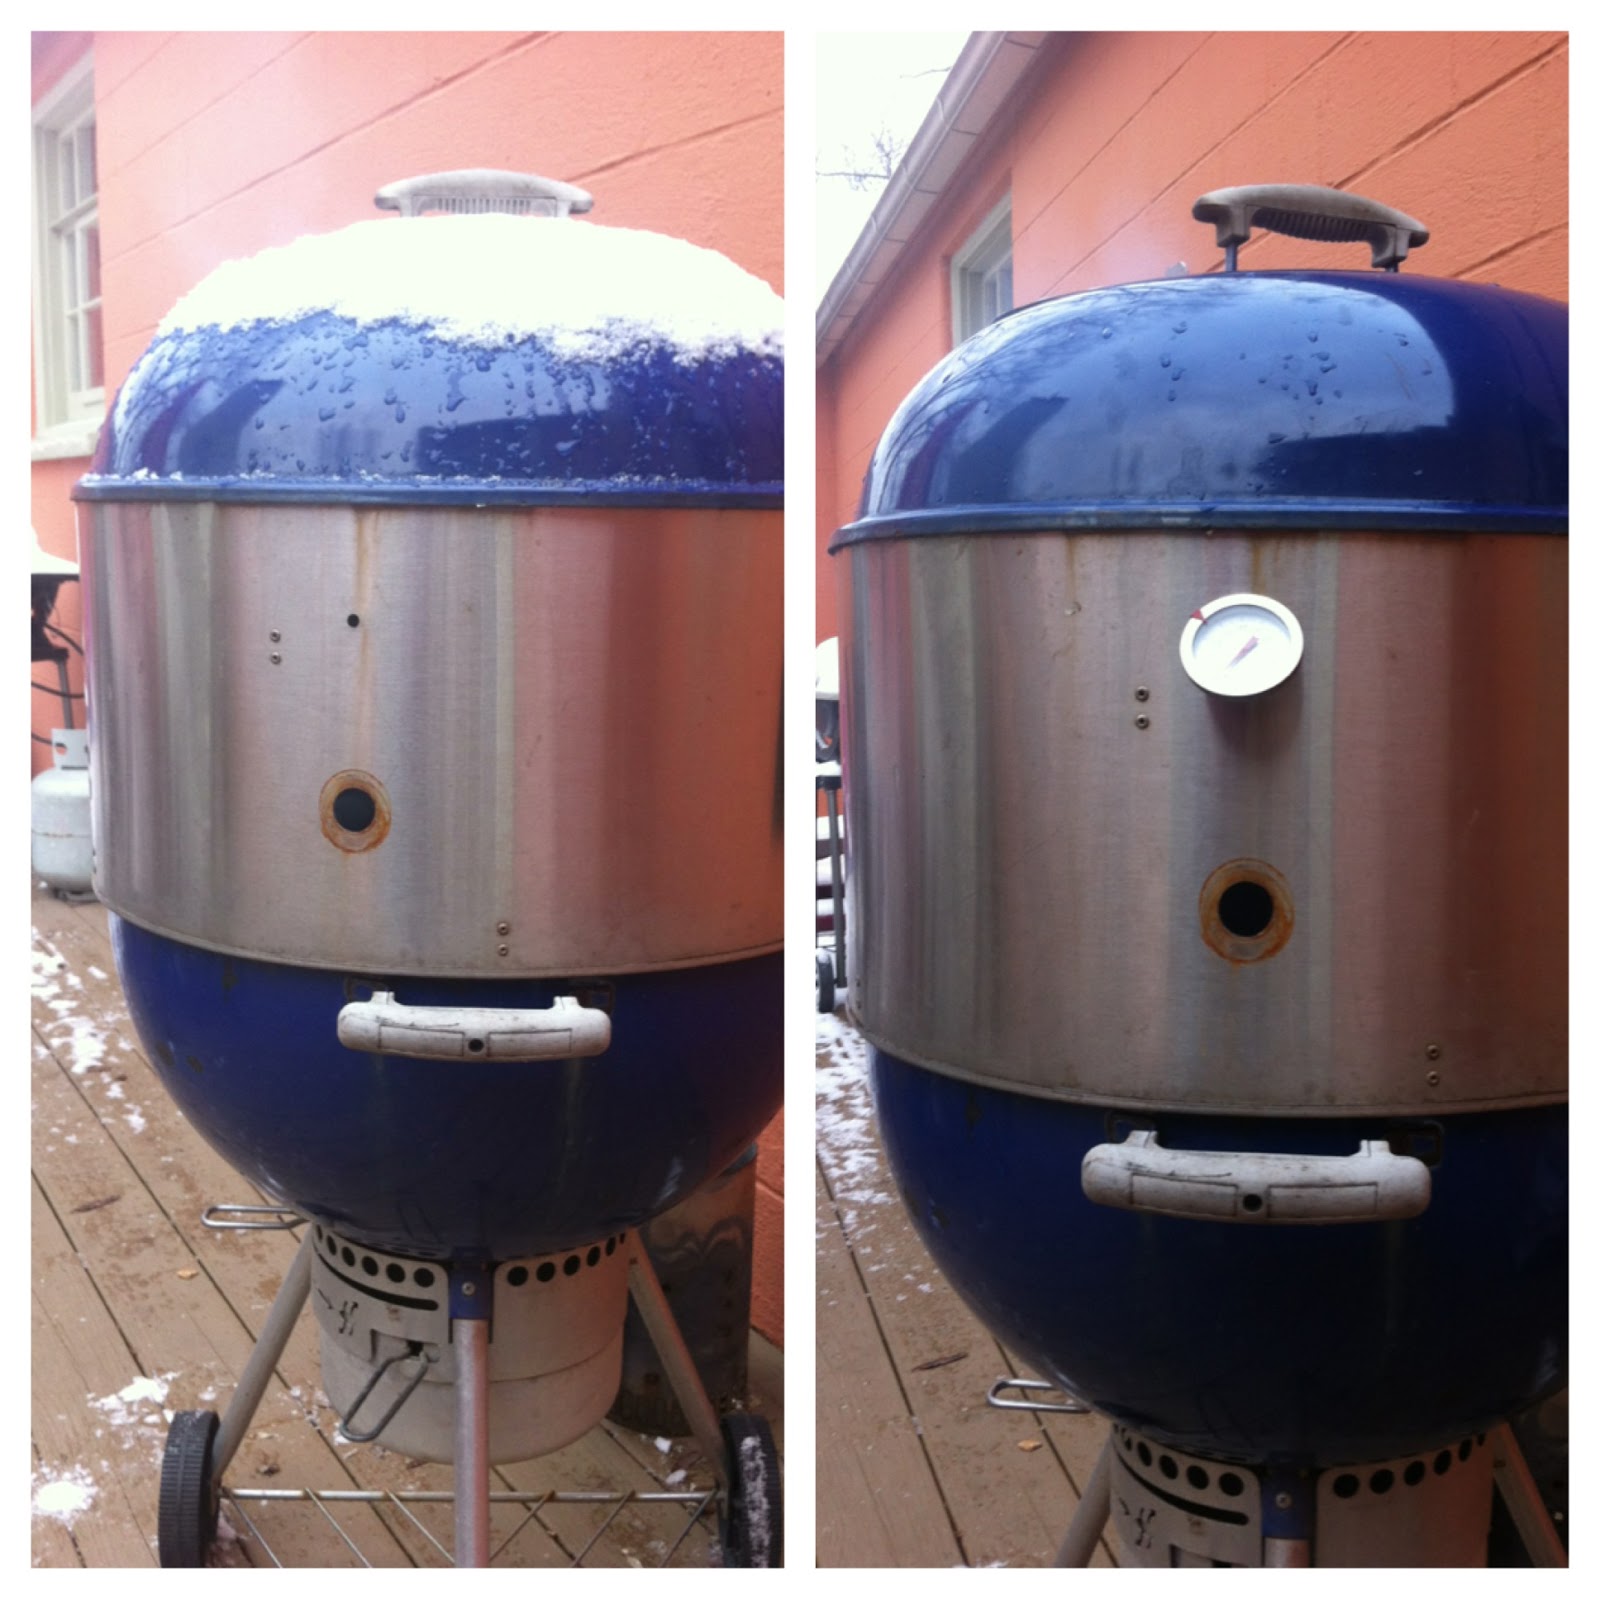
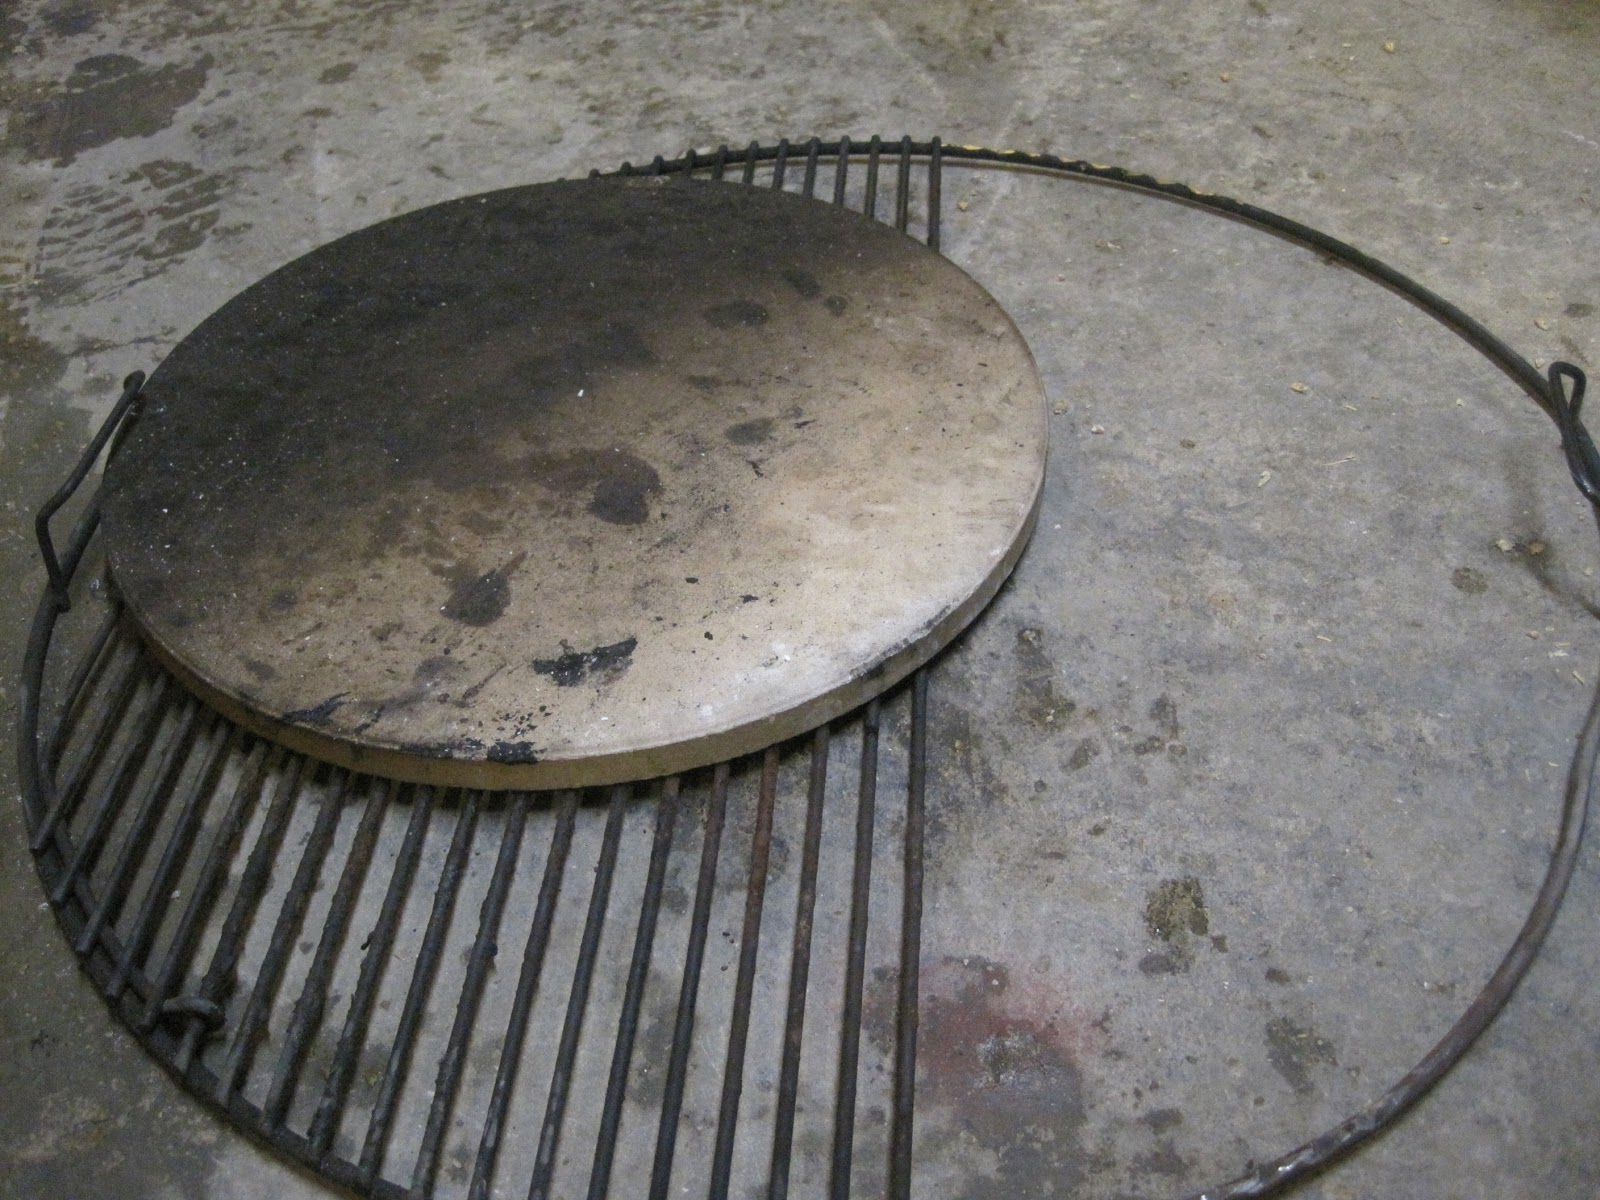
The Firedome project is my pride and joy. Although I can rely on it for pushing out a nice pie for friends, I still play around with ideas for changes. Here's a newer version that didn't quite work as I wanted, but the final cut shown in the last image reveals what may be a slightly better design than the current one.