12.17.2015

hotdog in a pretzel / bagel

Dog walks are when I do what I enjoy most,  think.  I think about how to get rich, how to replace my 9-to-5 with a more satisfying 9-to-5 and what things need to be baked.

I make pretzels once in a while.  They're fun and always come out tasty, big crowd pleaser.  I use a stiff, pretty dry dough:

water/milk (1/1) 200 g
butter 14 g
sugar 10 g
salt 5 g
unbleached white 300 g
instant active yeast 3-4 g

mix, knead and toss in fridge for about a day.  Then shape, proof, toss in 5% w/v lye solution for a minute, remove, place on Silpat, sprinkle with salt and bake at 400F convection on the Silpat until they are a rich mahogany color - like fine leather (that's a Ron Burgundy reference, he's my idol).

Then I started reading more on bagels. My last run wasn't very satisfying.  I use a similar dough for bagels, but after the shape and proof, I toss them in a sweetened (malt or brown sugar) pool  of boiling water and bake.  But I don't get the shine and tug to the exterior.  I read somewhere that bagels were originally subjected to a lye dip.  Are bagels just a chubby pretzel?  Until I sort this complicated mess out, I decided to take a side step and make a snack while I do research.  I had the desire to jam a hotdog into a pretzel (this is a reference to The Todd from Scrubs, another idol of mine "give the Todd some love!" /raises hand for high5).

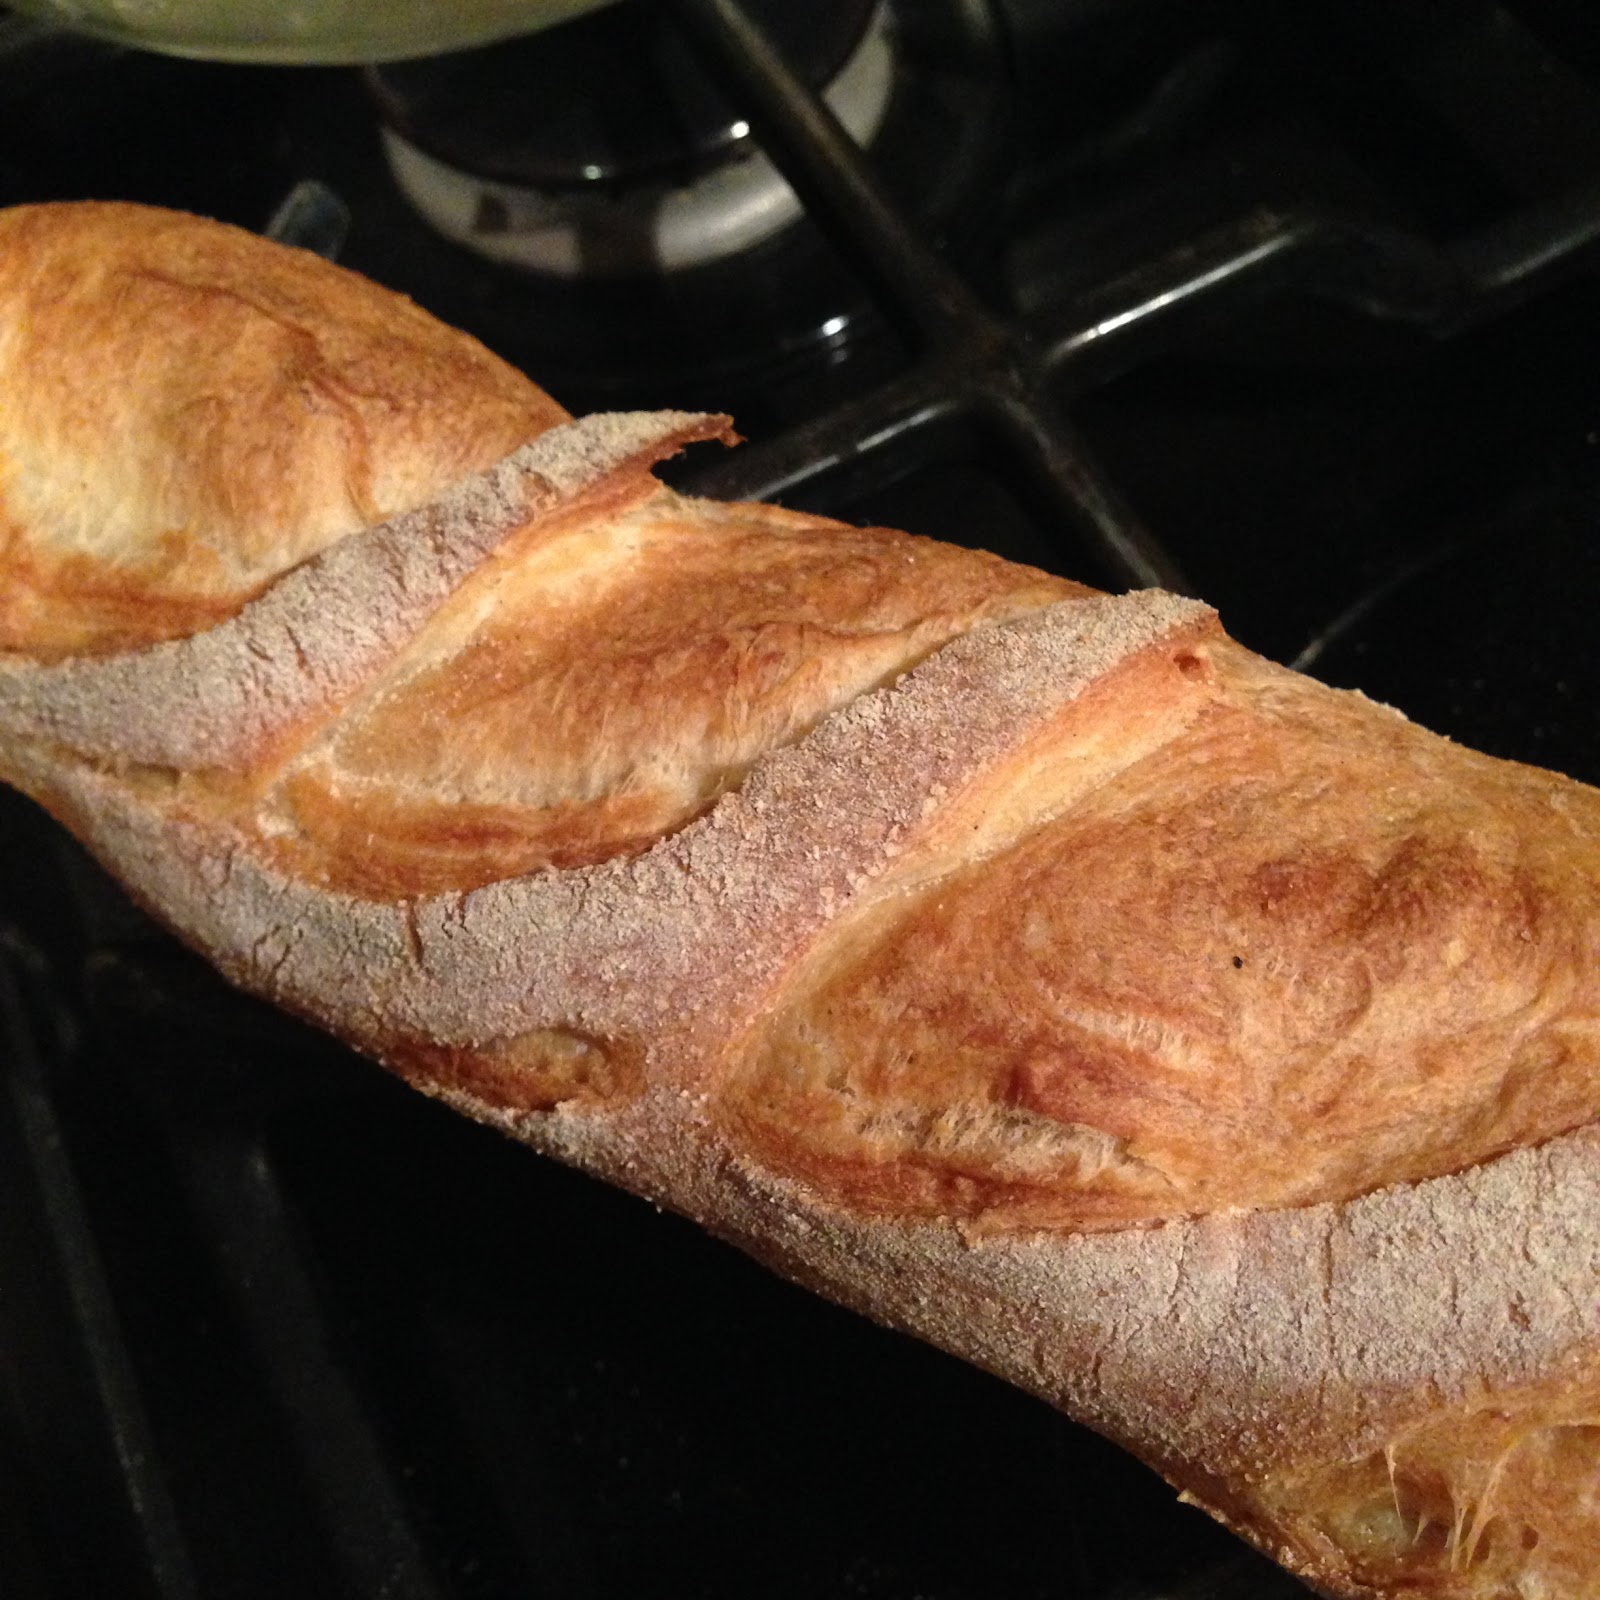
Some action shots below, not much of a procedural post, just a few notes.

 100 g of that dough rolled to 12" by 1 3/4"

Chopped (Ballpark) dog tucked in to the dough.

 Formed into a loop and dusted liberally with flour, allowed to ferment in fridge for a day.  Side note: looking at this image sometimes produces a negative image where the parchement paper looks like a bundt pan holding the bagel dough - it's crazy!

Removed from fridge, allowed to warm for an hour to do the final proof, dipped them (with care) into a 5% w/v solution of food grade lye, scooped them out with a stainless skimmer, placed the dipped dough on a silpat, sprinkled with coarse salt and baked at 400F (convection) until brown.

Taste test (photobombed).

A lot to think about on this.  Need to read about bagels vs pretzels.  Probably heading toward something similar to a pizza roll next, layered pepperoni, sauce and cheese in a pillowy soft dough but still using the lye treatment on the exterior, I like the effect a lot.  Thanks for all the online discussion!  And thanks to @jarsloth for being brave enough to taste it.  I'm hoping he's still alive.

12.11.2015

fermented banana muffin

A banana muffin.  I practically fell asleep typing that.  Looking at a couple rotting bananas on my counter I  decided to try something.  I'm pretty sure someone on the internet did this already, but I was too lazy to go find it.


I peeled the two bananas and mashed them with a wooden spoon and added a ca. 1/8 teaspoon of yeast.  


After 12 hours, the mush had what looks like krausen on a batch of fermenting beer and the mixture was at least twice as voluminous as when I started. 


I stirred in the head to reveal this fizzing mass of fermentation.  I let it go until that night, total ferment about 24 hours.

I figured enough alcohol hadn't been produced for me to be interested in, so I made a mixture to use it in.  This mush was destined for muffins.  I creamed butter (50 g) in sugar (100 g), added some milk (ca. 15 g) and then blended in the banana mush.  I added to this flour (135 g), baking powder (1 t), baking soda (1 t) and salt (3 g) and some allspice because I was too lazy to find the cinnamon that Frankie had taken for mixing in her line of cosmetics.  


I plopped the mix in little parchment cups and baked them at 350F for 30 minutes, internal about 198F, probably a tad too much.  But soft on top, nice volume, texture good.  Not sure they're any better than regular, but kind of a fun experiment.  

12.04.2015

pizza: cast iron vs pizza steel, visually similar but Baking Steel wins crispness and taste by miles

I hit a pizza slump some time ago.  A slump with regard to my indoor pizza, baked in a conventional indoor oven.  I bought a baking steel, altered my dough a bit and I'm out of my slump, but I'm not sure what made the big difference, cooking surface or dough.

So, the dough I'm using: water 220 g, Gold Medal unbleached white 300 g, salt 5 g, Fleischmann's instant active yeast 1 g, sugar 5 g, olive oil 10 g, mix, knead, toss in fridge for a day.  Scale to 225 g pieces (to be rolled into 10" diameter pies).

Baking Prep: preheat oven to 550F convection.

Surface 1: Lodge cast iron 15" round.  Tossed pan into preheated oven and let warm up for a full hour.  Surface temp registered 570F using a infrared gun.

Surface 2: Baking Steel (bakingsteel.com), preheated in the same manner, temp also 568F with same thermometer.

Baked a simple margherita on each surface (an hour apart) using the same dough, 4 minutes baking time.  Action shots below:

Final Pie

 cast iron
Baking Steel

Side view
 cast iron
baking steel

Bottom
 cast iron
baking steel

Verdict? Despite similar looking images, hands down, the Baking Steel wins.  Much better texture, more crisp, better volume and taste.

11.20.2015

croissants, some notes. use a long proof

I'm happy to call croissants a staple in our house.  I'm even at the point where I can vary the dough and fillings to get fun creations that we all enjoy.  I got to this point with a lot of practice and two significant events.  About 5 years ago, I took a croissant class with Tad at La Chatelaine Bakery (@LaChatColumbus).  Tad is a masterful baker, one of my favorites ever.  His croissant method produced exquisite pastry, but the method was taught to us with some rigidity.  *This* is how it's done.  I stumbled a little after this with little success.  The next significant stop on this journey was years later at another class at @The_Commissary with Aaron Clouse (IG @clouse11).  In this class the dough was more enriched than in my previous class (some milk and butter) and there were physical variations in the folding.  Some used a sheeter, some rolled by hand.  The combination of classes led me to conclude there is a much greater range of methodology and recipe that will yield an amazing pastry.  

My recommendation is to practice using any prep out there: Bouchon has a good method and many bloggers have stolen it and republished it - but it's easily available.  Another well detailed prep is from King Arthur.  BUT, I gather you'll need to use a class to go the distance.  Take either mentioned above, but I'm a little partial to Aaron's (sorry Tad!).

A few examples of my work below.  My benchmark numbers: 
X grams butter, 
X grams liquid, 
1.67 X grams flour.  

After a bifold of butter, 3 turns, scale each to about 75-100 g, roll, sit them in the fridge overnight covered, then a looong proof the next morning, ca. 2 hours, glaze with yolk/milk and baking at 375F for about 20 minutes (convection).


 Classic and nutella.  Dough using mostly milk and 10% whole wheat flour.

 Similar but no whole wheat in flour bill.

Also all unbleached white, no wheat.  Nutella on left.  Interesting that the nutella didn't crush the internal structure.

10.31.2015

quick pickles

I needed some gardeneira the other day for a secret family recipe.  For some reason, it's hard to find.  I know Marzetti's makes one, but it's never in the stores I visit.


When it comes to pickles, I've only used Ruhlman's tossing veggies in 3-5% brine and letting them sit in a cool place for a week or more.  I don't like them.  Not sure why, it's never been a good pickle for me.  So, from a few comments (@twixlen) and @SmittenKitchen, I found a general method that makes pickles I like and it's effortless.  Briefly boil vinegar and water (500 mL/500 mL) containing 2T salt and 2T sugar and a bunch of spices (coriander seed, mustard seed, herbs, dill, celery salt, etc.) and pour it over vegetables.  For tougher veggies, cauliflower and carrots, I simmer them in the solution a few minutes, but for sliced cucumbers, I don't.  Place the cut veggies in a container, pour the hot mixture over them and toss in the fridge.  No need to sink the veggies below the surface, just good pickles in less than a day.  

 Gardeneira: cauliflower, celery, carrots, cucumbers.

Cucumbers and zucchini.

10.11.2015

pizza notes

I've been a little preoccupied with Harvest's Pizza lately.  It's wonderful.  Tender, very lightly topped, crust as good as the toppings.  On occasion I can hit something close in my grill, but in the oven, most of my pies suck.  I latched onto thickness of dough over the past year or so.  I thought tenderness might derive from a super thin crust, but some observations the other night at Harvest led me to different thinking.  I realize a home oven isn't a real pizza oven, so my expectations are reasonable, but I should be able to do much better than I've been.


Thickness.  One can never measure dough thickness when it's less than an inch or so.  It's too irregular a surface to measure a cross section, one can only have a derived thickness by indicating the amount of dough per pie.  The other night at Harvest, me and my 3" x 5" recipe card coupled with our server kindly answering how much dough they use per pie gave the following: They use 270 g dough per 12" diameter pie, roughly 2.4 g / square inch of pizza.  I also noticed their toppings don't go anywhere close to the edge, presumably this is for crust people but more importantly, this undoubtedly keeps their oven from getting food on it and smoking.

This in mind, the next significant part is the dough.  The most likely candidate in my mind is fat content.  So, today I wanted to try a dough I've been fooling around with: a high fat dough from water 100 g, unbleached white 200 g, olive oil 40 g, salt 5 g, sugar 5 g and Fleischmann's instant active yeast, ca 2 g, allowed to sit in the fridge a day.

For kicks, I decided to try Lucky's dough.  They sell a bag for $3.  It's about 600 g, one of their pizza people says it's the amount they use for a 16" diameter pie (3 grams / square inch).  From the feel of their dough (the extensibility and snap back) and the label order of ingredients, my estimation is it's 70% hydration and a small bit of oil, ca. 5 grams and a trace of sugar.  By comparison to my high fat dough, it's much more slack and much leaner.  

For the comparison, I used 150 g dough per 8" diameter pie, topped with a light tomato sauce and some shredded mozz (cheap stuff) to view the puff on the dough.  I baked these directly on a cast iron sheet (half way position in the oven, preheated), 450F convection, 6 minutes each.
 Left is Lucky's Market and right is my high fat dough. Click to enlarge.

Crust profiles, the lean dough wins! Airy and more crisp.  The high fat one tasted terrible. Click on image to enlarge.

So I veered all over the place, that's what I meant by "notes" in the title.  Not a great comparison.  Lucky's made one dough, I made the other, undoubtedly different flour, not only higher fat in one, but hydration different, etc.  It was just an itch I needed to scratch. My goal is something as tender as Harvest, cooked in a regular oven,

Future runs:
-sticking with 2.5 - 3 grams / square inch
-leaner crust
-longer rest prior to baking
-my own version of Lucky's dough, e.g., water 210 g, flour 300 g, olive oil, 5-10 g, sugar 5 g, salt 5 g, yeast.  
-keep you all posted

9.27.2015

uthappam

This was fun and exotic, until I realized it was just a GF pancake.  The best discovery on this, is one doesn't need a sophisticated wet mill to get a nice result.  I mixed urad dal (20 g), basmati rice (80 g), a few seeds of fenugreek, water (150 mL), salt (ca. 1/2 t, 2 g) and let it sit an hour before pureeing with my immersion blender.  I cheated and added a touch of yeast.  Then, cooked 'em like any pancakes adding a mix of cilantro and green onion to the uncooked side of the pancake before the flip.

Try these, they're tasty at room temperature.  Fun snacks.

 Here's the batter after fermentation, about 8 hours after I added yeast.  All the fine particles of yeast and dal had degraded during the fermentation to give a soupy batter that doubled in volume sitting at room temperature.

I took a ladleful and cooked it on a non stick pan using some olive oil.  Just like a pancake, when the top surface gets the bubbles popping through it's time to add herbs/onions and flip.

Final pancake.  I left them out at room termperature for snacking.  They disappeared pretty fast.

9.15.2015

more experimentation on fries

Heston Blumenthal does a triple cook on his chips (fries).  One boil until the potatoes are nearly falling apart, drying in the freezer, a double dip  in oil.  The drying in the freezer is what kills the method for me.  No way it's going to be easy to prep 10 lbs of potatoes with that kind requirement.

In order to dry them out, I took the boiled potatoes and placed them at room temp in front of a fan last night.  I may have overdone it.  A sample of potatoes indicated I had a loss on drying of about 50% (sample of potatoes went from 50 grams to 27 grams).  These were placed in a tub and I'll  fry them tonight for kicks.

Russets: soaked, rinsed, dried for 8 hours at room temp with a box fan.  I stored these at room temp in a plastic container, covered and will fry them tonight.  I fear they have been dried out too much.  For better or worse, I'll post the result, because I do not fear failure!


9.01.2015

potato chips, another thing microwaves suck at

Food bloggers have a funny twitch.  If something can be done, it's a great method.

The other day I saw a microwave potato chip maker at the thrift store.  It was a round plastic carousel in which potato slices are placed and the loaded ring tossed in the microwave.  What emerges is a slightly colored, crisp chip - As Seen on TV.  There's a million posts about this method, without the carousel thingy.

A slice of raw potato and a piece of paper are similar; they are a hydrated (ligno)cellulosic or complex carbohydrate network.  When moisture is removed, the residual starch dries out, upon continued dehydration, it can ignite.  Igniting paper in the microwave is one of life's joys afforded only to the adventurous and drunk (similar to an exploding egg).

Still, intrigued by the idea, I had to conduct this one myself.  I would easily swallow my pride and fancy theories and happily eat chips if it worked well.  I sliced russets, rinsed them of residual starch, dried them lovingly, sat them on paper towels and tossed 'em in on HIGH.  And watched closely.  As the fine stream of smoke that precedes a fire started to rise from the chips, I stopped the microwave and rescued my starch nuggets from the (almost burning) microwave.

The chips had some reasonable color, were crisp but would not accept salt since they had no means to cling to it.  They were not objectionable.  A fun party trick at best. Real chips are deep fried.


8.29.2015

pasta, stat

The other night, the wife and I wanted to eat a special chili gifted to us by a friend, a special Indian vegetarian chili in limited supply.  Given the child's finicky nature when it comes to chili, we coveted it and gave her spaghetti.  Side dish of spaghetti coming up!

Rolling pasta by machine can take a lot of time if the initial hydration of dough isn't correct.  Too wet and the dough requires running it through rollers, dusting with flour, and repeating that until it absorbs enough flour to get to a fine texture and dry enough not to stick when the noodles get cut.  I also wanted to use a coarse wheat as part of the dough makeup.  Here's what I came up with: 1 yolk + 1 whole egg, 65 g, salt 2 g, olive oil 5 g, unbleached white 110 g, coarse whole wheat 20 g.  I mixed this quick by hand, dumped it on the counter and folded the stiff crumble a few times.  It eventually gathered into a ball after some work, but it was tough.  I resisted adding more water.  The rollers would finish the kneading.  I let it rest at room temp only about 10 minutes, passed it through coarse rollers and then down to 4 using a roller on a KitchenAid.  Then the strips were cut to fine noodles which turned out to be a nice looking spaghetti.  Because the dough was on the dry side, it flew through the process without too many passes and was silky smooth by the end.  We got our chili and the kid her spag.

The noodles were allowed to sit on the counter for 20 minutes while I prepped dinner.  These were boiled and tossed olive oil, butter, slivered garlic and hot pepper flakes.


8.24.2015

oven fried (coconut shrimp)

"Oven fried" is an expression commonly seen in the doctor's office copy of Family Circle. Potatoes or chicken skimmed with oil (because low fat food makes us all thin) and baked will make food that tastes "just like it's deep fried" claim the recipes.

These methods are an  insult to the beauty of deep frying.  With one exception. Mayo. Frankie and I will take thin pieces of chicken breast, coat with mayo and cover with seasoned bread crumbs and bake in a 400F oven.  They're really great.  It's not deep frying, but it's really a great coating that doesn't flake off.  The mayo sticks to the flesh and holds the breading better cooking with just a skim of oil.  It's like oil fixation .. or something.

I used this the other night on some frozen, poor quality shrimp in an attempt to salvage them.  I thawed the shrimp, air dried them a while, plopped a bunch of mayo on the floor of the sink (I frequently use the floor of the sink as a workspace for messy jobs), dumped the shrimp and worked the mayo over the outside of the shrimp with my hands leaving as much on the surface as would stay on.  I took the coated shrimp and dropped them in a mixture of 1 C bread crumbs and 1C sweetened coconut (and about 5 g salt) to coat them.  I baked them in a 425F oven (a little too hot) on top of parchment.  Next time I'll cook them a little lighter in color.  Fun appetizer for the gang.


8.05.2015

"natural" peanut butter

I'm a Jif super crunch guy. I lived on it during grad school. Almost everyday, lunch was a quick sandwich at my desk. When I'm not eating the maligned processed peanut butters, I love the peanut butters made before my eyes with peanuts ground in the hopper before my eyes. The style/peanut-crunching-machines are in most fancy supermarkets. The peanut butter has got great texture, doesn't separate for a long time, about a few weeks and tastes great.

Today's question: Why does each and every "natural," no additive peanut butter taste like shit and absolutely nothing like the stuff crushed just prior to eating? Sorry locals, even @KremaNutCompany. The pre-ground peanut butters have some texture, kind of runny, separated and above all, the deal breaker, with a bitter aftertaste?

Machine mashed before my eyes...yum.

Leading "natural" brand, runny, icky, bitter.

6.22.2015

baguette, focus on the baking

Instead of forcing you all into compliance regarding specific ingredients, I'm going to let my hair down a bit (ha, that's a joke) and let you use any damn recipe you like.  The baking method here is the thing to take a shot at with any dough you have lying around.
I'm using a slightly enriched dough.  I was curious to see the results using higher temp and a cast iron surface with a little steam.  The result was unexpected and great.  The dough I used was 73% hydration with some enrichment and baked at 500F.  What I got was incredible oven spring and a higher hydration gave a nice open texture.
The dough I used: unbleached white 275 g, whole wheat 25 g, salt 5 g, sugar, 5 g, crisco 9 g (sounds odd, but I wanted a neutral shortening at 3% rel to flour), water 220 g, fast dry yeast 3 g.  Straight dough mixed in a bread machine and left in fridge 2-3 days (I've made this many times now, I love it.
Using a 9 x 17" cast iron surface in the upper half of the oven (NOT TOO LOW, the dark surface can burn the bread if it's too low).  I'm a few inches above the half way mark with normal heat, no convection.  1/2 hour before baking, preheat to 500F (500F and above, your oven has to be clean).
For steam, lately I've been using a hand-pump pressure sprayer, 2L (dedicated use for water).  Have it charged, pumped and ready.
In this image, I'm squirting the water in a fine stream on the front margin of the floor of the oven to avoid hitting the electric element (I heard it can stress it and ruin the element; I've never had the problem).  I also avoid hitting the cast iron bake surface, I want that to maintain high heat - vaporizing water requires a lot of energy.  If you hit the cast iron, the surface goes down in temp rapidly, can't remember how much, but I've measured this a few times.  So, by squirting the floor and walls of the oven, you're able to maintain a hot cook surface from the pre-heated, high thermal mass of the cast iron.  That will stay hot while the oven recovers.

Dough removed from the fridge.  This is about 300 g and 15" shaped into a baguette and allowed to proof for about an hour.  Having proofed enough, I docked it (slashes) using a favorite serrated knife (I've tried a lame extensively and prefer the knife for docking).

Slide the loaf onto the cast iron, give a ca. 50 mL blast of steam initially and give another blast 5 minutes later, and that's it.  About 5 minutes into the bake, the soft dough jumps with oven spring. Use a total bake time of 15 minutes 500F. Watch your oven! I know mine very well.  This is a rapid bake.  It's over when it gets the color you like.

Even with this much enrichment, it's pretty crusty.

Pretty nice open texture (sliced AFTER at least 10 minutes cool down).  Aside from the cast iron ($20 at World Market columbus people), it's an easy method to try.  Let me know your results.

5.16.2015

porcini pasta

Ingredients tossed together, mixed, rested and rolled.  That's my quick fix for fresh pasta.  It's not quite as fine as that derived from machine rolling, but it's pretty good for a weeknight and a few servings barely takes an hour.


The other night @ChefBillGlover gifted me a sample of porcini powder and suggested one good use for it was as a partial replacement for flour in pasta!  

Here's my version:
 The powder, WOW!  After I broked the vacuum seal what an earthy strong smell!

This is the dough after some mixing in the bread machine: eggs (3, 160 g), olive oil (10 g), salt (3 g), porcini powder (20 g), unbleached white flour (290), whole wheat coarse ground flour (10 g).  I like a bit of whole wheat to tighten up the dough.  Look at that color!

After a few minutes kneading in the bread machine, I cut it into 3 balls, wrapped and let the dough rest for about 10 minutes.

 Using some whole wheat flour to keep from sticking, the first blob of dough was rolled to about 18" x 12" and kind of thin.  It got tough at the end and I was too impatient to wait for it to relax to get it thinner.

 To cut noodles, I laid out the pasta and let it dry out about 5 minutes.  This prevents the noodles from sticking to each other later.  Then I just cut lines with a pizza roller.  This is different than many cut pasta, but I like it, it's faster than it looks.

 Scooped the noodles from the center into a bunch.

 I let these rest on a wooden peel for about an hour while I went out for a quick wine tasting.

  Tossed in boiling salted water for about 5 minutes, strained and tossed with blanched/sauteed asparagus and peas, and topped with reggiano.

5.10.2015

poached, a validation

Validation has many meanings.  The most interesting context for this word from my experience was in big pharma.  When scaling up a process, bringing a chemical reaction from research to manufacturing, a reaction procedure goes through a process of being tried by many others to see if it  works as described.  If you're the first chemist in line, the innovator, it is a humiliating process.  You see your personal touch get shredded with vigor by others until it becomes reproducible.  It's one of the fastest ways an experimental chemist matures.

This is what I think about when @TestKitchen or the ilk call something "Master Recipe."  It rarely is.  But this poached egg method, it's perfect.

So, this post is only my experience with someone else's method, a validation of sorts.  The only thing - I don't know where ground zero is, feel free to chime in via comments.  I don't know who created this method.  I'd like to have a beer with whoever it is.

 Crack open and egg and swirl on a fine screen for a minute or so.  A small but crucial amount of white, will come through the screen, discard it.  Then place the egg in a cup or ramekin for dropping in the water.  Repeat with as many eggs that you want or will fit in the pan.

 Gently spill the egg into simmering water (no vinegar needed).  Let sit 3 minutes.  Use screen to remove them.  As they cook, they'll lift off the bottom of the pan of boiling water.  The eggs will stay separated!

 To serve, bake a baguette, slice in half, toast and butter.

Grab your egg out of the water with that same screen, swirl to remove excess water and plop on baguette.  Enjoy.  It always works.  Always.