8.26.2013

Mini lunch rolls/boules, the daily grind

I think it's in Silverton's La Brea book and plenty other places I've read about baking fully proofed formed loaves of dough right out of the fridge.  My fear was always the moisture built up inside while cooking would behave so differently than the exterior, a dense middle might result.

Time for some small risk taking.  We're in production mode: both off to work early, kid to school, and the city school lunch belched forth from whatever disgusting organization that sleeps with Columbus Public Schools is turning out disgraceful options.  So, we need good food prepared fast for lunches.

Little fresh breads, whether for sandwiches or dipping in nutella are versatile for Frankie (and for our dinners as well, the little round is a cool mini soup bowl).  So here's a quickie prelude to a series of posts on rapidly cooked breads with lots of flavor from slow fridge fermentation.

My first attempt made use of a typical lean dough, 65% hydration with a 2.5% oil enrichment, it's a versatile dough for us.  This dough happened to have aged in the fridge 3-4 days.  Last night I took it out, rounded 4 x 50 gram lumps and let them proof in the fridge overnight.  Next morning, I tossed them my Baparoma steam pan in a cold oven set for 425 F, 25 minutes covered and 10 uncovered and boom! Hot rolls.  A couple tossed in to the lunch bag loosely swaddled in a  paper towel so they could cool properly and I'm pretty sure they might be eaten first.

Some action shots: click to enlarge images:

dough balls rounded on the cover of a plastic container, the bowl gets affixed to the lid and dough can rise during the night with no contact, but still  prevented from drying out in the fridge.

The dough balls this morning.  A little flour dusted on them to prevent sticking to the pan.

 Note the dimpled surface of the bread.  Although I use a full yeast charge on this dough,  several days in the fridge result in a dough with some sourdough features.  The several day aging with full yeast is an interesting hybrid method between a straight, rapidly rising dough and a slow starter-derived dough.

Upcoming posts on this:  scale up, making about 16 of these at a time and using a regular half sheet aluminum pan for baking.  With more minis in at once, the overall humidity should be high enough to not have to use the Baparoma.  

7.17.2013

boules


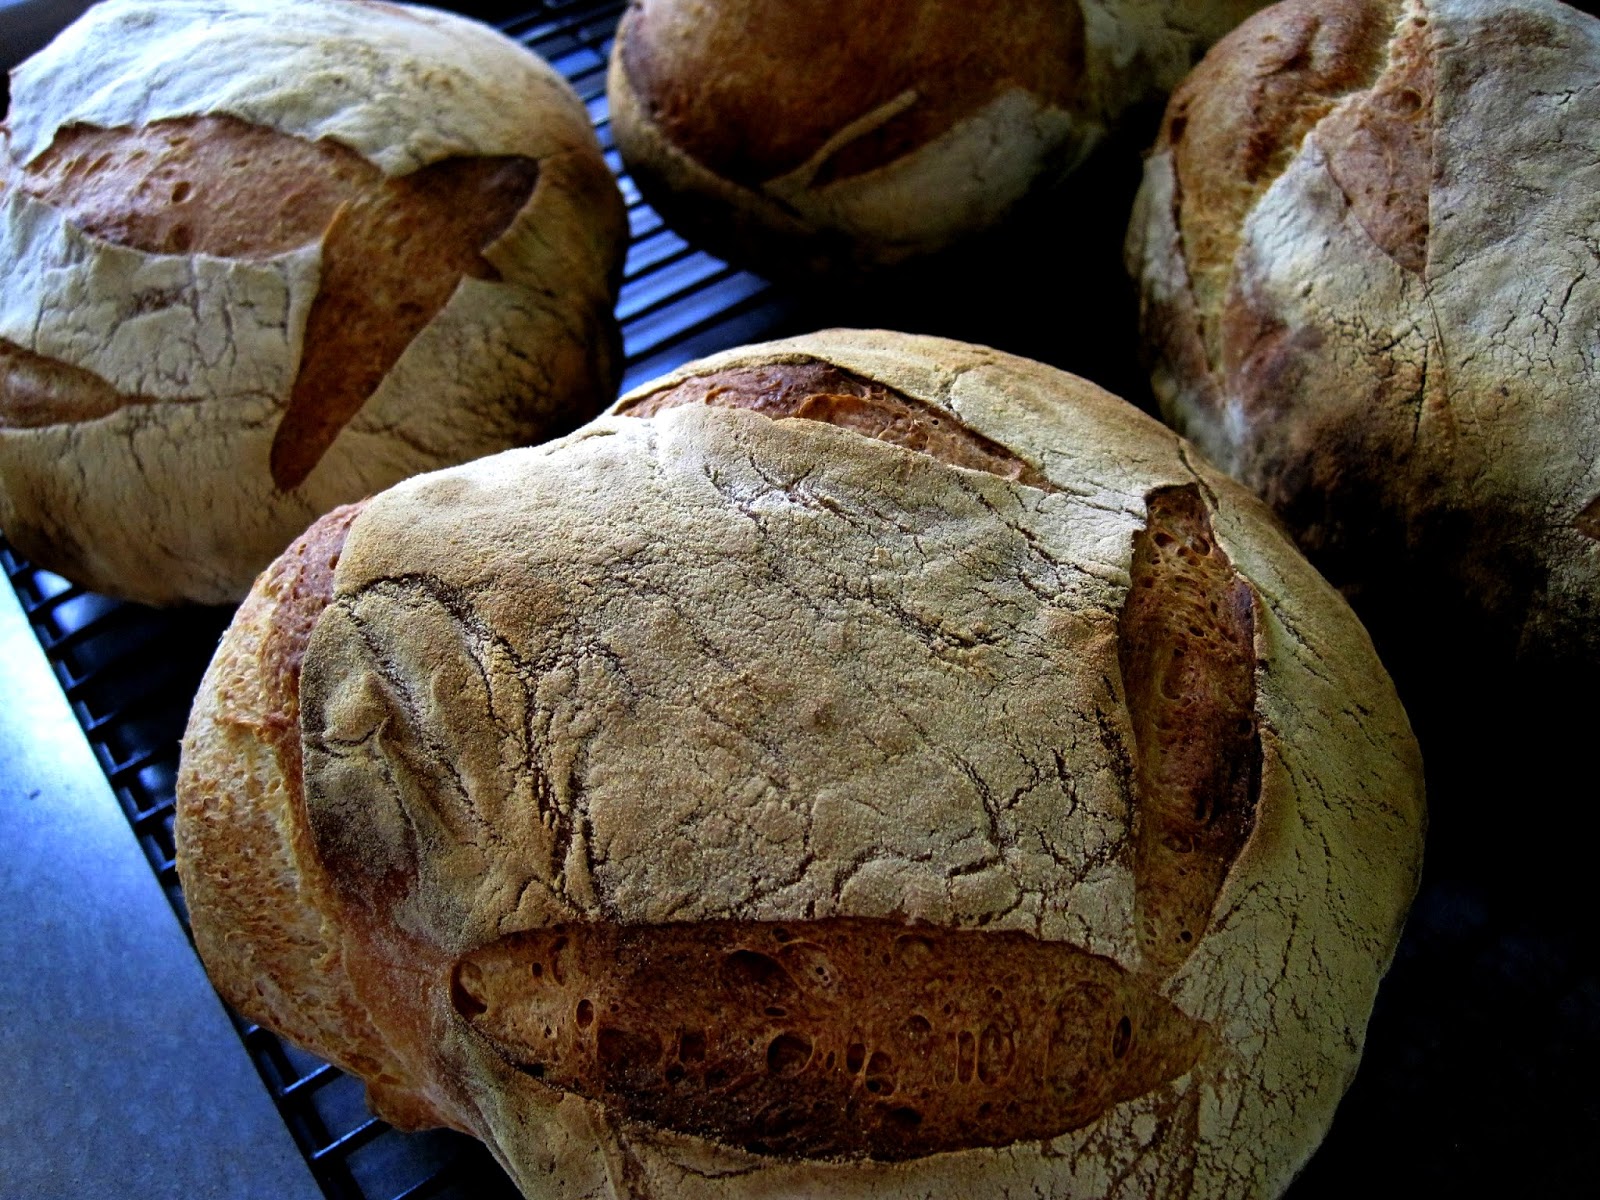
This is a little something different.  I used a prep Trish uncovered from a French video.  It uses a full charge of yeast, no sourdough/poolish/starter/chef/levain or anything like that but does have a delayed fridge rise.
Here it is in short note form:
flour 1000 g
water 700 g
mix, knead briefly, let sit for an hour (autolyse)
add salt (17 g) and yeast (Fleischmann's rapid) (7 g) and knead (machine)
let rise in fridge 12+ hours
let warm a couple hours at RT
portion into loaf size (in this case 425 g x 4)
round the dough and let rise about 2h
dock and bake in 450 convection oven for 10 min
turn oven to 350F for additional half hour

7.05.2013

focaccia or pizza

I'm not sure what differentiates a focaccia and pizza, especially in the states.  Ultimately, I don't care.  Here's a few shots of a focaccia I did recently and instead of a traditional salt and rosemary, I let my hair down and went nuts.

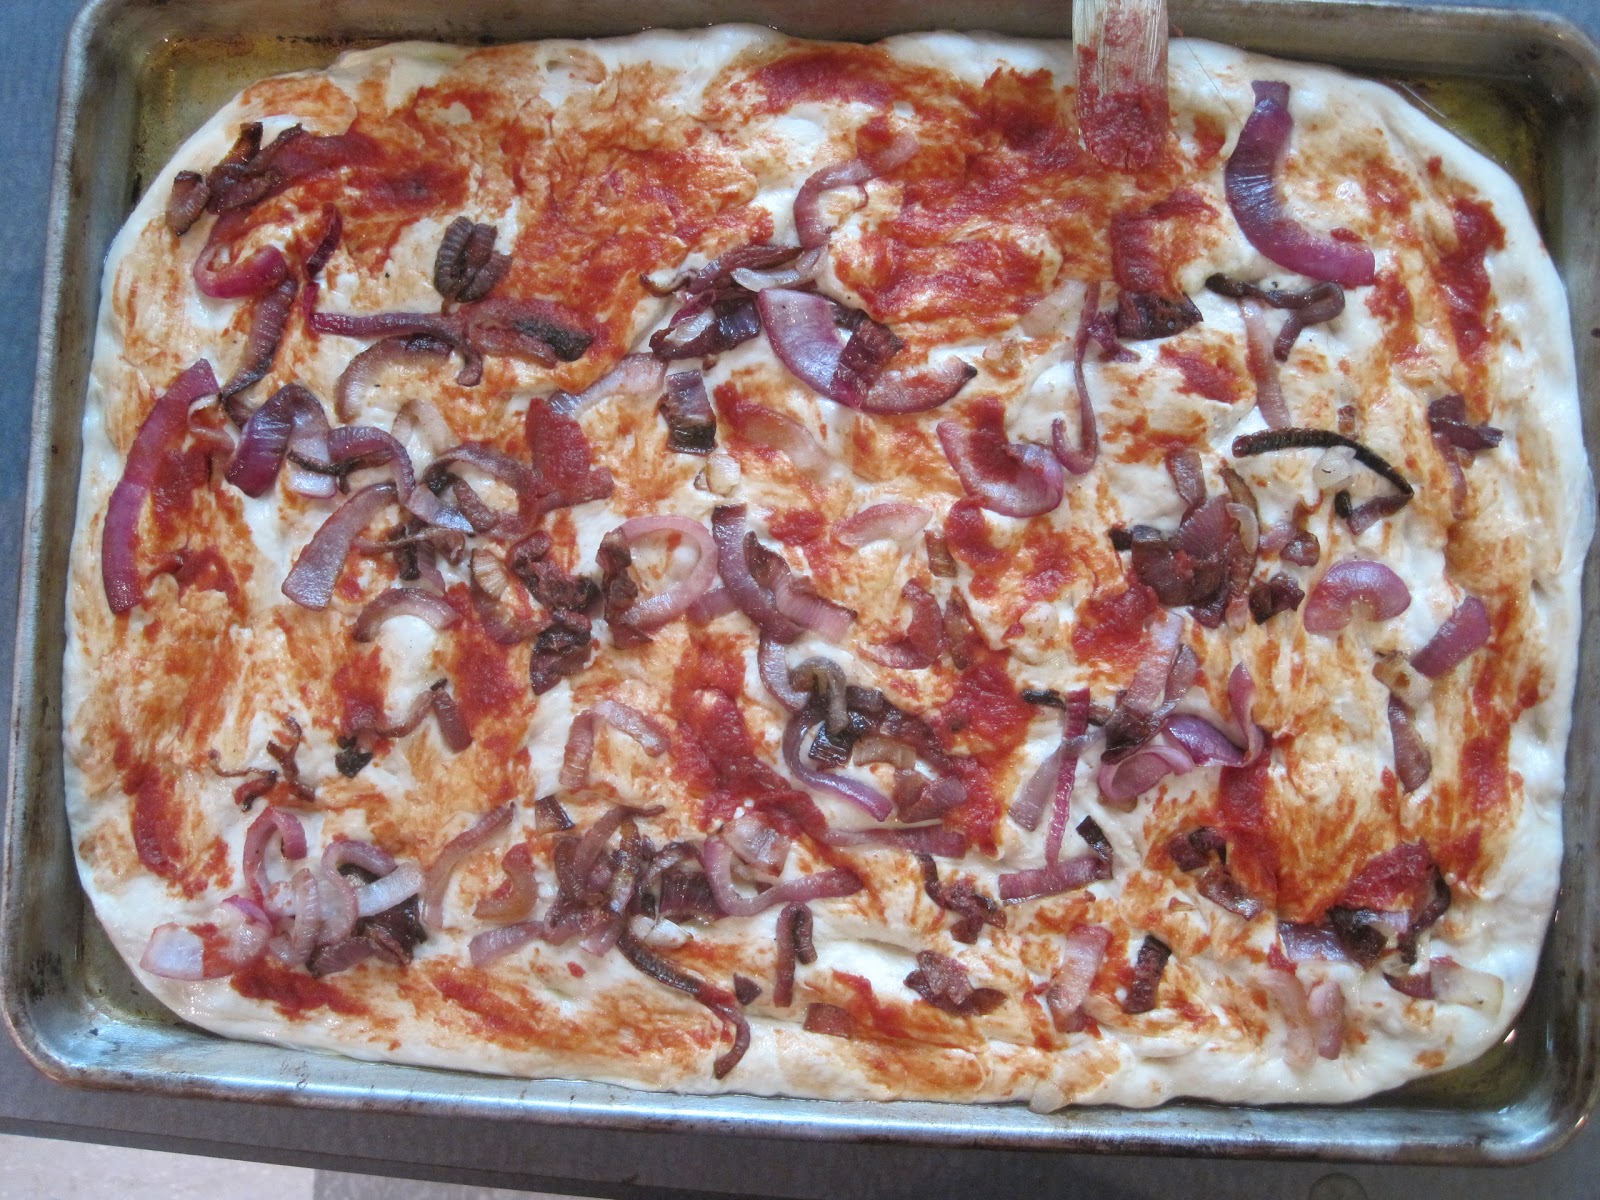
 About 1100 grams of 67% hydration dough (after a slow rise) enriched with milk, some olive oil and a little sugar.  Plopped in a 11 x 17" sheet liberally lubed with olive oil and allowed to ooze out to fill it.

 With wet fingers, I pushed it out the edges and dimpled the top.

 Some caremelized onions.

 A skim of tomato paste applied with an oil-moistened brush.  Then topped with shredded provolone, reggiano and a trace of coarse salt.  The top was drizzled liberally with olive oil.

Baked on a sheet at 375 for about 25 minutes.  Check out how cloud like the intereior is. Not sure if this a pizza, focaccia, sicilian style sheet pizza, but it's killer.  If you make one bread in your life, you need to make this.  It's a straight dough recipe (toss in everything at once).
Milk 100 g
Water 300 g
Olive oil 50 g
salt 10 g
sugar 10 g
unbleached white 600 g
Fleischmann's rapid yeast 7g
Spin it in a dough machine, let rise a couple hours, round it, plop it in a 11 x 17" sheet pan, proceed as above, add anything you want.  let rest about a half hour, top it, bake at 400 about 40 minutes.

7.04.2013

burger buns, happy bday America

Don't let your choice 80/20 chuck lie atop a soggy carbohydrate mess. Make these.


6.27.2013

Mini Minion Method supplement

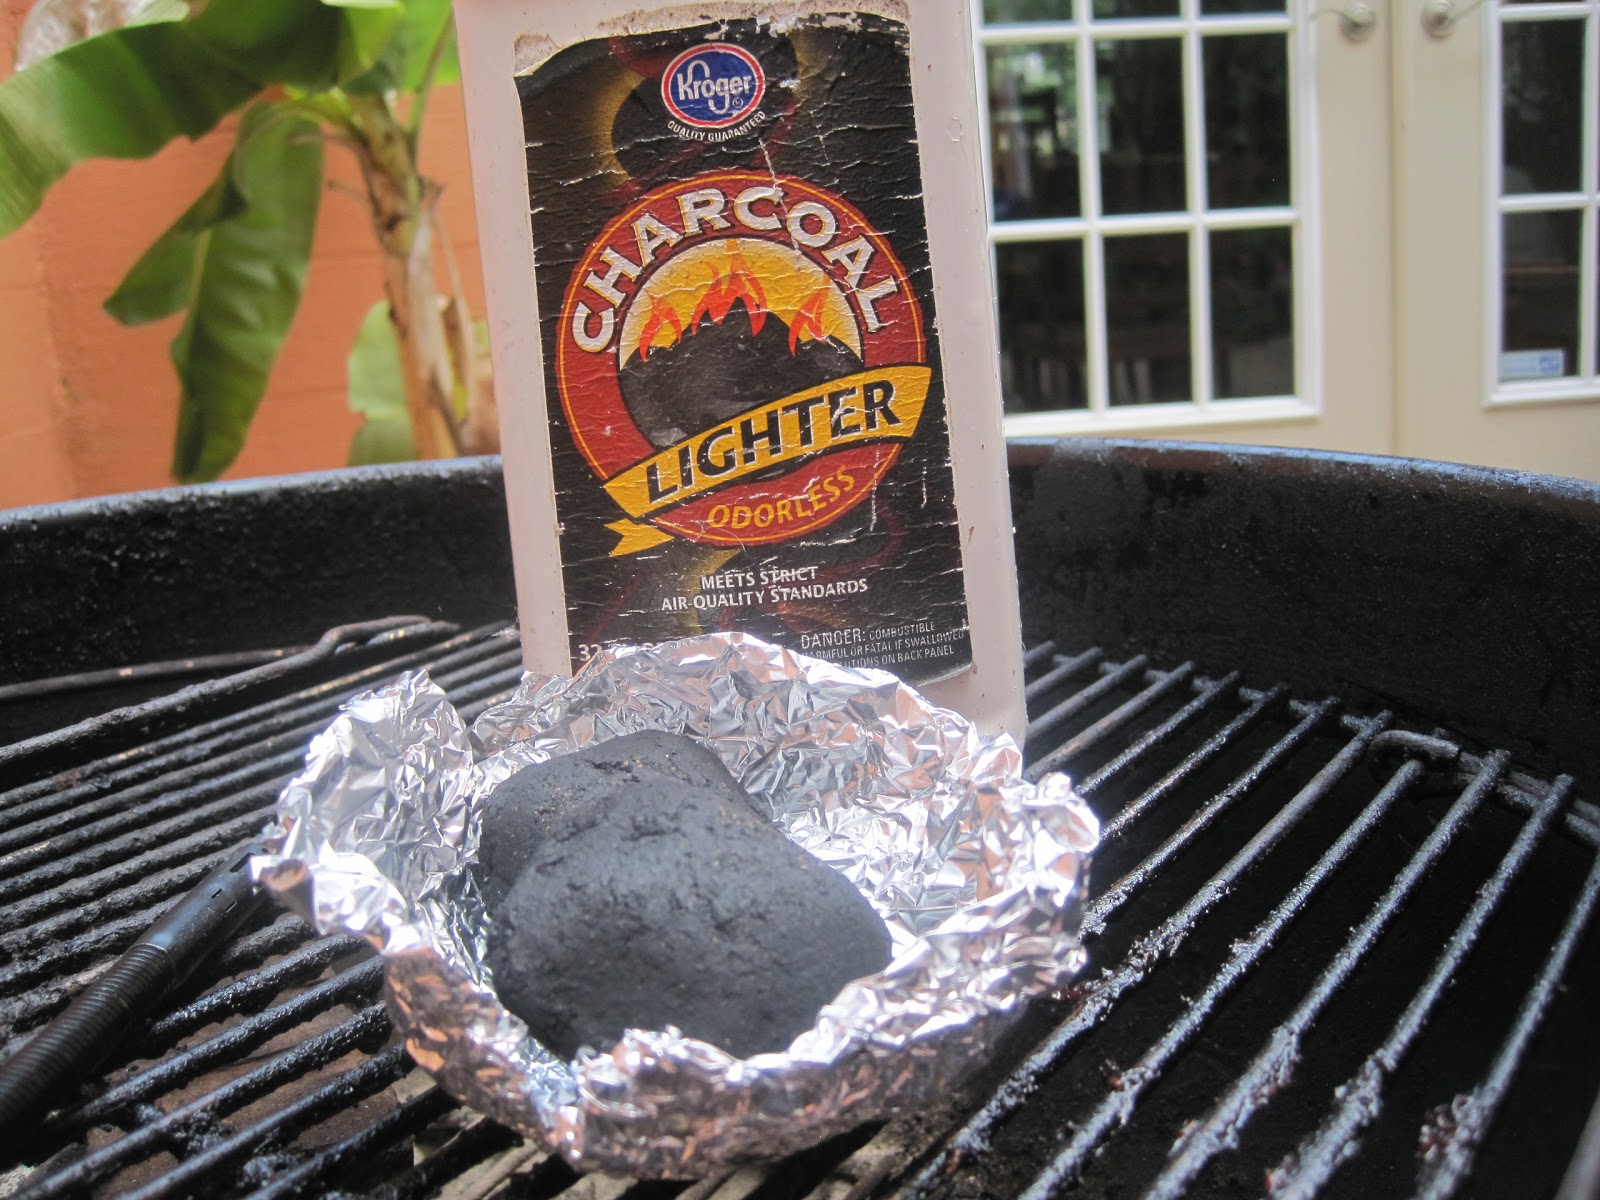
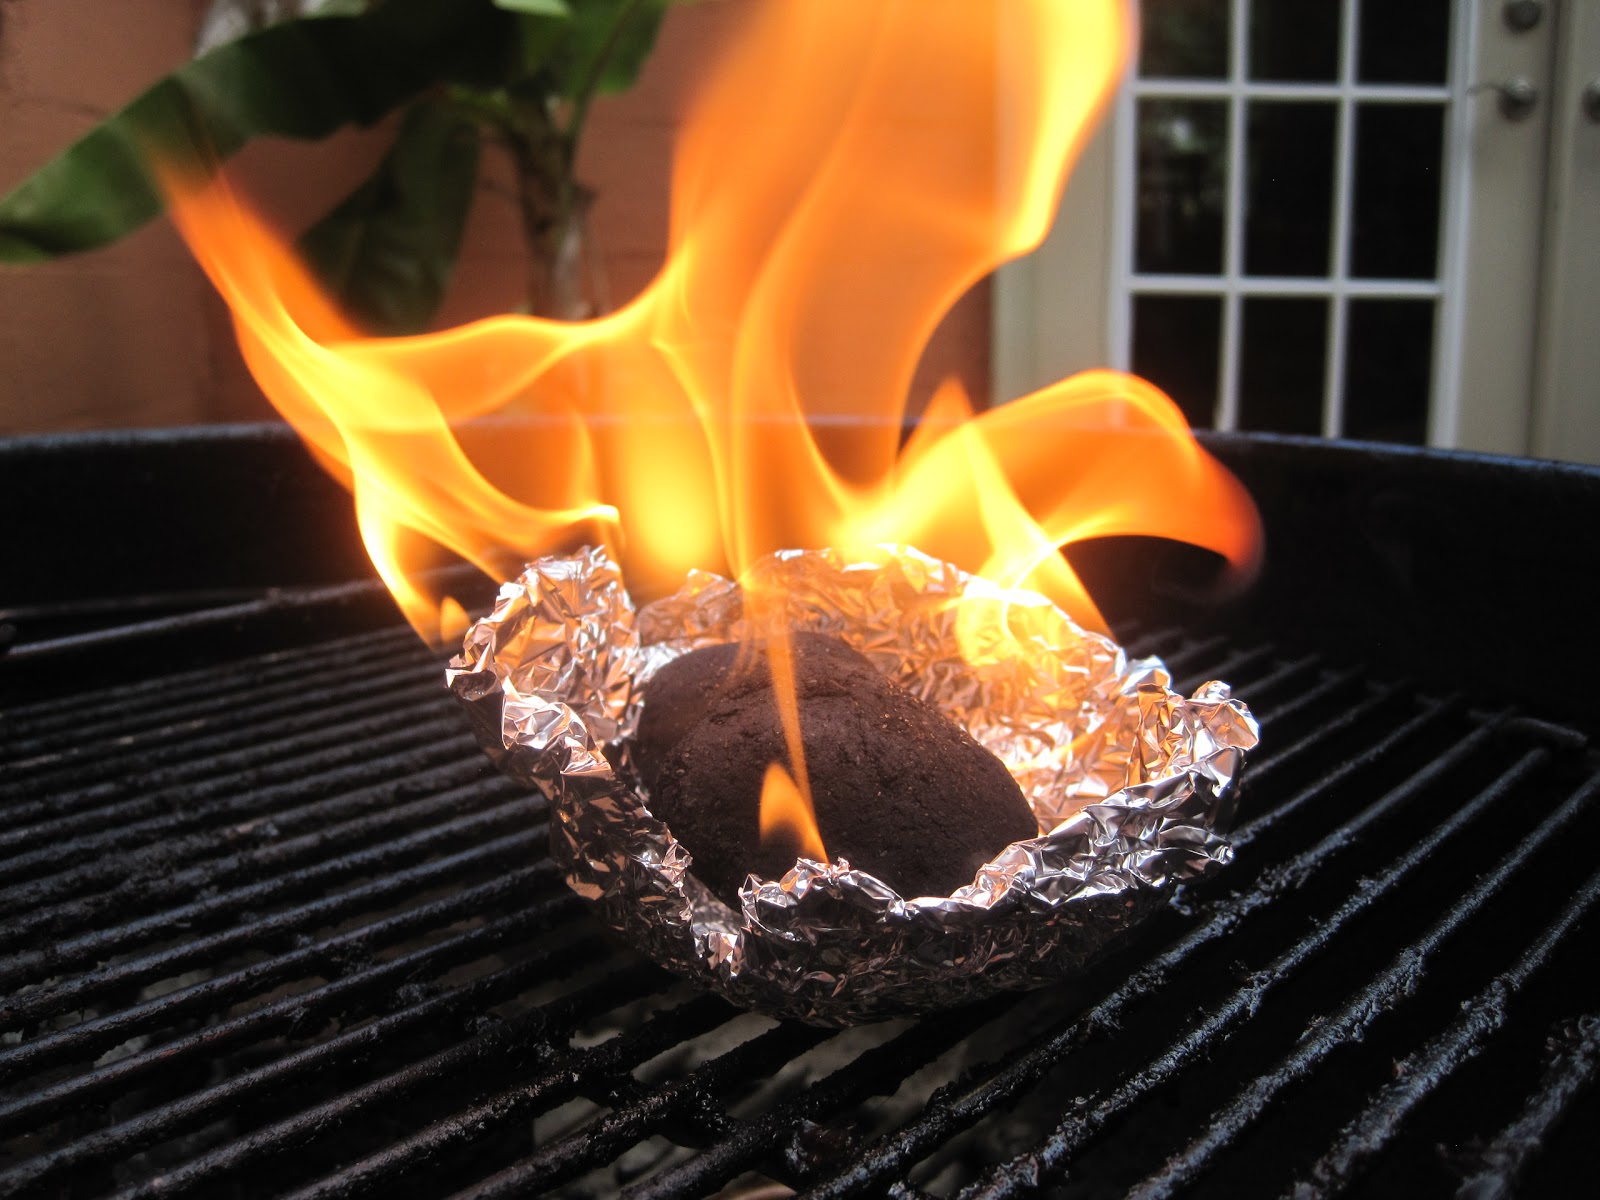
Lighting up a pile of briquettes using just a couple lit ones atop a pile of unlit fuel is a great trick for a long slow burn.  The snag?  Lighting 2-3 briquettes can be pretty maddening!  This is my trick for that.  Puddle some lighter fluid** with a couple briquettes in a cup of foil, light and let burn off.  About 5 minutes to two perfectly lit briquettes.  You are welcome!


** If you don't want to use lighter fluid, 70% isopropanol works well too (or cask strength whisky).

6.25.2013

The crispy baguette double bake strategy (and Twitter giveaway)

This crispy, shatteringly crisp crust of a golden baguette is my white whale.  I've had some luck with a Baparoma steam pan, but too often, the resulting bread comes out with plenty of volume, nice color,  but a fleeting crisp and eventually softened crust is the norm.

My suspicion for some time has been my oven runs too humid.  I wish I could make that statement with data but, the high temp humidity probe is about $500 (like this one).  My only substantiation is my observation of a steamy warm feel at the end of baking when I open the door.  What ensues is an all consuming rage from failure knowing that the exterior crust sucks!

Encouraged by some pilot experiments, tonight I'll embark on a new method, the double bake.  I've seen a few try it in the food literature and on other forums, but only scarcely.  I'll be baking 4 x 220 grams (prebaked weight) ca. 8" baguettes, length-of-center docked, lean  dough using a steam encapsulated cooking method, an inverted dome covering the baguettes on a heavy sheet.  The loaves will get a fine water mist, docked, covered, slid into the oven for 20 minutes at 425F.  They should  emerge shiny and pale and will cool a while.  Then I'll attempt to crisp them in a hot convection oven.  Wish me luck - you 4 testers - you're brave, I hope this isn't a waste of your time.

Update Wednesday June 26, 2013
Utter failure.

Here was what I actually did (slightly different than the plan above):
4 ingredient dough (water 360, flour 600, yeast Fleischmann's fast 7, salt 10
220 gram baguettes x 4 baked
dock, single cut center
mist w water
cover (see below)
425F / 15-20 min
pull off cover and let them crisp in the convection


[see image above,  click to enlarge]  This method of covering was a simple aluminum dome over 3 x 220 gram baguettes on parchment, slightly misted and pushed into a 425 oven.  When I pulled the dome off, the loafs were huge, glossy and pale, so far so good.  But when I pulled the dome, the loaves didn't get crusty until they got too dark and even then, the crust wasn't the crackly thin mosaic indicative of what I wanted.  I only recorded this tedious piece to remember what was done, remember, this site's my notebook, not some shit to share on Pinterest. 


 Interestingly the loaves cooked down to about 180 grams, a full 20 weight loss.  Typically, I observe 10%.  I really pulverized them in the final stretch with convection heat.

So I'm back to the problem of what I've read about.  Big pro deck ovens use injected steam, but just as important, their ovens actively exhaust residual steam about 1/3 of the way in until the end of baking.  I don't have a single link to this, it's all over baking forums with pros and I've also seen it in the context of reading case studies on high temp humidity probes.

The adaptation from steam injection professional deck oven to home is still unsolved for me.

To my testers: @racheltayse, @fearlessflavors @tgoodnight (and your generous treats!!!) and @fonzette,  hope you feel better, I'll make a delivery soon.  Thanks for playing.

6.02.2013

Summer To Do list

Guanciale - source of pork jowl: CAM, @_Bluescreek, ...


Coppiette (jerky from pork)

Salatini (salty snacks) laminated dough w topping/fillings

Aperitifs 

...

5.23.2013

DIY Carbonator Cap

The worst part of brewing is bottling.  One solution is to keg, but an equally nifty alternative is taking your aged, flat beer and carbonating it.  It can age forever at room temperature.  When you thirst for beer: decant into a PET bottle, place cap on, chill and carbonate (feel free to take on the road, no need to let settle) - beats the shit out of a growler.

A Carbonator cap is pricey, about $15 plus shipping.  I saw this DIY on a YouTube vid but couldn't find the link again and built a few from memory.  They cost about $2.50 each and seem to work swell.  Hunt down a threaded auto tire valve stem.  I got a flashy chrome one for $5 per pair at an auto parts store.  Drill a 3/8" hole in any PET cap and add an air chuck to your CO2 tank.  Boom!  I usually put about 30-40 psi on a chilled liter of beer and it's good to go.  You should be able to get the gist from these images. (click on images to embiggen).


5.20.2013

slider buns

I don't hate the 43g Schwebel hamburger bun,  but as a substrate for pork or little burger, it fails on many counts, the worst of which is it almost instantly disintegrates when exposed to a slight excess of moisture.  You'd think making your own buns would be easy, right?  Not really.  It's not just a squat piece of focaccia-ish bread.  That's certainly an option, but it looks terrible.  I wanted something with some lofty volume, soft inside and able to stand up to a moist burger or saucy bbq pork with coleslaw.

After playing with some variations, I came up with some desired specs: 2.5-3" diameter, an enriched dough but not nearly a brioche, say 15% bakers percent of fat - should give nice softness, sesame seeds on top and nearly vertical sides.  The last spec sounds odd, but I hate buns that simply spread out - they look like mini ciabatta, totally unacceptable for a 'merican slider assembly.

Recipe:  A little sweetener and fat as described above (maybe should've incorporated some egg, next time) should do the trick.
Size: I used the 43 g Schwebel and their ilk as a starting point for the size.  I like that size.  I ended up with a 60 gram dough ball which, after baking, turns into a 55 g roll.  This is a nice size for a bun.  One can also scoop out some middle to lighten it up if desired.  The Schwebel is puffier, but that's an industrial enigma, I'll never figure out and it may contribute to its facile disintegration.
Shape: The toughest part was the vertical sides.  I ended up used a packing strategy that enabled the rolls to rise and bake against each other.  This allowed the sides to be straight and  locked in some moisture during cooking and the appearance is cool.
These dimensions dictated 7 x 60 g units in a 9 inch diameter cake pan.

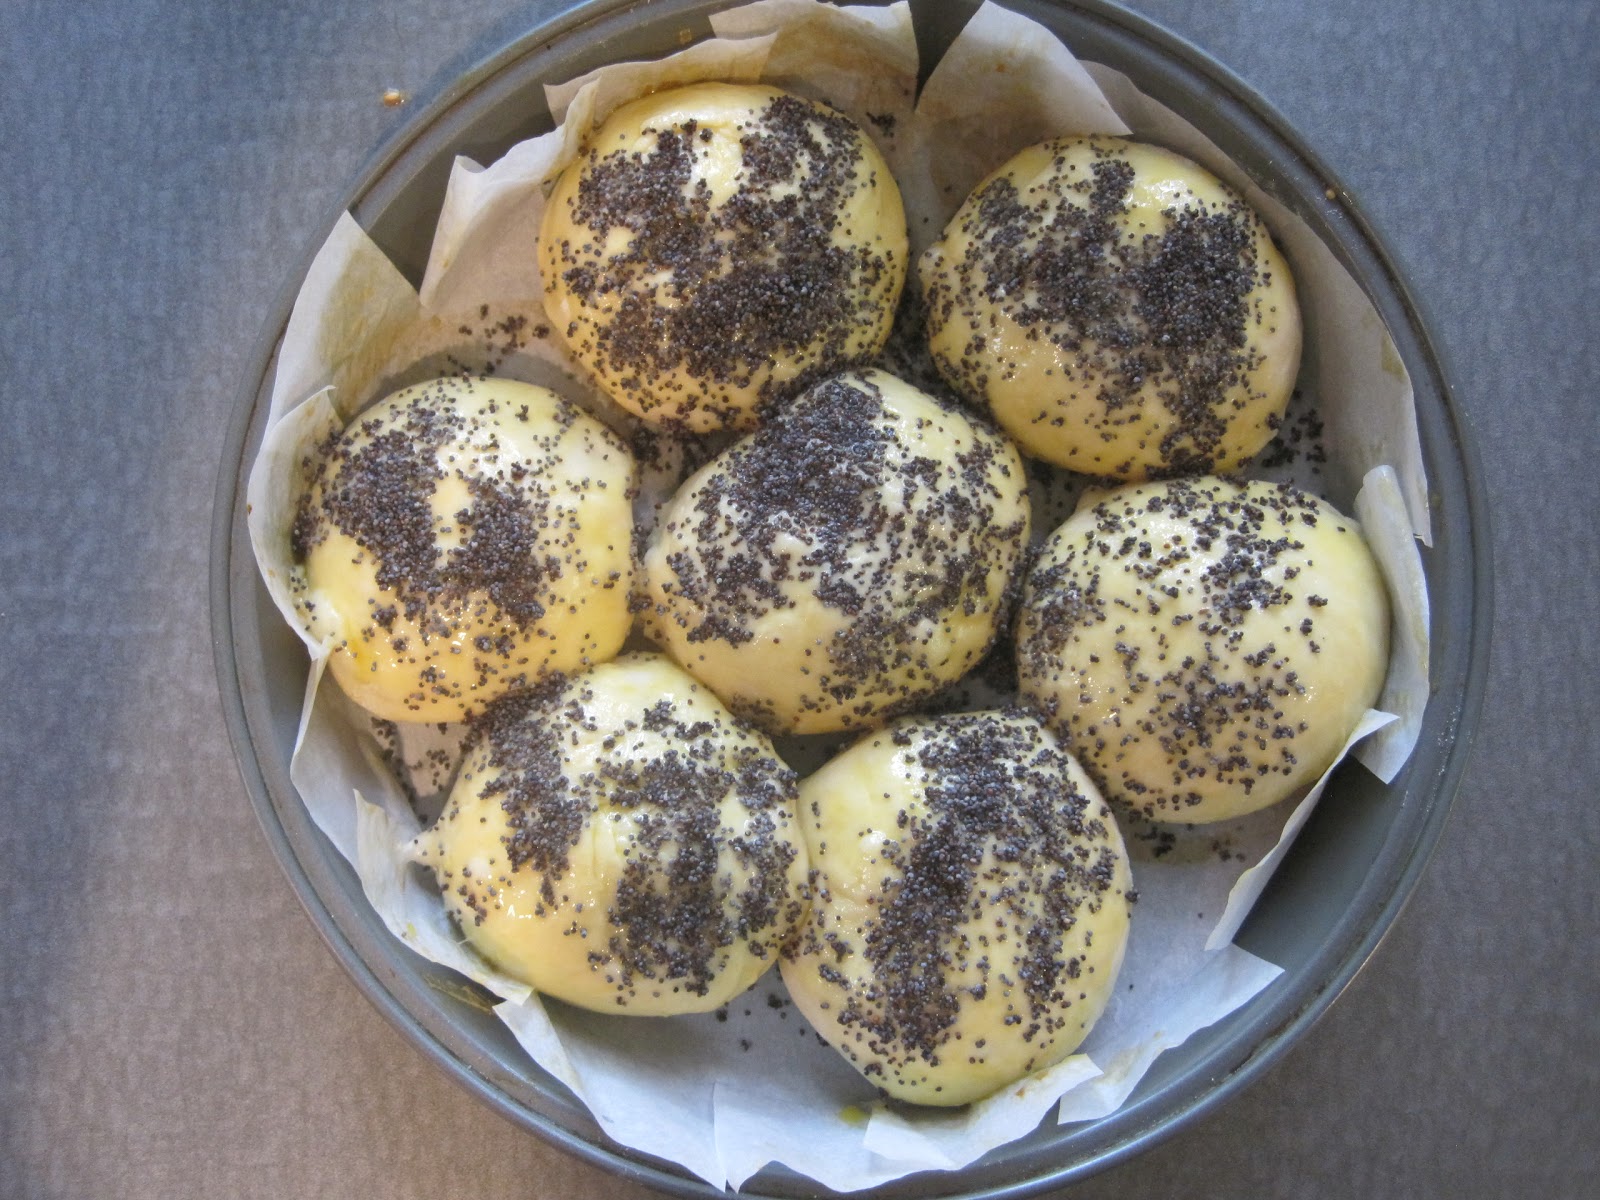
Here it is, Straight Dough: water/milk mix 180 g total (3/4 Cup), vegetable oil 20 g (1.5 tablespoons), butter 20 g (1.5 tablespoons), sugar 10 g (2 teaspoons), salt 5 g (1 teaspoon), yeast Fleischmann's instant active 7 g, unbleached white flour 300 g (2 1/4 Cups).  Mix, knead, let rise (I left mine in the fridge about a day), punch down and portion in 60 g balls, round them, place in parchment-lined cake pan, let rise until shown below (ca. 1 hour), glaze with whole egg, add sesame seeds, bake at 360F convection/about 12 minutes.

 This is BEFORE rising, let them proof until they are about 1/2" from touching each other.

 After coming out of the oven

 Spiffy vertical sides and soft.  Yum.

Another run with 70 g balls of dough (64 g after baking), my preference is the 60 gram rolls (pre baked weight). 

5.11.2013

Slider buns

Straight dough: egg 50 g, water 130 g, butter 12 g, veg oil 30 g, salt 5 g, yeast, flour 300 g, 60 g each, yolk glaze w sesame seeds, 2.5" x 2.5", cut in portions prior to baking, baked against each other at 400F, about 15 min.

5.09.2013

Big strides in the world of croissants (remember, this is my electronic kitchen notebook of sorts, this is a horrible post if you're looking for something fancy and bloglike)

I found a piece on the KAF blog recently called capturing butter heaven: making baker’s croissants which changed my life.  Some time ago, I took a class at @LaChatColumbus with the infamous Tad.  One particular instruction he provided was NOT to use too much flour between layers while turning (a turn is when the rolled out dough is folded into thirds, a lamination step).

Based on Tad's ethereal croissants, I can't argue with anything he says, but, from my own experience in long multi-step processes where the effect of each step is nearly impossible to isolate, such specific precautions are often derived from critical parameters.  And, in any experimental design, boundary conditions of critical parameters are everything!

The problem with my croissants has been a heavy and dense and my hypothesis was layers may have run together, broken due to something in the lamination process (too many layers, bleeding of butter between layers, etc).  I couldn't help think of Tad's precaution NOT to flour excessively between layers.  Having scrupulously eliminated flour dusting during lamination and seeing my results get worse with each try, I started to search on this phenomena and this KAF piece came up.

In this preparation flour is incorporated into the butter pat that gets folded into the dough to stabilize it, keep it from running out during baking.  The author makes a point of differentiating home baking from a bakery where a sheeter would be used.  Carrying this further, why not butter between layers (makes rolling MUCH easier) and maybe this would help keep layers separated until the final oven blast.  There are other things discussed in this piece, but that's what I latched onto.  Not sure if that's the *trick* but things are going well. Croissants are the result of a zillion steps, but there are so many rests, it's actually a great dough for a busy morning.  It's made the night before, final roll and makeup in the morning, quick bake, boom!  Up at 5:15, out the door by 7(ish).

I'm babbling because I'm excited.  I posted this to validate a great croissant tutorial.  My prep is pretty close to this with a few small things left to work out, if you want to make croissants, read this piece, it's well done.  Here's some action shots of the past couple mornings.

 Baking ham and cheese, nutella and even marshmallow fluff filled (Scoops got the marshmallow one, ick)

 Final ham and cheese, nice blistered surfaces, pretty light.

This morning's 400 gram run, rolled into 8 x 12", cut into 8 x 50 g traditional croissants.  To me, they were an 7-8/10, I only sampled 1 and was so excited, I ran around C'ville and gave the rest away.

5.01.2013

Crest (do I have to say it?) Gastropub

My tortured interpretation of the word Gastropub is a portmanteau of something to do with gastric upset and pubic something or other.  I hate the name.  I am offended that a bar with the name Crest, that Craig Dupler tended so proudly, is juxtaposed with it.  /rant

I will miss the open Jazz on Monday nights, a more casual jam session early evenings on Tuesday, the dart teams, Frankie playing pool on their table, my dog being allowed to sit by my stool while I sipped a pint and getting to know some locals; a large portion who grew up within blocks of the bar and I'll miss the bartenders who did more than sell drinks. 

I wanted to hate it. I visited the other night with @FeedMyBeast.  After loosening up and finding a seat at the bar, at approximately the same coordinates I used to sit, I found it easy to accept.  Good food, good drink, happy people.  Crest looks like it will continue to be a communal place to meet friends, eat, drink and be merry in the center of the area I enjoy calling home.  It's different, but it's good.

4.29.2013

bacon in the oven

I used to resist frying bacon because of the mess and spattering oil that remained on the stove when finished.  Then I considered the oven method.  Scanning the Google top ten results, most people bake it in the oven beyond the flash point of lard, ca.400-450F, the most often prescribed temperature.  The bacon sure does cook and fast at that temperature!  And, if you're lucky enough to forget about it for a minute because the dog is peeing in the mudroom and you're trying to clean it before it soaks in to the floor tile, the smoke detectors go off and your oven is smokey and covered in spattered bacon grease.

I played with temps and finally ended with a nice slow, 250F.  It cooks nice, there's a big window of doneness and it's just as good as anything on the stove.  Slow down people.  Smell the roses.  Eat the bacon.