12.29.2008
Potato Chips
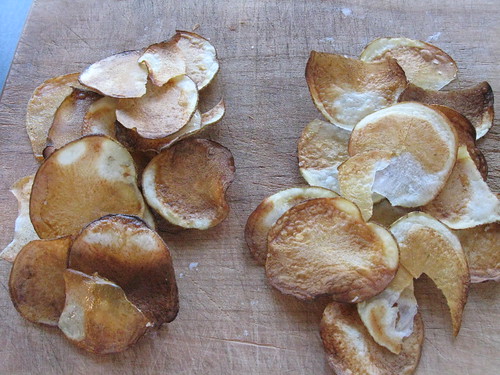
Years ago, I deep fried some mandoline-sliced sweet potato slices. They were absolutely perfect, but deep-fried. Today, I took the mighty russet and sliced it on a mandoline slicer. The slices were soaked in water for about 10 minutes, removed from the slurry of water and extracted starch and left to air dry (about 15 minutes). They were placed on an oiled, black cookie sheet (in a single layer), dabbed with a tad of soy oil using a paint brush (I would've used a spray can of veg oil, but had none) AND baked at 425°F (convection) for about 10 minutes. Voilà.
Why the two piles? Stay tuned ...
12.26.2008
Final steps in baguette prep
Third in a series, but I need to film the first two. If that makes sense. Hope you enjoy this while waiting for the beginning pieces.
12.25.2008
Winter brisket
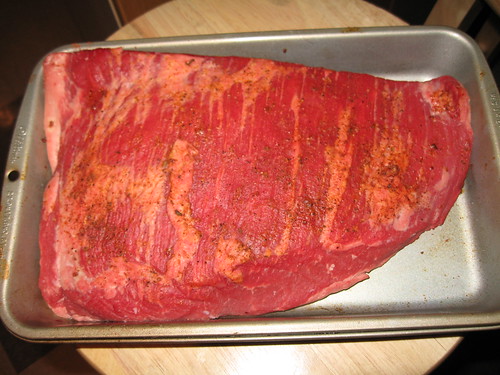
I've only tackled brisket once before. It was ok, but I gave it too much of a rub; a piece like this, doesn't need it. I did a combo cooking method that worked swimingly. A week ago or so it was really windy and about 18°F. Good day for barbecue I thought. I fired up my trusty Weber at about 5:30 am and tossed on the meat, fat side up of course, and let it smoke for about 5 hours using Kingsford embedded with hickory. Temp in the dome, about 275°F. A little erratic with the blustery wind but not bad.
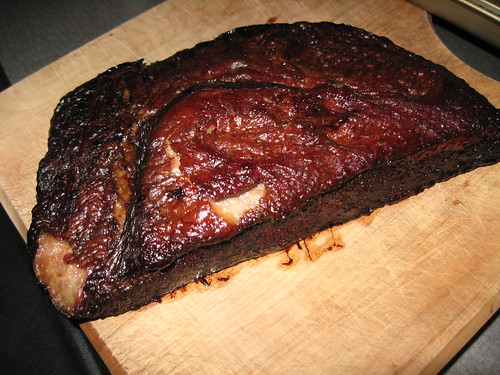
Suddenly, family matters dictated we needed to dash. I pulled the meat off since I didn't know how long we'd be away. I placed it in a small pan (and kept the smoky drippings for later!) and placed it in a 200°F oven (a la Wolfert's Slow Mediterranean Kitchen) and let it go for about an additional 6 hours. See the after pic.
I wrapped the brisket in foil for and parked it in the fridge. Warmed gently a couple days later immediately reminded us of the wonderful 'q aroma, it was served with baked sweet potatoes. If I were on death row, this might be the final meal I request. I no longer fear the bbq challenge of brisket. Not a very expensive cut, BIG crowd pleaser, not too fatty by the time it's finished. Be brave, bbq a brisket.
12.15.2008
My aromatic tasty nuts
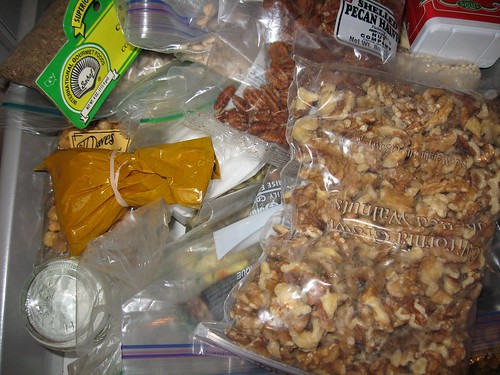
Saturday morning breakfasts are pedestrian in our home. Not quite gruel ... or ... yeah, it is gruel. We often have mixtures of grains (oats, old-fashioned or steel cut, rye or wheat berries, quinoa, what germ, flaxseed, etc.) mixed with 2 volumes of water and simmered until tender. This concoction's beauty is realized when we add the toppings. A drizzle of cool whole milk and a sprinkle of brown sugar are mandatory.
We also top the porridge with walnuts or pecans, lightly toasted in cast iron just prior to topping. The secret to our special nuts is the way we store them. We have a spice overflow drawer. Here we store all the spices for a nice garam masala, coconut, cardomom, cinnamon, paprika, and other savories that don't fit in the spice shelf. Over time, these nuts inherit a special curry flavor that is subtle but special. The specific flavors could never be duplicated - which is good. It evolves over time and surprises us each breakfast.
12.10.2008
Roasted Cauliflower, Israeli couscous, pine nuts and raisins
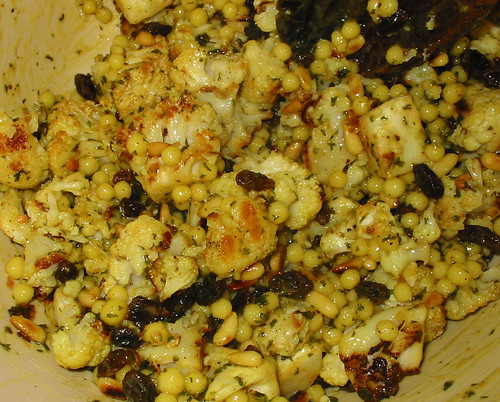 It's the holidays and I thought I'd repost one of my favs since:
a. no one reads my archives and
b. I got some free loot!
It's the frigging holidays and time for those excruciating office parties. Occasionally these require one to bring a dish. The depicted dish is perfect. It can be prepared the night before, tastes best at room temperature and it's healthy.
Also, I got a few freebies from OH Nuts!, a nut company in New York. A whole pound of pine nuts from them is about $12. The big difference with these vs. what I usually get (lately, from Mediterranean Market, when we can afford them) is they're really crisp out of the bag. I toast them for this dish, but they're really tasty toasted or not. Frankie now gets them in her lunch!
Thanks OH Nuts!, we're enjoying them! This dish is nice for them too.
Original Post
The wife pointed out this recipe for roasted cauliflower with Israeli couscous, pine nuts and raisins. It's seasoned with salt, pepper, turmeric and the giant couscous is briefly sauteed in olive oil and then cooked in chicken stock. I think it's a new "desperation dinner" for us. The longest step is roasting the cauliflower which takes about 20 minutes at 425F. The recipe also called for fresh parsley or cilantro; all I had to use was dried parsley. I'll fix that next time. Trust me, it's better than it looks. Recipe reprinted in case the link goes dead:
1 small cauliflowerClick the photo for a larger view.
4 cloves garlic, crushed
3 Tbs olive oil
1 onion, peeled and chopped
1 tsp turmeric
1 1/2 cups giant couscous (also called Israeli couscous) or fregola
2 1/2 cups chicken stock
sea salt and freshly ground black pepper
1/2 cup toasted pine nuts
1/4 cup currants
1/2 cup chopped fresh coriander or parsley
1. Preheat oven to 170C. Cut cauliflower into small even-sized florets and place in an oven pan. Combine the crushed garlic with 2 tablespoons olive oil, pour garlic oil over the cauliflower and toss well to coat. Roast for 30 minutes or until the florets turn golden brown, stirring occasionally to allow for even cooking. Remove to cool.
2. At the same time, heat a saucepan, add 1 tablespoon olive oil and the onion and cook over a moderate heat for 5-10 minutes until softened but not coloured. Stir in the turmeric and giant couscous and cook for 1 minute, stirring continually.
3. Add stock and bring to the boil, then turn down the heat and simmer for 8-10 minutes, stirring regularly until the grains are tender to the bite and all the liquid has been absorbed. Season with salt and pepper to taste.
4. Stir through the roast cauliflower, pine nuts, currants and coriander or parsley and serve.
Update
I prepared this with the other half of the cauliflower several days later. The only change I did was cook the giant couscous with boiling stock (like risotto). Still, the couscous had a fairly tough/al dente feel to it, identical to cooking it with cold stock. However, when the leftovers were heated up, I was told the couscous was much more tender.
Also, I was told by the proprietor of the market where I bought the Israeli Couscous, I should soak it at least 15 minutes prior to cooking, it would make for a more tender cooked pasta. I think I'll do the soaking next time in hopes of getting the texture of the couscous more tender and uniform. Without soaking, it has a slightly tougher interior than exterior.
