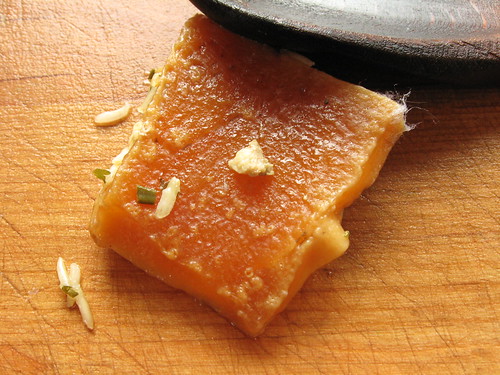
A while back Lisa posted an interesting food item post entitled Any Guesses?. Cool concept, hope she doesn't mind if I borrow the idea for a post.
I was making chicken soup (hint) the other night and pulled this out. Any guesses as to what it is? I was initially horrified until I remembered what it was.
4.16.2008
What is it?

4.12.2008
In which I come clean.
I've been trying desperately to control my Weber kettle to achieve 250 +/- 25-deg-F. Using the minion method (link in the right margin) I've not been able to do it. The minion method was developed specifically for the Weber Smokey Mountain. I've tried many times to apply it to a simple 22.5" kettle with little success. I usually get a hot initial burn (ca. 300-350) followed by a slow cooling over 5-6 hours to a final temp around 250 (and then it needs tending). I thought I was getting closer by closing the dome vent, but the fuel still heated things up too hot. This was done with the intent of achieving a constant temperature, without tending to the fire for at least 8 hours (overnight). The only way I've been able to get the temperature close to my desired setpoint is by feeding just a few pieces of fuel into the side at a time. This requires some attention every 3-4 hours. Not bad, but not what I wanted. My excitement in the past has been hopeful and biased, trying so desperately to see what I wanted, I almost ignored the data.
I am hanging my head in shame and will go back to the drawing board.
Last night, I did a control. An oven-controlled constant 250-deg-F on a picnic roast (cheaper than a Boston butt) with a light rub for 8-10 hours. It looks sublime. I wrapped it in foil and tossed it in the fridge. Soccer today, later this afternoon, I'll warm it up a bit and pull it. Pics later.
What next?? A trip to the dark side - electric??? Good steady LOW temps, slow smoking chips, all the attributes of a good low smoked piece of meat with no fire tending. Choice of busy parents everywhere. Problem with that option? Excommunication from the hallowed halls of Weber. Really expensive. Low end Brinkmann's have problems maintaining high temps due to thin steel contstruction (could be addressed by loading up the inside with some thermal mass - and - don't know if Mrs. Dave's Beer will allow another piece of equipment in the yard. (hint, hint). If I could apply some smoke via my oven, it'd be perfect, but smoking indoors is pretty much, uh, deadly I think.While I ponder these life changing events, have a peek at a lazyman's oven-mediated "pulled pork" run:
Please leave your thoughts in the comments.
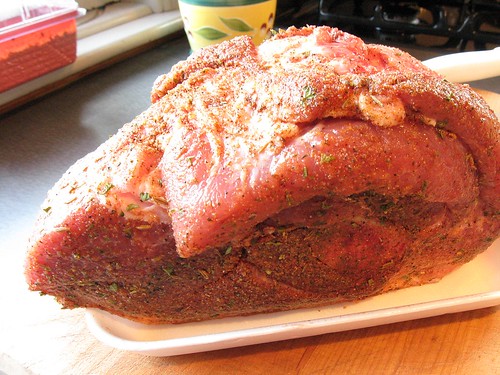
Started with a 4 lb picnic roast. About $5. Picnic is a shoulder cut lower on the shoulder than the Boston butt. It cost about half what a Boston butt costs and the taste is about the same. It's bone in too. I always make pulled from bone-in roasts. Oh, it's also dusted with my basic rib rub.
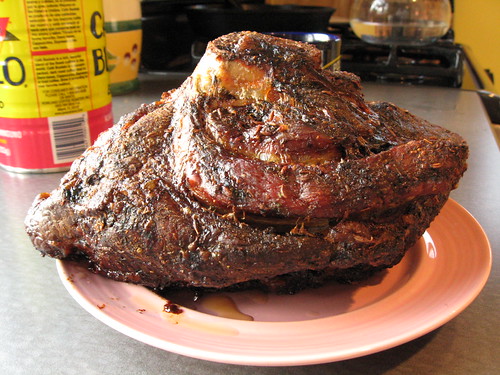
Here's the roast after cooking at 250-deg-F in the oven for 10 hours. It was sitting in rendered pork fat. I saved the pork fat to add dabs in my lentils. The finished product looks very much like a bronzed glorious piece of bacon - only bigger. This was removed from the pool of pork fat and wrapped while I went to the soccer game (Mustangs v. Wizards, tiny tots soccer).
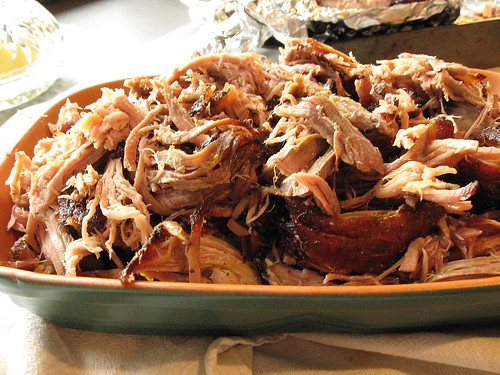
Voila. After it was wrapped and in the fridge a few hours, I warmed it back up until barely warm, unrapped and shredded it effortlessly in my fingers. I must say, it was not smoky but perfect texture and moist. I got about 2 lbs. yield - almost, had a few samples for QC. For a fatty bone-in roast, that was a decent yield. We're having it tonight on wheat rolls (no coleslaw though, darn) with slow cooked black beans and a salad.
4.09.2008
It is NOT time for you to go Grasshopper (Smoked Tofu)
![smoked tofu [2/5]](http://farm4.static.flickr.com/3064/2401561969_b285a05fd2_m.jpg)
![smoked tofu [4/5]](http://farm3.static.flickr.com/2088/2401563139_c628f251a8_m.jpg)
However, once we dust ourselves off and think about it, we're usually glad we did the experiment for the opportunity to modify, learn and to know what not to do so we can keep our friends from getting sick.
I marinated my tofu exactly as in Heidi's recipe, fired up the smoker and layered in a ton of apple wood. Then I tossed on the marinated lumps, closed up the grill and measured temps. I used my new data logger, the EL-USB-TC shown below. It was equipped with a "K"-type thermocouple and placed in the dome beside the thermometer I usually use. Below is an image of the data logger and below that, the corresponding temp profile for the 2 hour smoke.
![smoked tofu [3/5]](http://farm4.static.flickr.com/3220/2401562033_b9e86ce6cb.jpg)
![smoke_temp_tofu [tofu 1/5]](http://farm4.static.flickr.com/3125/2402389766_554b580e76_m.jpg)
![smoked tofu [5/5]](http://farm4.static.flickr.com/3165/2402392308_fb37cdd4e7_m.jpg)
My wife and I eagerly placed a tender nugget in our mouths. While in some else's home, no member of our family is allowed to say anything derogatory about food served. But, we were home, and no one was around. It sucked. Bad. Texture was nice, but it sucked.
Post-Mortem
1. The lemon in the marinade clashed badly with the smoke.
2. For some reason, I thought a delicate food like tofu required a strong smoke blast. I couldn't have been more wrong. The opposite is probably more like it.
3. The lemon in the marinade clashed badly with the smoke.
Improvements?
With all the cool monitoring capabilities I now have, I can't stop. I'm considering a soy/sesame oil marinade and a hint of smoke for the next run, but I have lots to think about.
If I were on Top Chef, Padma would've told me to pack my knives.
4.08.2008
Grasshopper, you will know the path when it is right.
I am getting dangerously close to the dark side. Smoked Tofu.
Inspired by Heidi's marinated tofu and my recent experience smoking kielbasa, I'm preparing to try something I haven't observed yet. Application of smoking to explore new fusion cuisine. Tennessee meets Southern China.
I scored some apple smokewood at Weiland's Gourmet Market yesterday, as well as some extra firm tofu. The texture of kielbasa is similar to that of tofu. Fine grind, kind of amorphous, soft. I intend on smoking it for about 1-2 hours with a heavy dose of apple.
My friends on the Weber forum may never reply to my posts again. A risk I'm willing to take to take on new challenges.
4.04.2008
weber_cam will soon be so darn tedious, nobody will visit!
 I've been hunting for an affordable means to measure temperature over time between the range of about rt to about 400-500-deg-F. I have found it! This little baby is selling at MicroDaq for $82 and I jumped on it fast.
It takes conventional K, J and T thermocouples giving a range of temperature of -200 to about 4,000-deg-F (should be adequate). Acquisition frequency can be adjusted from every second to every 12 hours; it stores zillions of data points. Then, plug it in to a USB port and analyze the smoked pork shoulder goodness like few have ever analyzed it before. I will bring bbq pork to a whole new level. I'm giddy with anticipation.
What am I going to use it for you ask? Long burn bbq runs, warming dough from the fridge to find the perfect temp for proof/baking, determination of exothermicity of fermentation (bread and beer). Yes, this blog, with all 20-something daily visitors should soon turn so tedious, I should be able to diminish my traffic to 5 or so in a month. I can't wait.
I will however have some of the most reproducible, robust processes in all of food preparation/processing. Temp profiles posted after my first pork picnic roast overnight run.
3.26.2008
I might give these guys names.
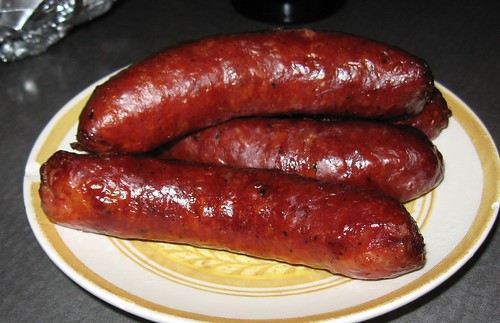
In the grocer's meat case, there is no shortage of products called "smoked" sausage. Most of these products are bland.
This past weekend, we were in Newark, Ohio and ate at a place called Dicky's. Chain bbq place, but good. Had some lovely smoked kielbasa (or brats?) and immediately, I had a mission.
My new favorite hangout online these days is The Virtual Weber Bullet Forums. Perhaps the most informative and civil forum I've ever visited. Lots of good information and courteous contributors. From a discussion today, I gleaned I should smoke sausage low 'n slow, with apple wood if possible and to an internal temp of 170F. I got some kielbasa from Giant-Eagle today, smoked between 250-275F (dome temperature) for about 2 hours using lump with a mixture of mesquite and lump. I took 'em off at an internal of 180F because I was distracted socializing around the neighborhood. However, they smelled so good, we almost had them as a second dinner.
I wrapped them and put them in the fridge. I may make use them in red beans and rice. Not sure. For now, I'll just stand in the fridge and smell the smokiness of a real smoked sausage.
3.17.2008
If Weber-Stephens gave Nobel Prizes, I would be the laureate for 2008.
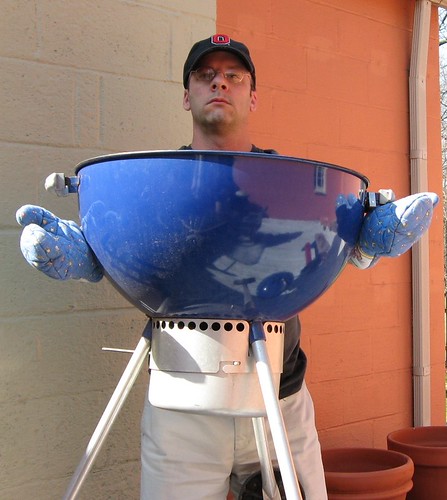
Ever since I managed to discover the dome vent method for temperature regulation during long smoking sessions, I've regained new interest in my kettles. I bring my blue one flowers daily.
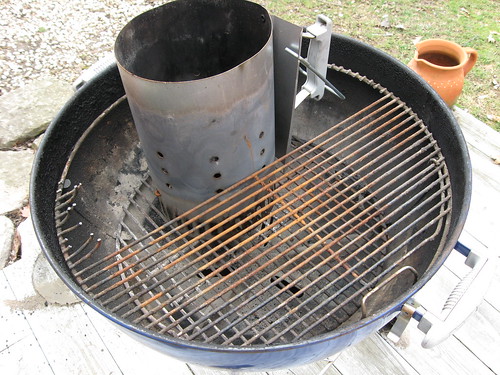
I've gone one step further with my new mod. With the temperature regulation handily taken care of, I now wanted it to be easier to stop and start for my indirect sessions. When the lump charcoal is loaded on one side, it works fine, but to stop and restart, one has to re-stack the fuel, get messy and light it again. With a chimney inserted in the kettle, the fuel could dispense itself perfectly and the burned stuff just falls out. But, could the chimney be placed right inside the kettle? With a little cutting, no problem.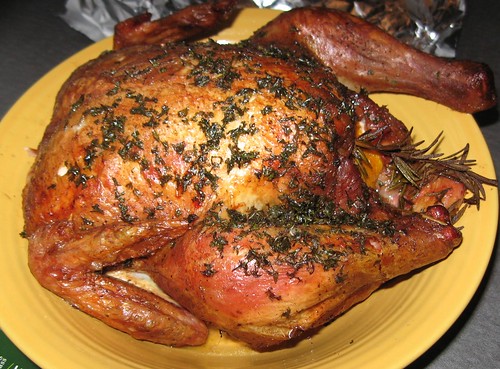
I lost a bit of cooking surface, a tad less than with normal indirect, but gained ease of operation. I stack in the fuel, ignite it, let it rip ... tonight I did a chicken (with mesquite and maple) at 330-deg-F for 1.5 hours ... close the vents and finish. The remaining fuel is still loaded and ready to go for the next session. No re-stacking the fuel, just toss another piece of paper in and light it and ready to go in about 10 minutes (tonight's fired up in about 5-10 minutes, 1 match). This chicken was prepared while we ate dinner. After it was done, I wrapped it up to contain the smoky goodness and it's ready for dinner tomorrow.
Update
Been hanging out on the Weber Bullet forums the past day asking about dome vent temp control and realized I made a huge mistake. Or, I conducted a method prone to overheating. The setup should remain the same. However, the chimney should not be lit from the bottom. This will quickly ignite ALL of the fuel making for one vicious mound of heat. Using something called the minion method, I should have lit a few pieces of fuel and placed them on top of the fuel. And the fuel should contain several pieces of smoke wood in the pile. Then, as the lit coals proceed to ignite fuel below them the burn will commence in a slower manner than all the fuel ignited at once.
The chicken was still killer but the heat source was hard to control. Can't wait for another run. Same set up, just minion method and I'm there. May even be able to keep the top vent open if the fuel burns slower. Keep you posted on further developments.
3.15.2008
Flour Grind, Particle Size Effect
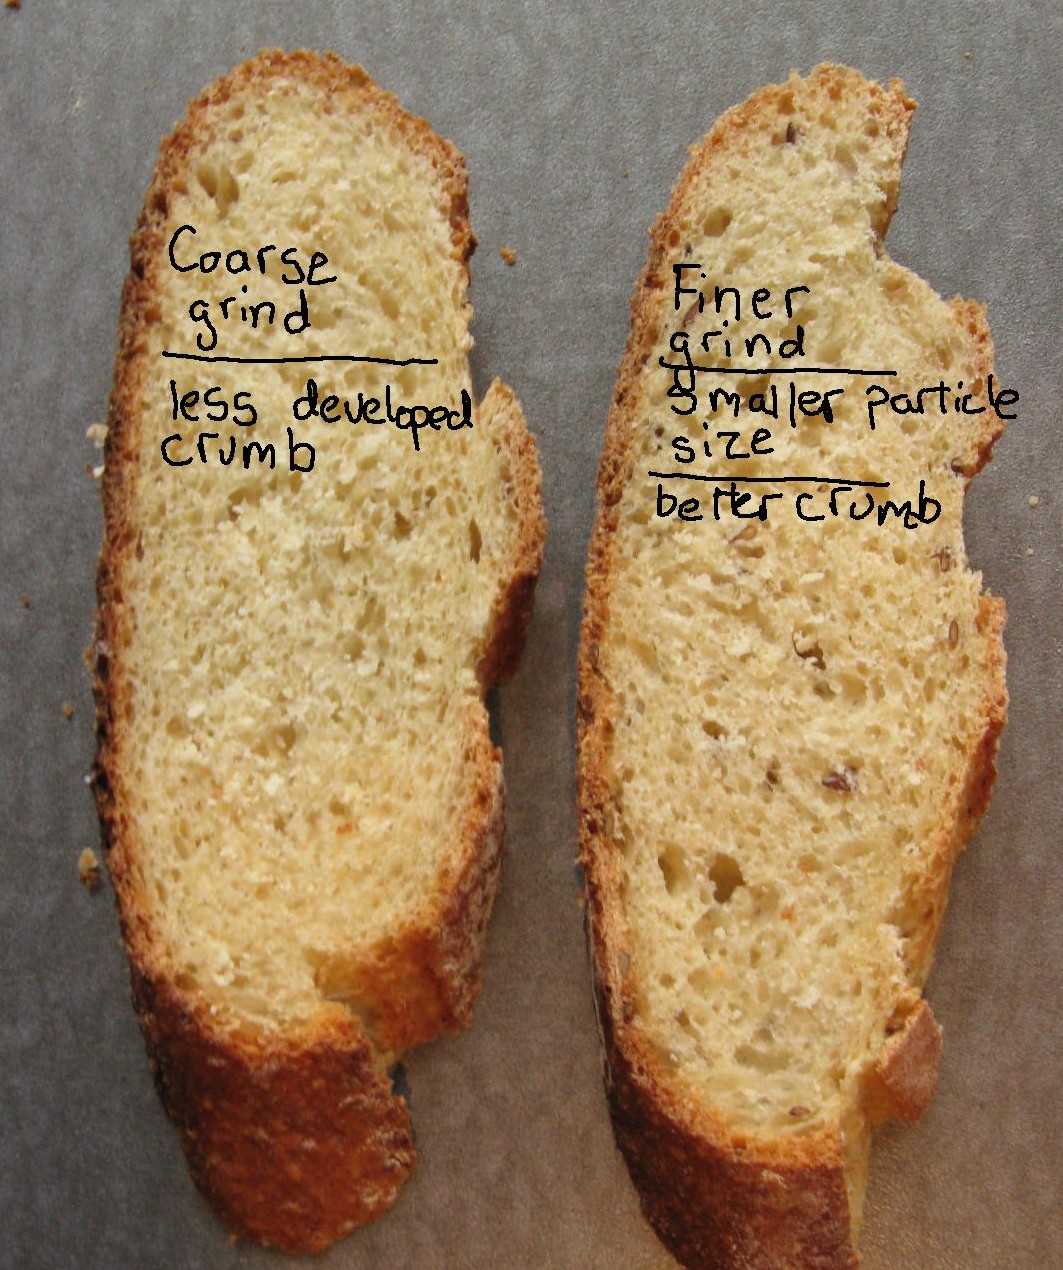
The past couple weeks, I've been playing with fresh ground flour from red wheat berries. I've ground it using a coffee grinder on the finest setting. Still kind of coarse but incorporating it into my baguette recipe for 1/3 of the flour bill. On the left is a typical cross section using this flour. It's got what I characterize as an underdeveloped crumb. No long, swirly streaks of crumb but a more granular appearance.
On the right is a slice with using a slight variation. Still a 1/3 substitution of the flour but I've processed the flour to an additional fineness with a whirly coffee grinder. These mills are inadequate for large quantities of flour but was appropriate for the 100 g I needed for this experiment. It was a finer grind (smaller particle size) by visual inspection and in the final loaf, it showed. The crumb appears more "swirled" and had a better texture. Still not great though.
I've been doing this because I don't like any whole wheat flour I've ever tried and want to "grain up" my breads. Commercial whole wheat flours suck. Bitter and dark and bad tasting in a lean loaf. They're fine for enriched (fat and sweetener) loaves. I may be giving up this effort soon since the texture of the final loaf is inadequate.
I've heard these same observations on message boards of from communities of people who buy fancy mills and make their own flour. The big particle size apparently isn't good for gluten development and the final loaves are grainy.
I'm also currently testing King Arthur's White Whole Wheat with limited success. No big conclusions, just an interesting observation I thought I'd share. Experiments don't always yield a a complete story.
3.09.2008
Dave's Beer
Despite owning the domain registration Dave's Beer.com, I'm not a fanatic brewer. Dave's Beer embodies the spirit in which I would like to live. Kicked back, relaxed, sharing food and spirits with friends. I'm a tad type A to fully realize that dream. Something to work on.
I do love to brew though. With parenting and work, brewing gets low priority. In addition to celebrating food, I also have a passion for process development. Not quite an idea man, I don't invent many things, but I see opportunity for improvement on underdeveloped good ideas.
If you Google no boil ale, the #1 search result is a 2001 piece from a periodical called BYO (brew your own). Kind of interesting but not a popular concept. Boiling the wort (beer before it's fermented) takes a long time and I don't know how important it is since I do only malt extract brews with some specialty grains infused.
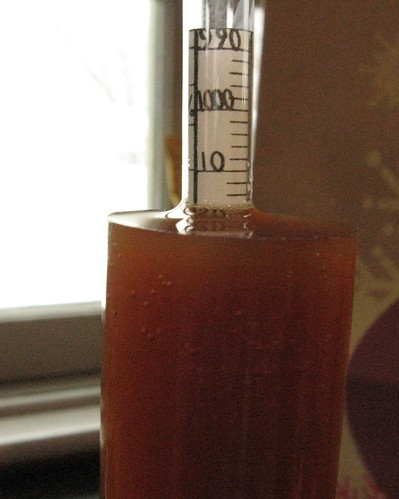
A couple weeks ago, I put this method to the test. I infused some chocolate malt (1/2 lb.) and 120 crystal malt (1 lb.) in 140-deg-F water for an hour. This mini mash was filtered and added to 6 lbs. Breiss Gold dry malt extract and about 2 ounces of Fuggles hops and a couple teaspoons of gypsum and dissolved in water that was about 140-deg-F. The mixture was stirred vigorously and a Nottingham yeast culture was added once the mixture cooled to about 75-deg-F. I aerated it vigorously and let it ferment for about a week. My basement was approximately 60 +/-10 degrees (we lost heat for a day during that period), but the fermentation kept going along, ending the primary at 1.015 F.G. (O.G. 1.060). Should be a nice copper colored brown ale about 6% alcohol by volume. The sample so far is better than any recent batch. And, much easier brew! We'll see after a brief secondary and bottling/kegging for the final test.
3.02.2008
Weber Temperature Regulation
Yesterday I scored an 8-lb picnic roast from Giant Eagle for about a buck a pound. I'm cooking it for my neighbor who helped me cut down a tree several weeks ago. There should be a few scraps leftover for our dinner. I was giddy as a school girl. The picnic is my favorite pork shoulder cut. It's fattier, but the fat is more easily separated from the meat than the more common Boston Butt during the pulling (the more times you state butt in a post, the more it gets read).
I gave it a rub last night and plopped it on my weber this morning at 6:15 using the minion method for setting up the fuel. In the past, I had regulated the temperature of the Weber using the bottom vents cracked and the top full open and "controlled" the temperature by placing only a few briquettes in at time. This requires intermittent fussing during the day. Maybe only every few hours, but still kind of a pain. Using this method the temperature bobbles around 250-325-deg-F.
The minion method permits one to charge lots of fuel at a time and have it ignite slowly over time. This way, less maintenance during the 10-12 hour burn is required. More time to sip brew and contemplate life (or chase little girls around the park).
I've only been moderately successful with the minion method. My heat undoubtedly gets to 400 and then slows down but takes too long to cool. In all the years I've been cooking pork roasts, I never bothered to attempt to regulate the heat via the top vent of the Weber.
Today, on the sabbath, my eyes have been opened.
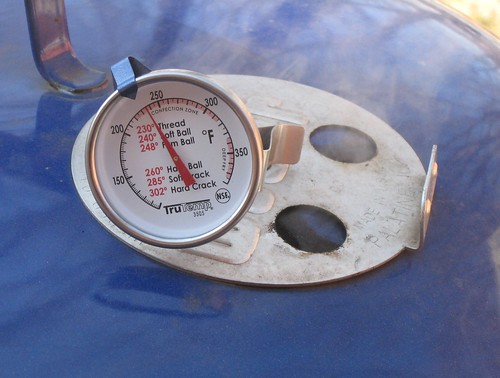
That top vent is as precise as the dial on your oven. After the erratic morning I spent trying to control dome temperature, I nearly shut down the vent, all but a crack, and left a thermometer in the dome to watch. There's a TON of fuel charged (briquettes, maple and mesquite) ignited and the temperature is ROCK STABLE at about 240-deg-F. I think I have conquered the ultimate lazyman's slow cooking method on the infamous Weber. I hope I haven't hurt the roast from the early exposure to high heat. Over the next few hours, the temperature never moved more than +/- 5 deg-F. I'm going to pull it off around 4 for a rest before a 5:30 dinner. A damn good day for 'q.
2.28.2008
lupini beans
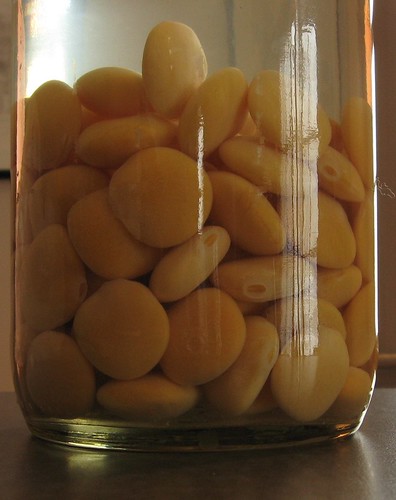
When I jump into the nightly dinner prep, I like to drink wine and snack. If there's a Cheeze It or a Goldfish Cracker nearby, it's gone and I can destroy my appetite. It's a bad habit. Something I like just as much for a quick snack is lupini beans. Odd comparison, but I love them. And, at 2/3 of a gram of fiber each, a nutritional snack too.
They are a pretty interesting food. Historically, they've been of a variety that has contained high concentrations of lupin alkaloids, e.g., sparteine (sorry, the link's a pdf) which is an oxytocic, can cause contraction of the uterus. Today, a different variety is common that contain much lower concentrations of lupin alkaloids.
However, when dry, they're still bitter. Really bitter. To make these beans good enough to snack on (popular beer snacks), they need to be hydrated. They can be purchased hydrated in brine, but they're a bit pricey. I scored a couple pounds of dry lupini at Carfagna's a month ago for about $3.30/lb ($4 a lb. delivered from Amazon). They can be soaked and hydrated - but it takes a long time. My first batch is finally done. I lost count of how many changes of water I've used. I took about 1/4 pound of them in a jar and covered them with water and about a tablespoon of salt. I dumped out this liquid and repeated the process every few days for about 2-3 weeks. Today, they are finally ready to eat. Yum. Better start hydrating another batch!
2.24.2008
Bring your baguette to work day
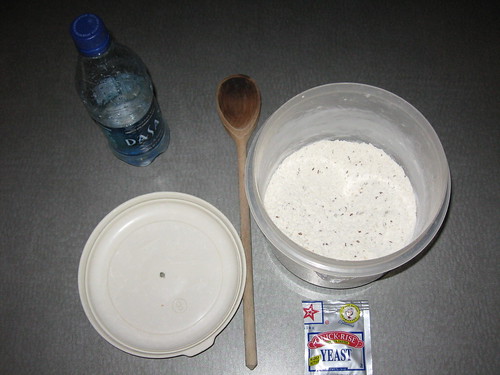
My baguette isn't just a good bread, it's a staple in our lives. The optimal surface area/volume ratio to get lots of crust and cool down properly in order to work on a weeknight for dinner.
Tomorrow, I'll be picking up the kid from daycare and I'd like to get a bread to the table for bread, salad and cheese night, so I'm packing my things and getting ready to prep the dough just before I launch out of work to daycare. In the bowl is 200 g unbleached white, 100 g of whole grain wheat (ground myself), 2T flax seeds, 1/4 C sunflower seeds and 1t salt. Tomorrow, I'll close my office door briefly and charge the yeast to my dedicated rubbermaid container then dump in my bottle containing 200 g water and 3 g olive oil, give it a stir until it clings in a shaggy mass and take it on the lam.
With the dough in process, I can relax, pick up Frankie, hang out a bit on the playground all the while my bread will be doing it's first rise. When I get in the door, I'll preheat the oven and pop the bread in within a half hour in the door and it should be out about 1 hour after getting in. In time for 6:00 dinner.
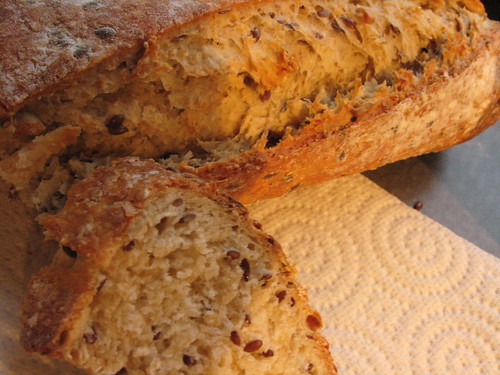
This will be a slightly different loaf. The quick baguette recipe with the coarse flour as 1/3 of the flour makeup and some seeds. I'll post a pic of the final loaf. Can't wait.
... the next day
Still some alterations to make due to the increased water absorption properties of the crushed wheat/coarse flour, but a nice loaf. We had a camembert with it as well as a salad with warm lentils over it.
2.18.2008
2.17.2008
Stove Top "Boston Baked" Beans
Ever since my recent successful experience cooking old, old, dried chickpeas s-l-o-w-l-y, I've been thinking of bean tenderness and cooking time.
I love Boston Baked beans and decided to try cooking them the easiest method possible anticipating slow cooking would be key to the method. I wanted the prep to be as easy as possible, so I could do my Saturday crazy run of errands while the beans cooked. In a 3 1/2 quart saucepan, I tossed in a ham hock, dried, great northern beans (1/2 lb.), salt (1.5 t), brown sugar (2T), dry mustard (1T), pepper, cheapo generic bbq sauce (didn't have molasses, ca. 2T) and water to cover by a couple inches and gave a quick stir.
The mixture was heated to a boil and then placed on the smallest gas burner at the lowest setting half off the heat for the next 10 hours. It smelled lovely all day long. After the cooking, I pulled out and discarded the ham hock and gave a final taste. The consistency was a tad soupy, not thick but the flavor was nice. Not too sweet. I put the pot in the fridge overnight. Next morning, the beans had obviously continued cooking and simply aging. They thickened to a near perfect baked bean consistency. They are a tad more pale than most baked bean recipes because I didn't use molasses, but the taste is quite good. I'll be serving these with a small piece of ham and some bread this week. I'll put up a pic soon.
Subscribe to:
Posts (Atom)


 Posts
Posts

