In which I embarrass my wife.
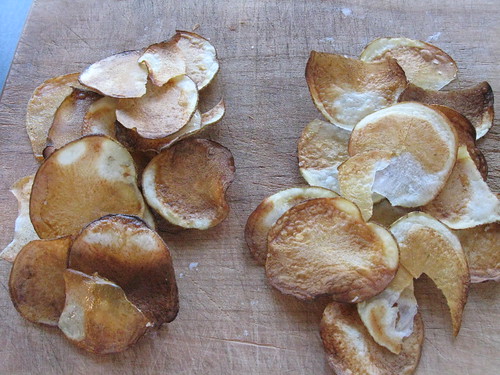
Final product after baking.
Saturday morning breakfasts are pedestrian in our home. Not quite gruel ... or ... yeah, it is gruel. We often have mixtures of grains (oats, old-fashioned or steel cut, rye or wheat berries, quinoa, what germ, flaxseed, etc.) mixed with 2 volumes of water and simmered until tender. This concoction's beauty is realized when we add the toppings. A drizzle of cool whole milk and a sprinkle of brown sugar are mandatory.
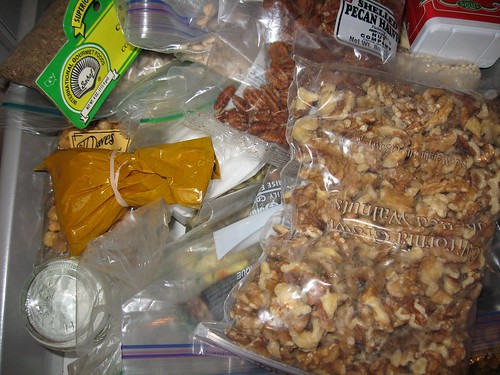
We also top the porridge with walnuts or pecans, lightly toasted in cast iron just prior to topping. The secret to our special nuts is the way we store them. We have a spice overflow drawer. Here we store all the spices for a nice garam masala, coconut, cardomom, cinnamon, paprika, and other savories that don't fit in the spice shelf. Over time, these nuts inherit a special curry flavor that is subtle but special. The specific flavors could never be duplicated - which is good. It evolves over time and surprises us each breakfast.
 It's the holidays and I thought I'd repost one of my favs since:
a. no one reads my archives and
b. I got some free loot!
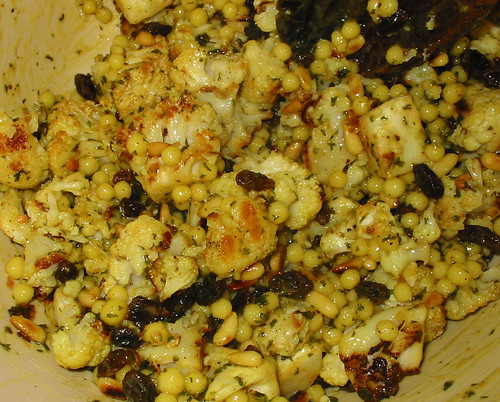
It's the frigging holidays and time for those excruciating office parties. Occasionally these require one to bring a dish. The depicted dish is perfect. It can be prepared the night before, tastes best at room temperature and it's healthy.
Also, I got a few freebies from OH Nuts!, a nut company in New York. A whole pound of pine nuts from them is about $12. The big difference with these vs. what I usually get (lately, from Mediterranean Market, when we can afford them) is they're really crisp out of the bag. I toast them for this dish, but they're really tasty toasted or not. Frankie now gets them in her lunch!
Thanks OH Nuts!, we're enjoying them! This dish is nice for them too.
Original Post
The wife pointed out this recipe for roasted cauliflower with Israeli couscous, pine nuts and raisins. It's seasoned with salt, pepper, turmeric and the giant couscous is briefly sauteed in olive oil and then cooked in chicken stock. I think it's a new "desperation dinner" for us. The longest step is roasting the cauliflower which takes about 20 minutes at 425F. The recipe also called for fresh parsley or cilantro; all I had to use was dried parsley. I'll fix that next time. Trust me, it's better than it looks. Recipe reprinted in case the link goes dead:
1 small cauliflowerClick the photo for a larger view.
4 cloves garlic, crushed
3 Tbs olive oil
1 onion, peeled and chopped
1 tsp turmeric
1 1/2 cups giant couscous (also called Israeli couscous) or fregola
2 1/2 cups chicken stock
sea salt and freshly ground black pepper
1/2 cup toasted pine nuts
1/4 cup currants
1/2 cup chopped fresh coriander or parsley
1. Preheat oven to 170C. Cut cauliflower into small even-sized florets and place in an oven pan. Combine the crushed garlic with 2 tablespoons olive oil, pour garlic oil over the cauliflower and toss well to coat. Roast for 30 minutes or until the florets turn golden brown, stirring occasionally to allow for even cooking. Remove to cool.
2. At the same time, heat a saucepan, add 1 tablespoon olive oil and the onion and cook over a moderate heat for 5-10 minutes until softened but not coloured. Stir in the turmeric and giant couscous and cook for 1 minute, stirring continually.
3. Add stock and bring to the boil, then turn down the heat and simmer for 8-10 minutes, stirring regularly until the grains are tender to the bite and all the liquid has been absorbed. Season with salt and pepper to taste.
4. Stir through the roast cauliflower, pine nuts, currants and coriander or parsley and serve.
Dual posted from Flickr for the the podcast I have tonight with Jim and Andrew.
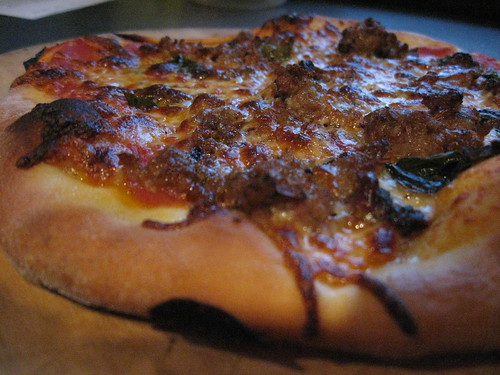
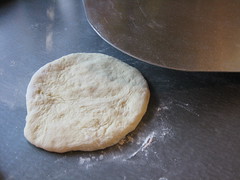
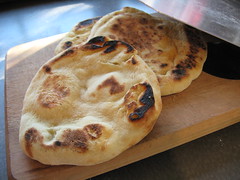
This was originally to be a honey wheat kneadless boule. It did the first rise overnight for 12 hours, punched down and let proof most of the day today. When dinner rolled around, it's fate changed from a boule to a pie. 600 g into a 15" pie (3.4 g/in.2). I usually make a thinner crust (225 g/11" or 2.4 g/in.2).
I love thick pizzas but the wife doesn't. When she's away, we have the thick crust. Yum! (click on the img for a few comment discussion)
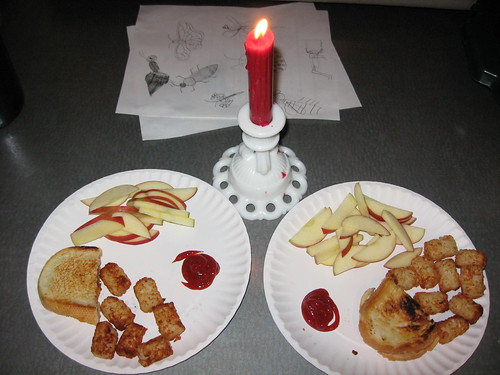
It's rare that I give in to the failure that is the grilled cheese dinner. With Mom away, prep for demos in Frankie's class on Monday, leaves and gymnastics on Sunday, etc. etc. I caved in last night. This was our dinner.
It's a failure to me. The kid thought I was a god.
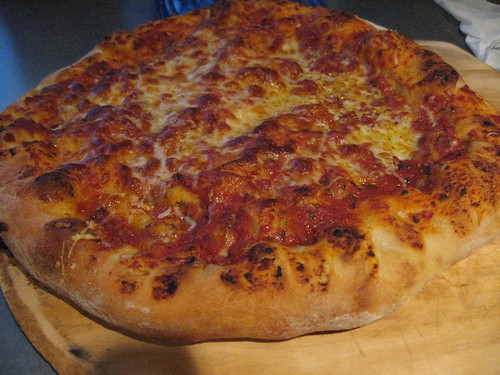
A while back, I was making pizzas for our playgroup. I made about 14 that time. I actually made a bunch more dough than I needed. I was ready to make about 26. At the end of the day, I was going to pitch the remaining dough. It had already risen 3 times; 1 rise overnight, 1 rise during the day and 1 rise during pizza making. Andrew encouraged me to just round it and toss it in the freezer.
Big question: Should I take a chance and try reusing the dough. Everyone's sitting around the dinner table and I'm going to use it - after I allow it to thaw during the work day (it's 4th or so rise). Will I be serving them a beauty of a pie or an unleavened cracker-like pizza. Here's the final product - oops, none left to photograph.
I don't know technically how to determine when the yeast has run out of food and the dough turns into mush, but, empirically, it's still going strong after 4 times. A very cool observation in this don't-waste-a-damn-thing economy. Thanks for the tip Andrew.
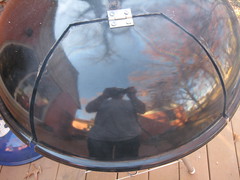
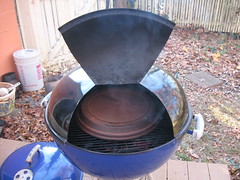
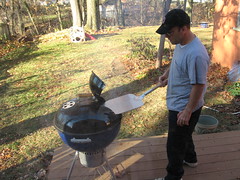
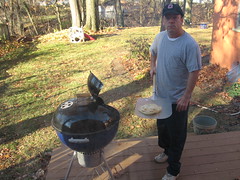
In the time-honored tradition of leaking communications inevitably to be republished in the form of a full disclosure, I present the first installment of the Weber Kettle modification. Firedome.
Some months ago, in an attempt to get my kettle grill to cook low 'n slow (ca. 225°F overnight with little or no attending, I tried taking advantage of a chimney starter's cylindrical shape to deliver urburned fuel to the heat source at a slow rate. It didn't work. That failure, however led to an interesting observation. Even if a single lit lump of fuel is placed on top of an unlit mass of fuel in a chimney starter, within a few minutes, the entire mass is ignited. The chimney is aptly named. It is the fastest means of initiating and maintaining fuel combustion.
With an entire chimney full of lit fuel, it was really hot. More so than a small equivalent mass of fuel placed on the lower grate of the kettle in a mound.
The heat source for this project will be contained, inside the kettle, in a chimney.
Upcoming:
-type of fuel
-Weber Kettle modification (you will need a grinder with a steel-cutting disc).
-Cooking surface
-Dry run temperature data
...
-Should be a fun series. Stay tuned.