5.28.2011

mini molds

Ah, I remember why I don't make brioche much. When I do the final glaze, the glaze drips below the edge of the bread into the loaf pan and makes the bread stick. When a beautiful loaf comes out of the oven, nothing is more anger-provoking than that kind of complication. So, a better mold - a mini too. I like to make small breads to share, especially such rich ones.

I recently tried cupcake wrappers, but these suck for breads, they don't release. Here's my yet untested solution. Wish me luck. Parchment never fails, it always releases a bread. I'm going to line my little muffin trays for the loaves tomorrow morning.


Cool huh!
Enhanced by Zemanta

5.27.2011

Brioche


They disappeared minutes after baking.
I'll replace this image when I remake them.

I don't make brioche enough. Recipes vary, but it's essentially a yeast-leavened pound cake. I made a bunch this morning to give to Frankie's teachers. Not all of the rolls made it to school. 500 Feet out of our driveway, Frankie and I spied a yappie Jack Russel. She was tagged, running in the street and we decided to use the bread to aid our rescue attempt. Frankie placed bits of her roll in the street; the dog snatched it and ran back to bark at her. Similar schemes played out for the next 20 minutes until a neighbor drove up and told us we'd never get her. The dog lived 2 houses down and rules the street. She was totally playing us. At least we gave her breakfast.

Recipe
Sugar, 50 g (1/4 C)
milk, 160 g warm (1/2 C)
eggs, 3 yolks, 2 whites
softened butter, 57 g
canola oil, 57 g
yeast,  1 pkt rapid rise (7 g)
salt, 7 g and (1.5 t)
just enough flour, 420 g (3 C unbleached white)
...to make it stick together (I spun the dough in a bread machine for 5 minutes). Ferment 1 h at room temp, chill for 5-24 hours, let warm at room temperature the night before baking (or at least 2-3 hours at room temperature, form into 60 gram rolls, proof 20 minutes in cupcake tins, paint with yolk, bake 350°F about 30 minutes, makes 12-15. Distribute to loved ones.

4.19.2011

Crusty breads in a pan using passive steam

Recently I was poking around Ruhlman's Ratio and noticed his raving of the cooking a boule in the covered, then uncovered, pot as the most valuable part of Lahey's no knead bread. I've had some luck with this, but the results weren't always consistent, but I think it's because of the hydration level of the dough inside. I wanted to explore this more.

Last weekend I made a sourdough starter. I don't know if this really counts as a sourdough starter, but it's close enough. I made a poolish of 1:1 flour:water (w/w) and a ca. 1/8 t yeast and let it ferment overnight, dumped out all but ca. 50 g and refreshed a few times over the next few days with 1:1 flour:water (100 g each) and by the 2nd-3rd refresh, considered it a starter. Purists, go stomp on grapes or dissect a rasin or whatever it is you do to get a starter, I'm busy.

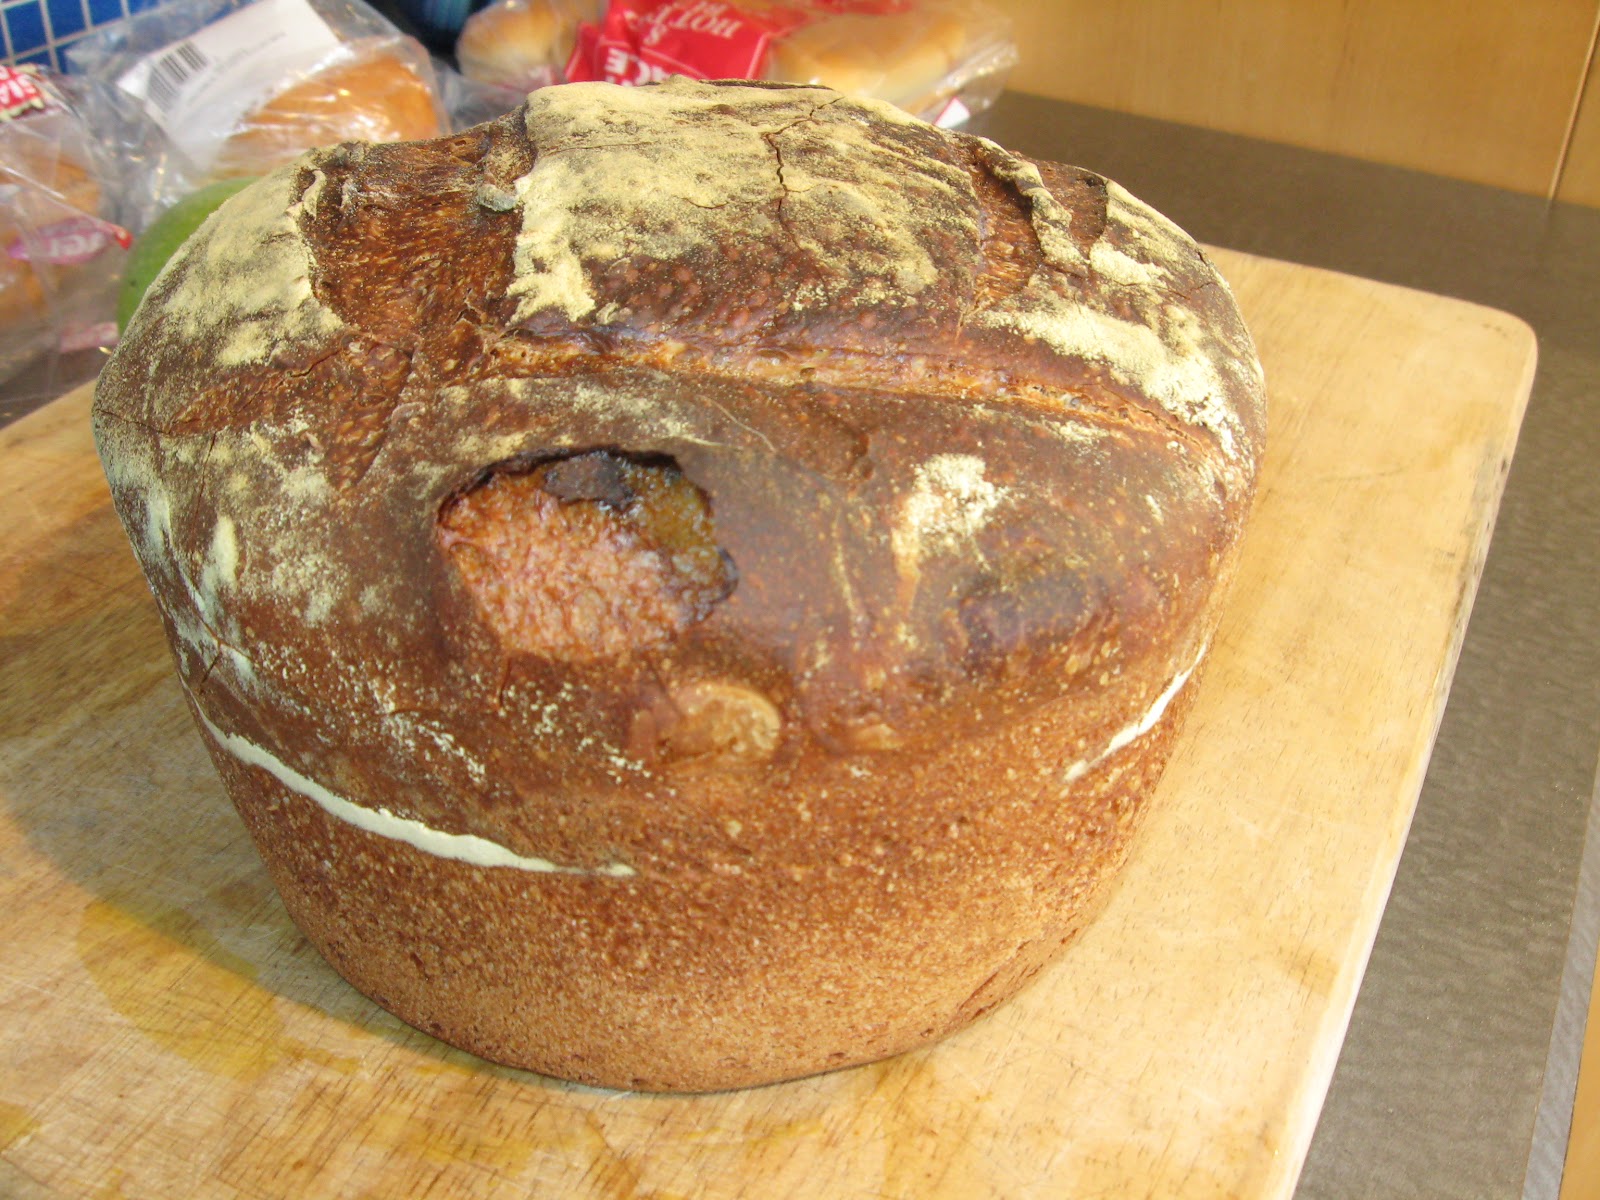
I plopped a 100 g of the starter into water (300 g) and unbleached white flour (Montana Sapphire, 500 g) and salt (9 g) and let it knead in a bread machine.* The first rise went overnight and formed it into a boule and placed it in a covered sauce pan to proof until "double," always a tricky estimation on a sourdough - in this case 5 hours, but it's tough to overproof a sourdough, so don't fear. I baked it in a simple 3 3/4 qt sauce pan covered for 40 minutes at 425, removed the cover and baked until brown on top.
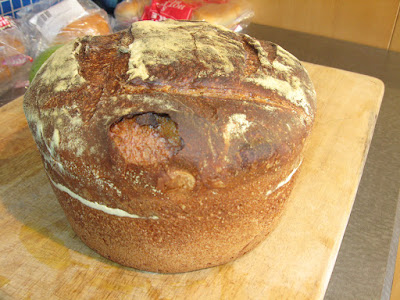
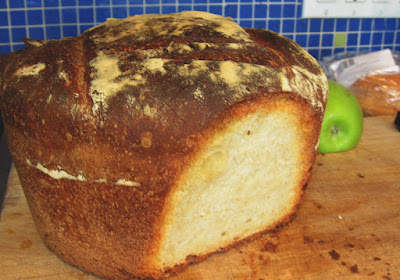

*Bread machines are abundant and about $5 in any thrift store.

Notes to me
-Cast iron isn't needed for this capture of steam (steam from the dough alone is referred to by some as passive steam), in this case, I only used a medium heavy saucepan.

-Cooking like this, as in the Baparoma steam pan, doesn't even require the oven to be preheated

-This covered/uncovered method appears incredibly robust compared to any baking on a stone or other surface I've tried (with regard to spring and crust).

-I don't like the size of the Baparoma steam pan and may fabricate my own covered aluminum/ss/? pan, more efficiently sized for the oven based on this and ongoing expts.  Lowes has some conveniently sized pieces of metal to work with.  I'm thinking about 24" long and cylindrical with a slightly flat bottom and loose fit lid ...

-If anyone has ever heard of another term for passive steam in this context, please let me know via the comments, thanks.

(Did anyone catch the white squishy hot dog rolls in the background of the first image?  Hah, I'll eat anything.)
Enhanced by Zemanta

4.12.2011

Roasted Legumes: lima bean edition

Given my recent fear of the purported evils of high glycemic foods, I've been interested in anything to prevent my 2 pm attack on the vending machine for that 2 oz pack of Cheese Its I lust for. Some time ago, I posted an interesting snack of roasted cannellini beans. They were a great roasted legume and clearly a good snack even Atkins might approve of.

I've dabbled with the recipe since then; some problems during roasting caused irregularities in the final bean. Some were soft, others ethereal and crisp. This time, I chose Lima to practice with. Aside from over salting them, the texture on these is what I was looking for, uniformly crisp. I think the key is overcooking the bean prior to roasting.

A pound of small lima beans were cooked overnight at barely a perk on the stove. They were overcooked but still hanging together. See final pot of cooked beans.

cooked very well, no al dente here

I drained the beans (carefully, they're kind of fragile) and dumped them in a big roasting pan, squirted them with olive oil and sprinkled salt (mistake, they were cooked in salted water and didn't need this final dash of salt). I didn't work to hard to break up the plopped pile o' beans. As the oven dried them out, I started giving the pan a shake every 30 minutes or so. Eventually all the beans separated into their own crispy goodness and the batch was finished in about a couple hours. Here's the final product. For those couting calories, the oil added prior to roasting was only about 20 grams per pound and the dry-roasted weight about 90% of the starting bean weight. So, I'd estimate a 30 gram sample (1 ounce) to be about 90 calories, 22 grams carbs and 7 grams fiber. Other beans would definitely be good too, but cook them well for a uniform final roasted texture.

final product (go away Cheese Its!)

4.10.2011

The Baparoma Steam Pan and my first baguette with it

I recently learned of a pan called a Baparoma steam pan. The company is out of business and the pans can only be found for sale used. I scored one recently on Ebay, pricey. It was $80, but I've been pursuing crusty baguettes for too long not to get it. It's a historical artifact to me.


It's a simple idea.  Two tablespoons of water in the bottom (far left pan, 15 ml center, 7 mL on either side), the middle pan goes on top of that, the baguette sits in the middle of the second pan and the lid goes on while the loaf proofs.  Uncover, dock the loaf, cover and place the assembly into a 425F oven for 20 minutes, then take off the cap and let it cook another 10-12 minutes, remove and crackly, shiny goodness.  A near flawless baguette.  Superior volume, crackly razor-sharp crust, lovely taste.


Nice ears from the oven spring


Frickin' perfect
So, why am I pissed?  It's a crutch.  A (low output) link from a pro steam deck oven to a home oven that I haven't been able to duplicate in any of my attempts.  I'm frustrated.  Look at the damn perfect loaf.  Just frigging awesome.  So. Angry.

PS I learned of this at The Fresh Loaf, one of the best bread baking forums I've ever read. I think mostly home bakers, but pretty darn skilled bakers and nice people.

Was it worth the $80? To me? Knowing the result, I'd have paid 10X that. Now I need to crack it and figure out a home oven workaround.

4.05.2011

simply sublime

sorry for the mediocre image
During the great 2011 baguette giveaway The Kate was kind enough to stop by and give me some precious loot - Jam!!  This one,  now depleted, was Strawberrry.  It was sublime and got our mornings off to a special start.  Thanks Kate.

3.31.2011

Free Stuff! The Olive Orchard

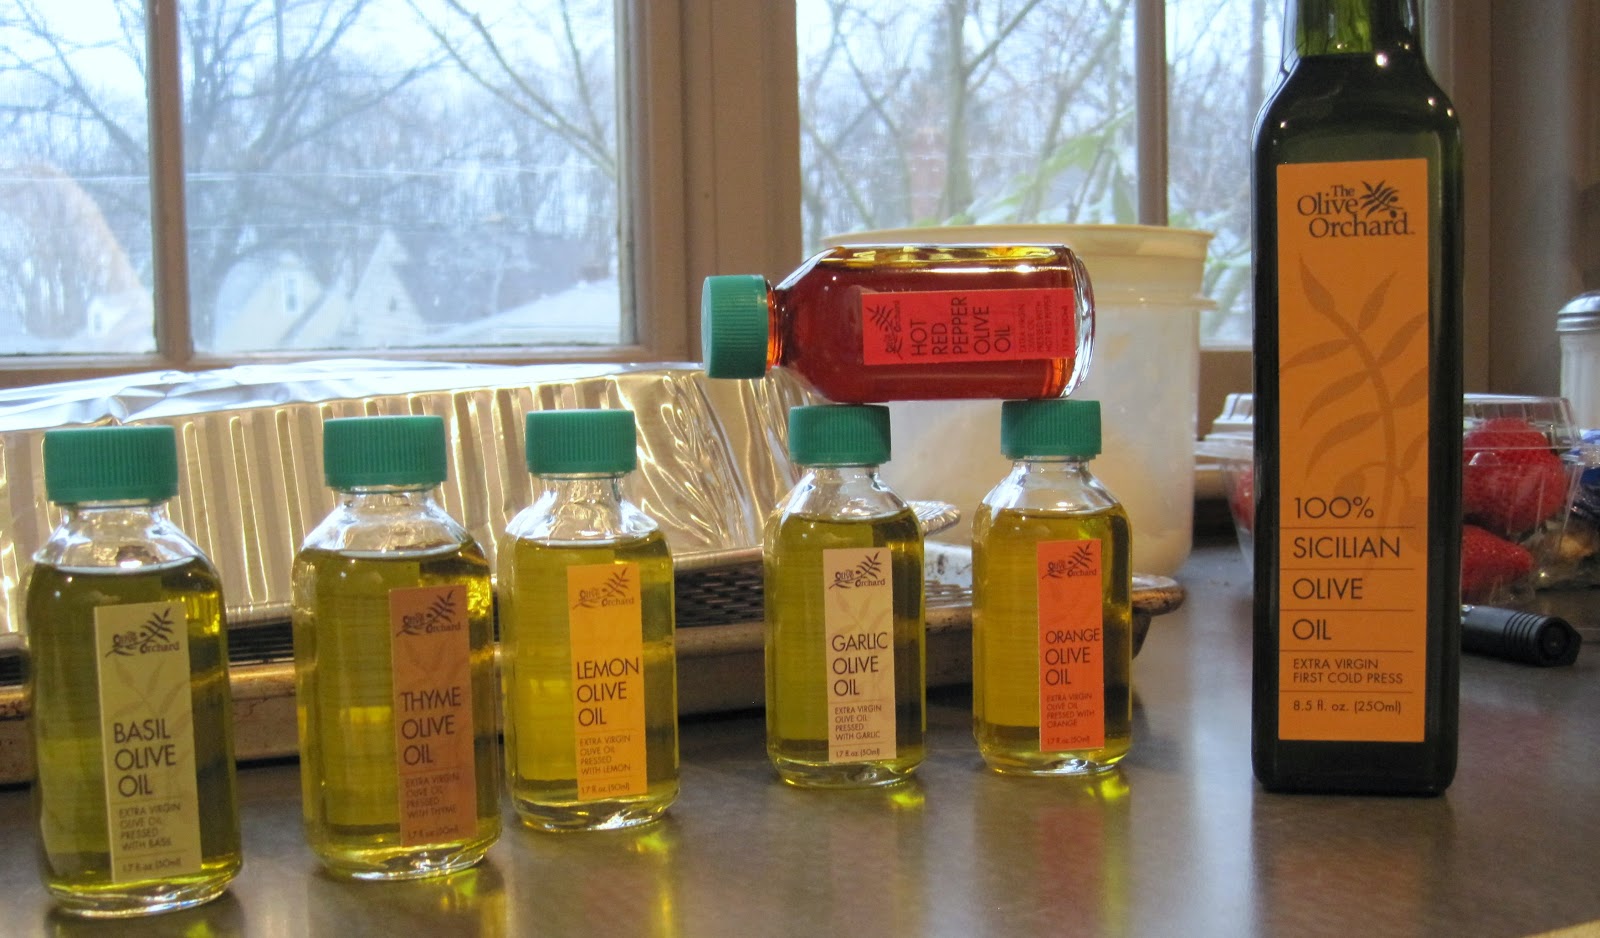
Got some freebies the other day from Michele at The Olive Orchard, curators of olive oil located in our fair metropolis. The staff here at weber_cam are cheap, but not easy, we do not varnish our opinions. I told Michele if we in the test labs didn't like the product, we'd say nothing and cast the samples back, with anger. Not the case. Pictured here, arranged like Stonehenge, are their 5 bottle sampler of flavored oils and a larger bottle of extra virgin olive oil.

To use these I decided to make something simple to highlight the flavors of the oil. I've been reading about low carb diets (hence the beef jerky) which sent me into a frenzy of anticipatory anxiety at the thought of losing carbs in my life. Henceforth, I am disregarding any health information gleaned from said reading and will be joining a local monastery to survive on beer and bread while wearing a less than flattering, yet slenderizing robe (sorry @TheOtherZach). I will, however, make my carbs as complex as possible (porter in place of lager). To that end, the recipe I'm using is a simple lunch salad that's wicked easy. It's been developed and varied this week. I used both the basil flavored olive oil and the lemon flavored oil in two different salads.

A bulgur salad for work
bulgur, 1/3 cup
water, 2/3 cup
olive oil, 2T
cider vinegar, 1T
salt and pepper (not much)
+ anything else you like

Procedure
Mix everything the night before or in the morning. Bulgur doesn't need to be hydrated by hot water, room temp is just fine and easier. By lunch it's pretty wonderful.

I made this salad with only the first 5 ingredients (salt and pepper is one) using the basil oil. The basil flavor was surprisingly bold, even in a chilled salad. The basil flavor was even more pronounced at room temperature. When I made the salad with a few additions, pine nuts, slivered carrots, etc., I used the lemon olive oil and it was killer. The lemon oil is not something I'd have bought for myself, but I'm lucky to have had the chance to try it. Might be a fun gift to give.

I am saving the evoo for a special bread and salad night, simple dipping is the only event in its future. Can't wait.

the henge of oil

ingredient labels like this are too rare

sorry, my images are not good today
Enhanced by Zemanta

3.26.2011

Easy boeuf jerky

Wow, you need to do this.  It's cheaper than anything you can buy, just as good or better because of the varieties of spices that can be added and it's really easy.

I got a flank steak and cut it up into thin pieces (across and/or with the grain) and trimmed all the fat.  It's really important to trim ALL the fat.  It looks gross in the finished product and it does NOT render out.  I think I'll be choosing a less marbled cut next time like a top or bottom round.  And, cut it thin.  The more plump pieces don't have a good mouthfeel when eating them.

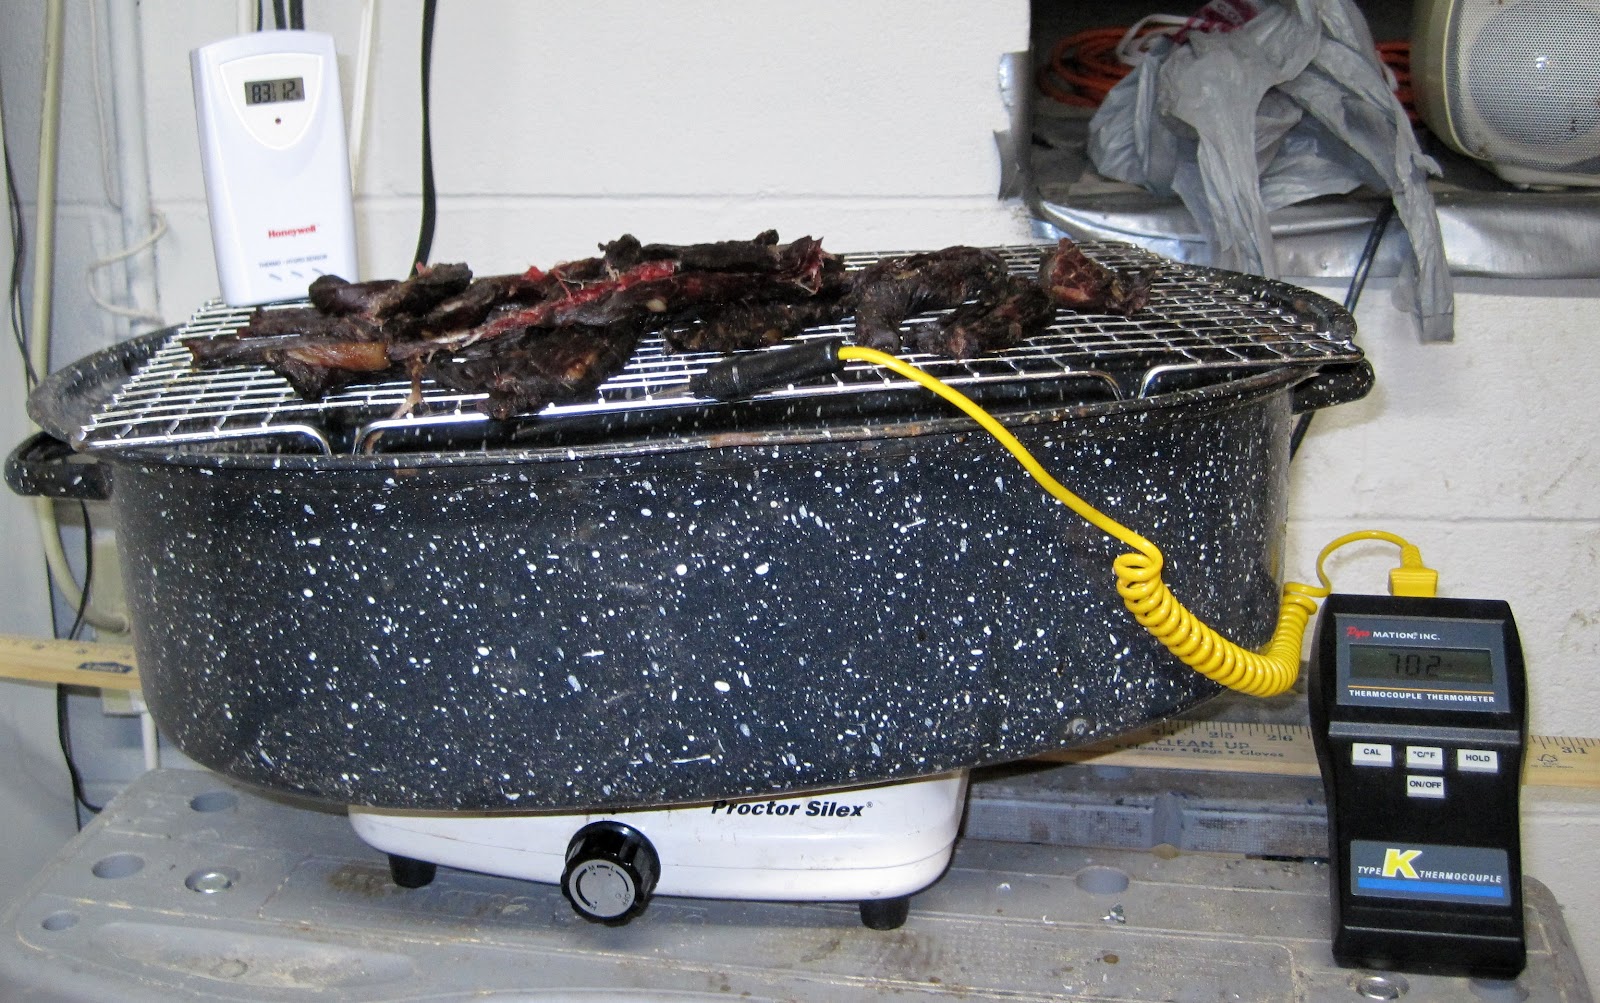
Take the trimmed pieces and marinate in a bag.  I used 1/3 soy, 1/3 worcesteshire and 1/3 mirin for about 4 hours.  I removed them pieces and lay them on the depicted cooling rack.  This was placed on top of a roasting pan and placed on a low-setting hotplate.  I adjusted the temperature on the hotplate so the air above the rack was about 90-120, hotplates have sloppy cycling.  I gave the pieces a final sprinkle of coarse salt and went about my way for a day.  No fancy airflow, just relied on convection.  A day later, jerky bliss.  We all liked it immediately.  It is Scoopy's favorite!
Enhanced by Zemanta

3.22.2011

Twitter baguette giveaway...

Update Mar 25 
Thanks to all who stopped by or received in some way the demi baguettes this week.  I gave away about 15 in a couple days.  The ratio of flour to water (1.67 w/w) so far is the dominating factor in the volume and taste.  I also varied the shaping a bit this morning, 130 g (precooked weight, ca. 110 g final) was a nice size for a petit dejeuner.  I'll probably work on the final proof next, since the oven spring was too much.  I was baking in the morning of a busy day and rushed it a little.  Stay tuned for more giveaways...

Original post
My breads of the past months have, well - sucked.  Not real bad, just not good.  I just got into a slump of sorts that I couldn't figure out.  Based on my previous manic outburst, I climbed out of the rut with a new (or rediscovered old) ratio.  I'm up and running again and the volume is perfect.  Now, the crust is sometimes soft, sometimes perfect.  For a baguette, the perfect crust is razor thin, sharp and crackles as it leaves the oven.

At 20 liters per tablespoon of water, steam is an abundant commodity, even for a hack no matter what awkward technique one uses.  The real challenge for the home baker without an oven equipped for steam injection and evacuation is to remove the steam sometime into the baking cycle.  Therein lies the much bigger challenge for the home oven.  Ovens vary and this may be the source of reproducibility problems from person to person, recipe to recipe, etc.   The breads need to steam a bit and then bake in a dry environment.  I'm not going to go into to too much detail on this.   All I'm saying is that I'm in experiment mode and I'm baking faster than we can eat.

So, I'm introducing the first in an occasional series:  I bake early in the morning and you get to taste my experiments.  Tomorrow morning about 6, the dough will have risen overnight and I'll produce, by 7 am, some demi baguettes.  About 100-110 g with or without a good crust.  Don't worry, they'll taste good even if the crust isn't right.  DM me on Twitter and I'll reserve one for you and give you the address.  Just stop by at 7 and I'll toss one in your car.  For tomorrow, I should have about 8-10 available.   With your mini, you get a little pat of butter and jam.  Enjoy - and thanks for helping me not waste food and get some experimentation in. I love you guys.

Enhanced by Zemanta

3.18.2011

On the importance of ratio

click to make big enough to read
A friend has suggested 1.618.. , I'm on it.

3.10.2011

Saucisson Sec (finally)

Some time ago, I was muddling through my attempt at preparing one of the simplest dry cured sausage in Ruhlman's Charcuterie, saucisson sec. It's not fermented, just a simple mix of ground pork, garlic, salt and pepper and some curing salt.

I have a way of turning simple things into a 3 body problem. But, when I finish, I usually have a robust solution in which I know more about the process variables than if I nailed it on the first try. It's a frustrating way to learn, but learning is rarely uneventful.

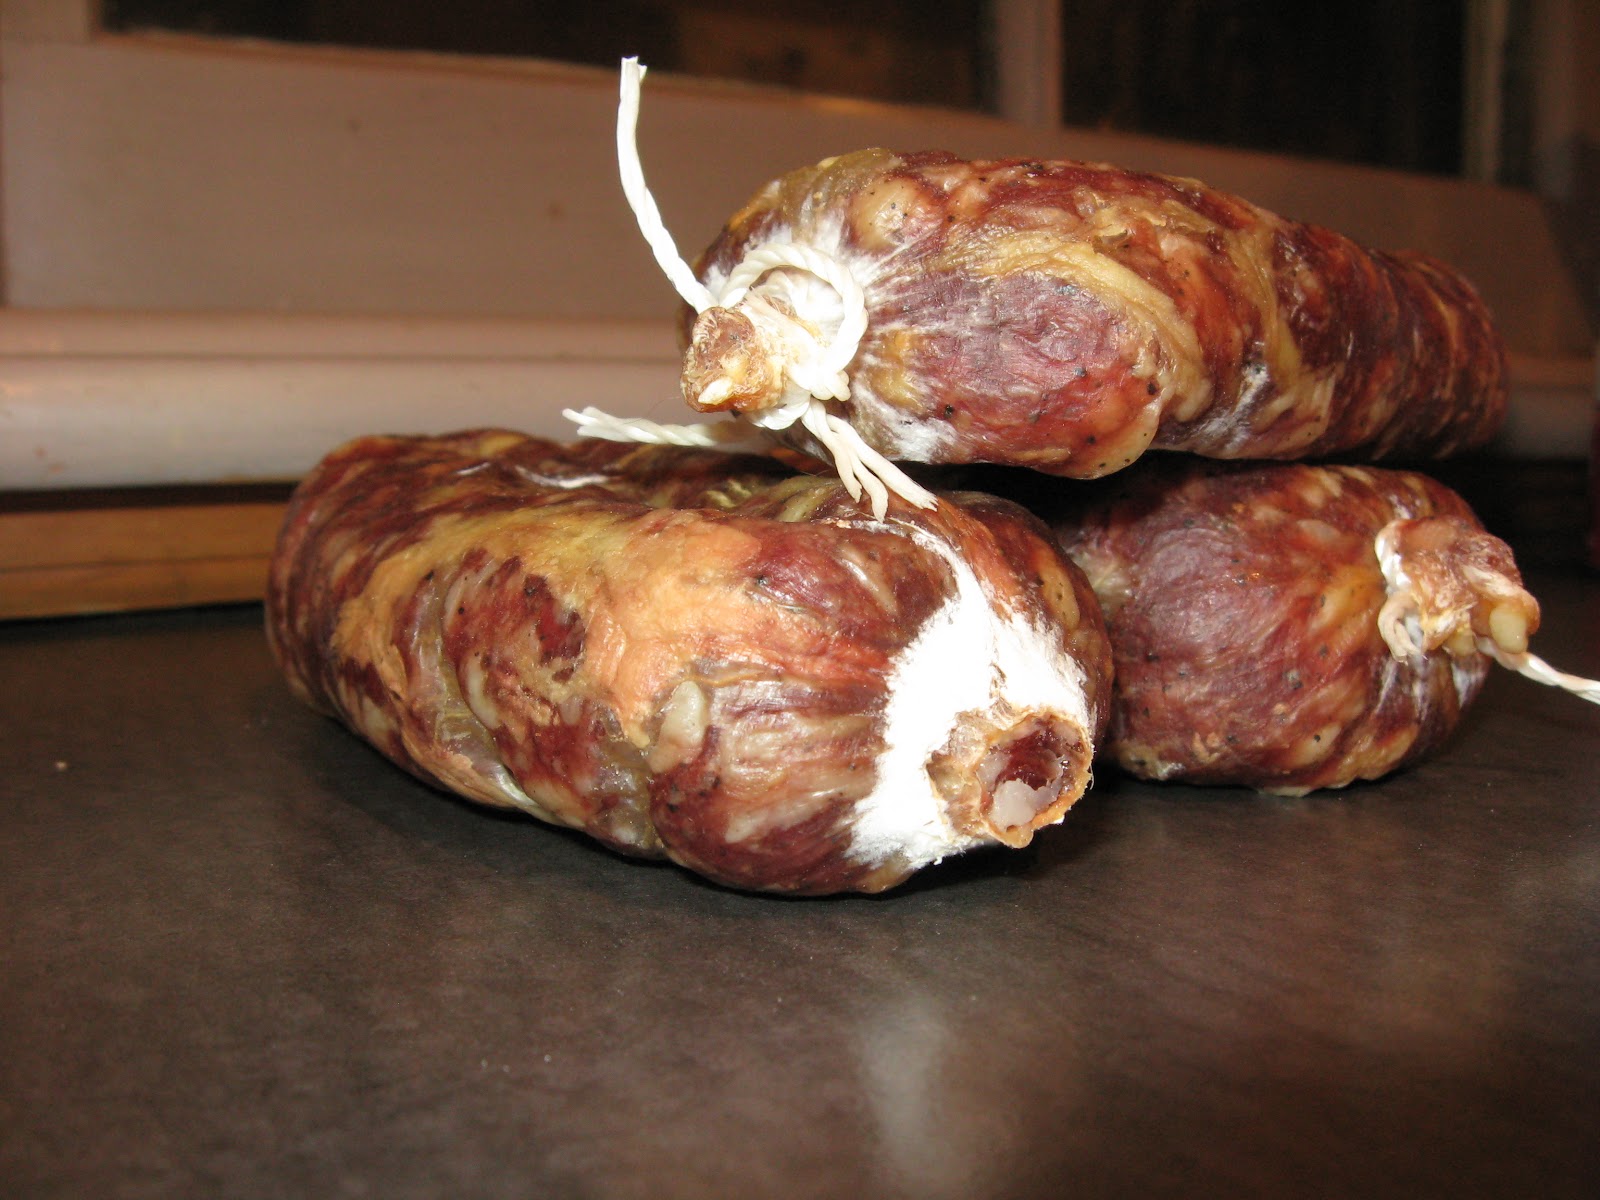
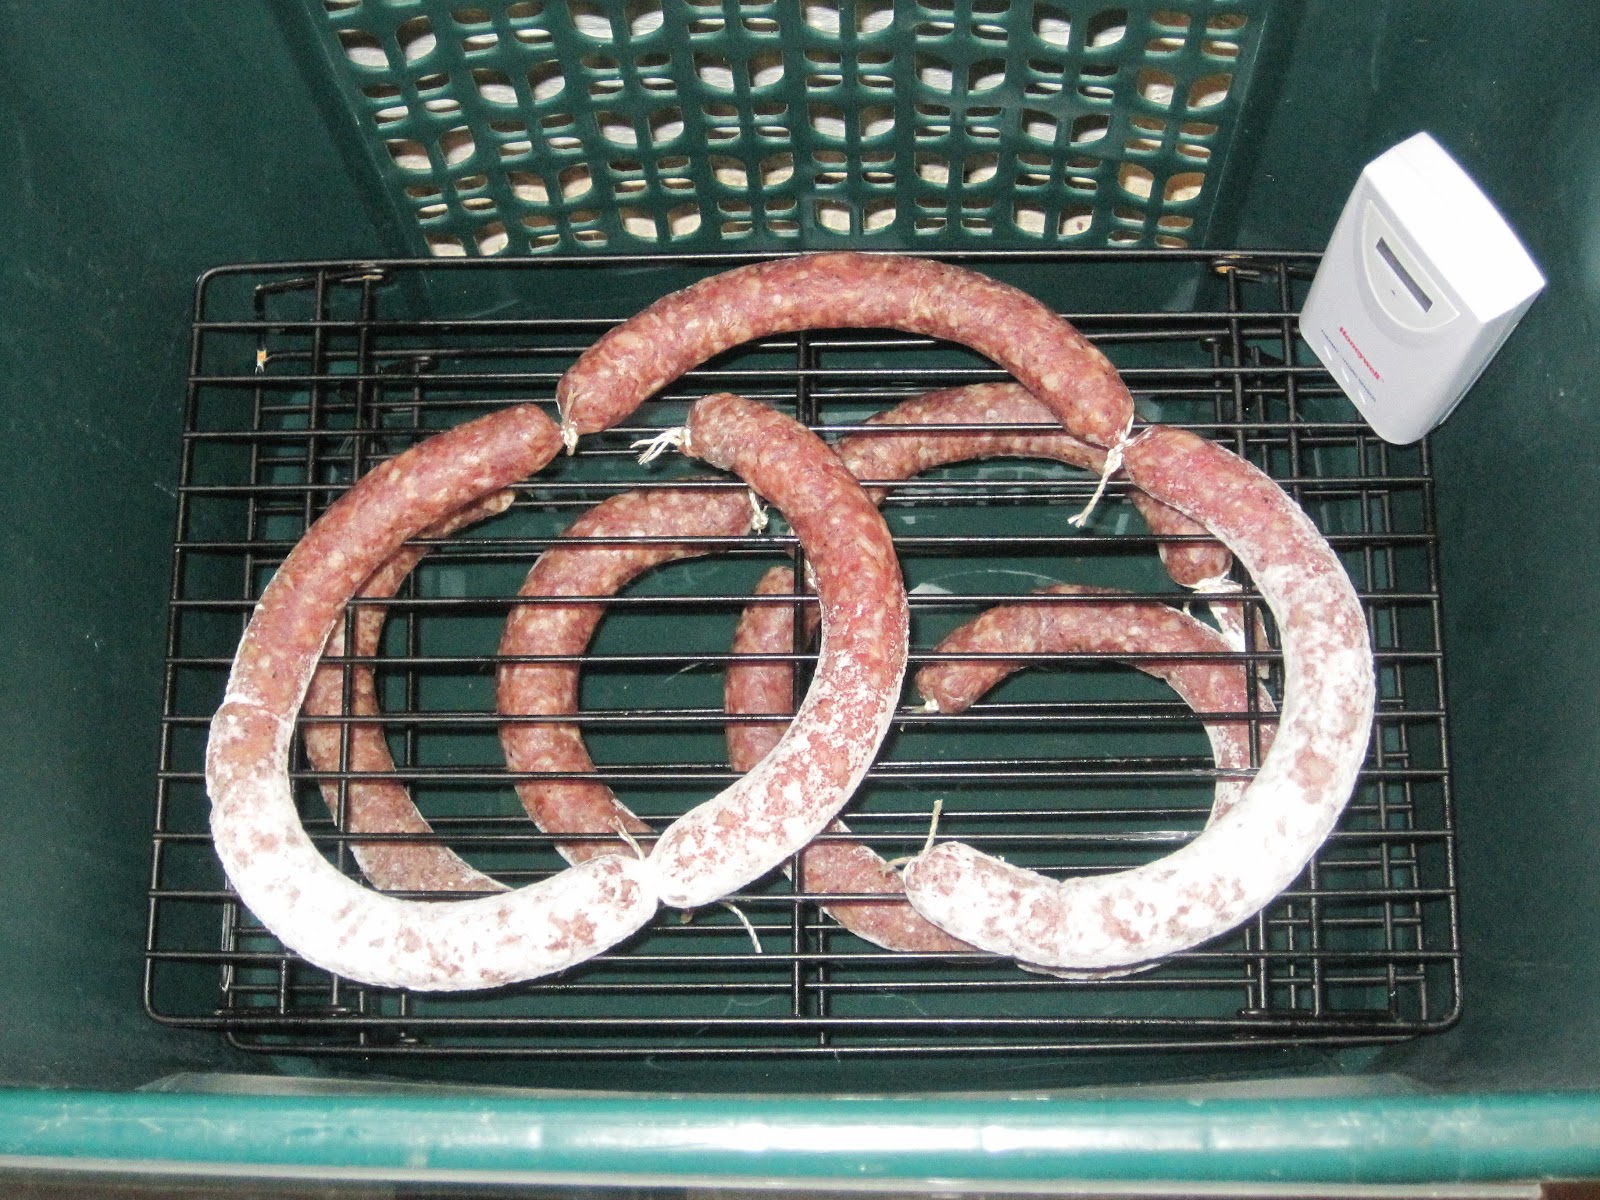
The key environmental variables are 60°F, at least 60-70% relative humidity and some air movement. I won't rehash all the past attempts buried in my archives spent trying to find that environment. I will simply cut to the chase: I stuffed the sausage in beef casings and lay the links on a cooling rack suspended over some water in a plastic cooler in my basement. The open top of the high-walled container permitted air movement. The sides of the container coupled with the puddle of water in the bottom created a naturally bounded localized cloud of moisture that registered ca. 70% according to an accurate humidity probe and the temperature in my basement is about 60°F +/- 8°F almost all year 'round.

4 weeks of aging and voila. The sausage looks a little squat because it was on its side. So what. After I tasted it, didn't die, I fed it to others who enjoyed it immensely. The only changes? I didn't like the appearance of the wide beef middle casings - the biological reality of the appearance of these things is not pretty, I'm going back to simple small hog casings. And, I'll be using a finer grind. I like coarse for fresh sausage, it keeps them moist on cooking, but the dry cured, I believe, needs a finer grind.


A peek at the newest run (smaller casings, finer grind) about a week in:


Enhanced by Zemanta