12.29.2008
Potato Chips
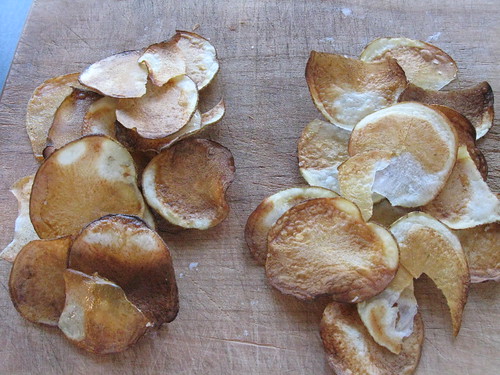
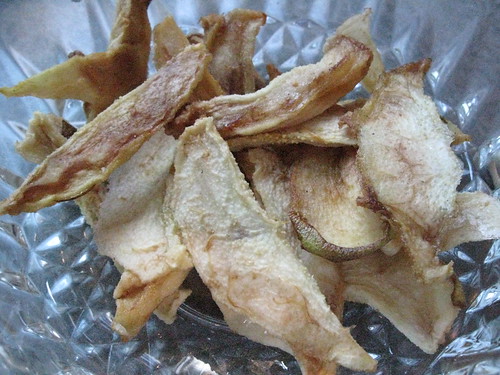
Years ago, I deep fried some mandoline-sliced sweet potato slices. They were absolutely perfect, but deep-fried. Today, I took the mighty russet and sliced it on a mandoline slicer. The slices were soaked in water for about 10 minutes, removed from the slurry of water and extracted starch and left to air dry (about 15 minutes). They were placed on an oiled, black cookie sheet (in a single layer), dabbed with a tad of soy oil using a paint brush (I would've used a spray can of veg oil, but had none) AND baked at 425°F (convection) for about 10 minutes. Voilà.
Why the two piles? Stay tuned ...
12.26.2008
Final steps in baguette prep
Third in a series, but I need to film the first two. If that makes sense. Hope you enjoy this while waiting for the beginning pieces.
12.25.2008
Winter brisket
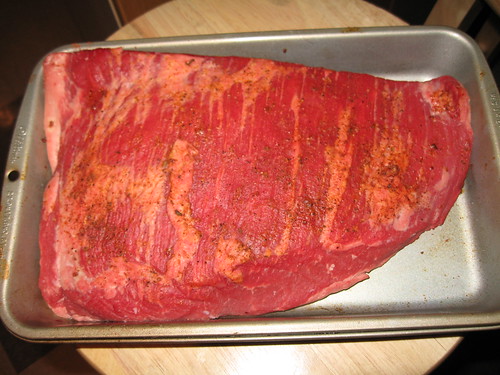
I've only tackled brisket once before. It was ok, but I gave it too much of a rub; a piece like this, doesn't need it. I did a combo cooking method that worked swimingly. A week ago or so it was really windy and about 18°F. Good day for barbecue I thought. I fired up my trusty Weber at about 5:30 am and tossed on the meat, fat side up of course, and let it smoke for about 5 hours using Kingsford embedded with hickory. Temp in the dome, about 275°F. A little erratic with the blustery wind but not bad.
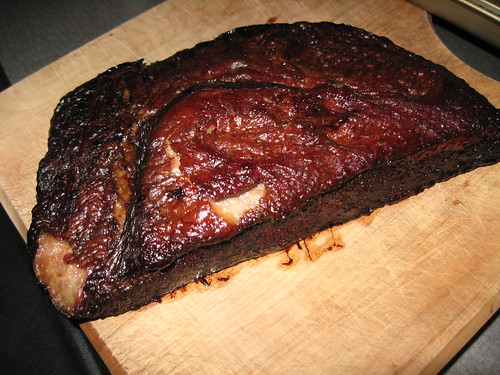
Suddenly, family matters dictated we needed to dash. I pulled the meat off since I didn't know how long we'd be away. I placed it in a small pan (and kept the smoky drippings for later!) and placed it in a 200°F oven (a la Wolfert's Slow Mediterranean Kitchen) and let it go for about an additional 6 hours. See the after pic.
I wrapped the brisket in foil for and parked it in the fridge. Warmed gently a couple days later immediately reminded us of the wonderful 'q aroma, it was served with baked sweet potatoes. If I were on death row, this might be the final meal I request. I no longer fear the bbq challenge of brisket. Not a very expensive cut, BIG crowd pleaser, not too fatty by the time it's finished. Be brave, bbq a brisket.
12.15.2008
My aromatic tasty nuts
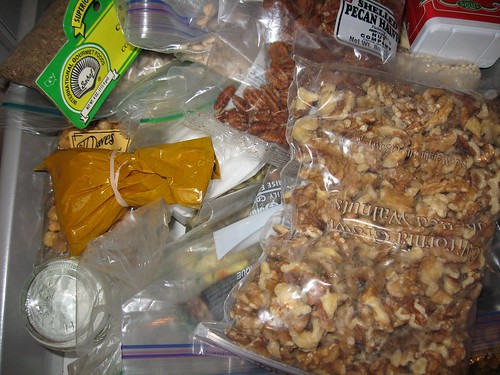
Saturday morning breakfasts are pedestrian in our home. Not quite gruel ... or ... yeah, it is gruel. We often have mixtures of grains (oats, old-fashioned or steel cut, rye or wheat berries, quinoa, what germ, flaxseed, etc.) mixed with 2 volumes of water and simmered until tender. This concoction's beauty is realized when we add the toppings. A drizzle of cool whole milk and a sprinkle of brown sugar are mandatory.
We also top the porridge with walnuts or pecans, lightly toasted in cast iron just prior to topping. The secret to our special nuts is the way we store them. We have a spice overflow drawer. Here we store all the spices for a nice garam masala, coconut, cardomom, cinnamon, paprika, and other savories that don't fit in the spice shelf. Over time, these nuts inherit a special curry flavor that is subtle but special. The specific flavors could never be duplicated - which is good. It evolves over time and surprises us each breakfast.
12.10.2008
Roasted Cauliflower, Israeli couscous, pine nuts and raisins
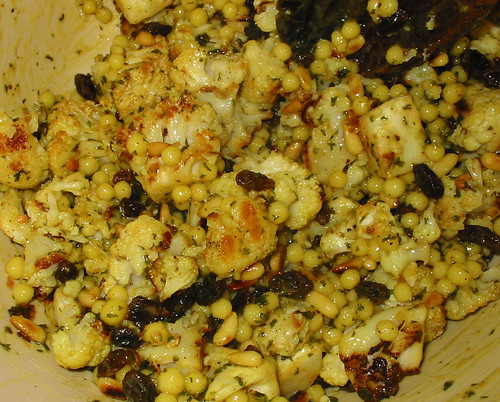 It's the holidays and I thought I'd repost one of my favs since:
a. no one reads my archives and
b. I got some free loot!
It's the frigging holidays and time for those excruciating office parties. Occasionally these require one to bring a dish. The depicted dish is perfect. It can be prepared the night before, tastes best at room temperature and it's healthy.
Also, I got a few freebies from OH Nuts!, a nut company in New York. A whole pound of pine nuts from them is about $12. The big difference with these vs. what I usually get (lately, from Mediterranean Market, when we can afford them) is they're really crisp out of the bag. I toast them for this dish, but they're really tasty toasted or not. Frankie now gets them in her lunch!
Thanks OH Nuts!, we're enjoying them! This dish is nice for them too.
Original Post
The wife pointed out this recipe for roasted cauliflower with Israeli couscous, pine nuts and raisins. It's seasoned with salt, pepper, turmeric and the giant couscous is briefly sauteed in olive oil and then cooked in chicken stock. I think it's a new "desperation dinner" for us. The longest step is roasting the cauliflower which takes about 20 minutes at 425F. The recipe also called for fresh parsley or cilantro; all I had to use was dried parsley. I'll fix that next time. Trust me, it's better than it looks. Recipe reprinted in case the link goes dead:
1 small cauliflowerClick the photo for a larger view.
4 cloves garlic, crushed
3 Tbs olive oil
1 onion, peeled and chopped
1 tsp turmeric
1 1/2 cups giant couscous (also called Israeli couscous) or fregola
2 1/2 cups chicken stock
sea salt and freshly ground black pepper
1/2 cup toasted pine nuts
1/4 cup currants
1/2 cup chopped fresh coriander or parsley
1. Preheat oven to 170C. Cut cauliflower into small even-sized florets and place in an oven pan. Combine the crushed garlic with 2 tablespoons olive oil, pour garlic oil over the cauliflower and toss well to coat. Roast for 30 minutes or until the florets turn golden brown, stirring occasionally to allow for even cooking. Remove to cool.
2. At the same time, heat a saucepan, add 1 tablespoon olive oil and the onion and cook over a moderate heat for 5-10 minutes until softened but not coloured. Stir in the turmeric and giant couscous and cook for 1 minute, stirring continually.
3. Add stock and bring to the boil, then turn down the heat and simmer for 8-10 minutes, stirring regularly until the grains are tender to the bite and all the liquid has been absorbed. Season with salt and pepper to taste.
4. Stir through the roast cauliflower, pine nuts, currants and coriander or parsley and serve.
Update
I prepared this with the other half of the cauliflower several days later. The only change I did was cook the giant couscous with boiling stock (like risotto). Still, the couscous had a fairly tough/al dente feel to it, identical to cooking it with cold stock. However, when the leftovers were heated up, I was told the couscous was much more tender.
Also, I was told by the proprietor of the market where I bought the Israeli Couscous, I should soak it at least 15 minutes prior to cooking, it would make for a more tender cooked pasta. I think I'll do the soaking next time in hopes of getting the texture of the couscous more tender and uniform. Without soaking, it has a slightly tougher interior than exterior.
11.23.2008
Weber Kettle Modification: Firedome (Part 2)
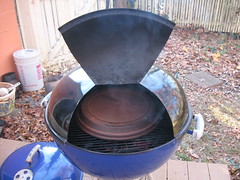
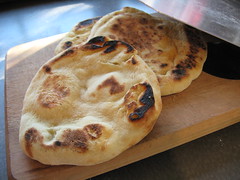
Image 1: This is the dome of a 22.5" Weber Kettle Grill. I took a grinding attachment and my power drill to cut out a door. I have some additional images of this fabrication I'll post later. I also put a shutter hinge on it to keep it attached. The idea was to heat up the grill and place a pizza in it without having to remove the entire lid and lose heat. Ideally, the dome should be shaped like an igloo. Need a welding friend to pull that one off.
Image 2. Lid up and inside is an inverted saucer from a flower pot; it's made of unglazed quarry tile. Upon heating the inside to 500°F+, it cracked once. Still fine to cook on. It's diameter is 12" on top. The heat source is lump charcoal and I decided to try it direct. The pile of fuel is directly beneath the clay. I thought since the clay surface is so thick, I might not need indirect. I think I'm wrong on that. Another day.
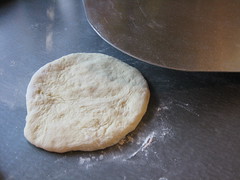
Image 3. This is an 8" diameter or so piece of pizza dough. It's kind of squat and about 150 grams. This dough had been thawed only about 3 hours. It was frozen and I made it a couple weeks ago.
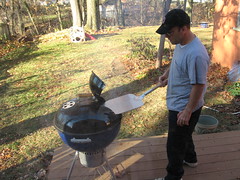
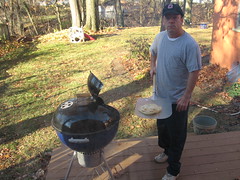
Image 4. Notice the hinged door was made wide enough to accomodate the peel. I flipped up the door and tossed in the dough. I used a little flour for the dough to slide on. I closed the lid and waited about 2 minutes. I didn't use any fancy temperature measureing devices, but I do know the air above the tile surface was much greater than 500°F.
Image 5: After 2 minutes on one side, I removed the shell and flipped it on the peel and slid it back in for another 2 minutes.
Image 6. The final product. Click image for a better view of this beautiful flatbread.
Conclusion. I think this setup, as is, will not cook a pizza properly. I need to find a means of heating so the top and bottom cook at approximately the same rate. I'll try distributing the fuel all about the edge of the grate below and try to achieve better convection. So far though, I pretty damn good pita. Breads were gone pretty fast.
• Complete set on Flickr, including more of the dome cutting details.
11.21.2008
honey wheat crust
Dual posted from Flickr for the the podcast I have tonight with Jim and Andrew.
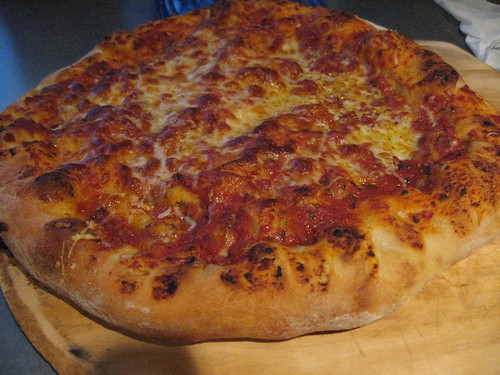
This was originally to be a honey wheat kneadless boule. It did the first rise overnight for 12 hours, punched down and let proof most of the day today. When dinner rolled around, it's fate changed from a boule to a pie. 600 g into a 15" pie (3.4 g/in.2). I usually make a thinner crust (225 g/11" or 2.4 g/in.2).
I love thick pizzas but the wife doesn't. When she's away, we have the thick crust. Yum! (click on the img for a few comment discussion)
11.16.2008
Hi Honey, we're eating well, don't worry.
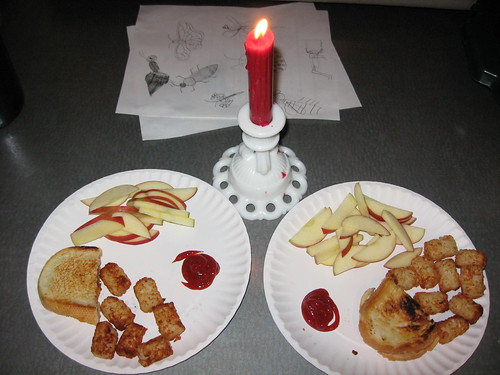
It's rare that I give in to the failure that is the grilled cheese dinner. With Mom away, prep for demos in Frankie's class on Monday, leaves and gymnastics on Sunday, etc. etc. I caved in last night. This was our dinner.
It's a failure to me. The kid thought I was a god.
11.11.2008
How many times can a lump of dough rise?
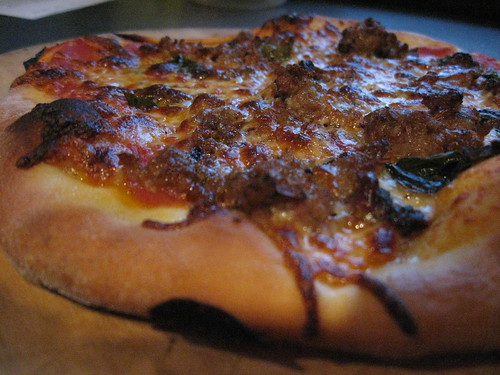
A while back, I was making pizzas for our playgroup. I made about 14 that time. I actually made a bunch more dough than I needed. I was ready to make about 26. At the end of the day, I was going to pitch the remaining dough. It had already risen 3 times; 1 rise overnight, 1 rise during the day and 1 rise during pizza making. Andrew encouraged me to just round it and toss it in the freezer.
Big question: Should I take a chance and try reusing the dough. Everyone's sitting around the dinner table and I'm going to use it - after I allow it to thaw during the work day (it's 4th or so rise). Will I be serving them a beauty of a pie or an unleavened cracker-like pizza. Here's the final product - oops, none left to photograph.
I don't know technically how to determine when the yeast has run out of food and the dough turns into mush, but, empirically, it's still going strong after 4 times. A very cool observation in this don't-waste-a-damn-thing economy. Thanks for the tip Andrew.
11.06.2008
Weber Kettle Modification: Firedome, (Part 1)
In the time-honored tradition of leaking communications inevitably to be republished in the form of a full disclosure, I present the first installment of the Weber Kettle modification. Firedome.
Some months ago, in an attempt to get my kettle grill to cook low 'n slow (ca. 225°F overnight with little or no attending, I tried taking advantage of a chimney starter's cylindrical shape to deliver urburned fuel to the heat source at a slow rate. It didn't work. That failure, however led to an interesting observation. Even if a single lit lump of fuel is placed on top of an unlit mass of fuel in a chimney starter, within a few minutes, the entire mass is ignited. The chimney is aptly named. It is the fastest means of initiating and maintaining fuel combustion.
With an entire chimney full of lit fuel, it was really hot. More so than a small equivalent mass of fuel placed on the lower grate of the kettle in a mound.
The heat source for this project will be contained, inside the kettle, in a chimney.
Upcoming:
-type of fuel
-Weber Kettle modification (you will need a grinder with a steel-cutting disc).
-Cooking surface
-Dry run temperature data
...
-Should be a fun series. Stay tuned.
11.05.2008
New Weber Kettle Mod coming soon
tossing dough
I have started sketching out ideas for a modified Weber Kettle so I too can have a domed pizza oven that can achieve 800°F. That's pretty frigging hot. I'm not even sure if the old reliable kettle is spec'd for that kind of temperature, but we'll see. With my home oven running at 550 and convection, I can get 600 pretty steady. The extra 200 is going to be challenging. Keep you posted when I get some pilot data.
11.01.2008
Aubergine, to salt or not to salt?
I am now a salter. Last night was salad night. A bed of greens topped with aldente, fenugreek-laced puy lentils, some Egyptian-style feta on the side and a grilled veggie on top; dress the salad and it's dinner time.
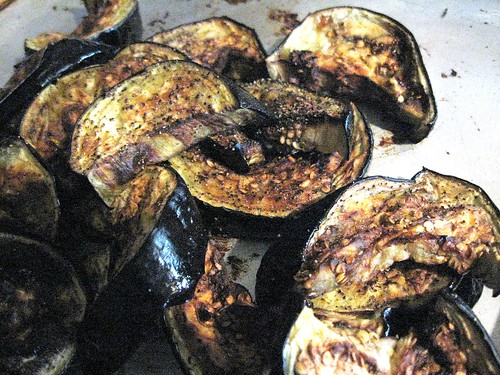
Busily speeding around the kitchen the other night, I sliced the eggplant and decided to give salting a try. A heavy brine is the fastest way to brine anything in the shortest time. Don't mean to be arrogant, but I don't need a 30-comment rambling thread on Chowhound to be convinced of the proper method. This is a matter of chemistry. And, I'm right.
I immersed the slices in the brine beneath a heavy plate (the brine was made from about 1/2 C salt and a couple cups of water). They stayed submerged about 15 minutes.
Here is a really big sentence because I'm in a hurry:
The slices were rinsed,
dried by paper towel,
tossed in oil [the first difference observed immediately, the oil coated the eggplant, the oil didn't get sucked into the flesh],
peppered (salt from the brine),
tossed into a single layer on a sheet pan and roasted for 20 minutes at 400°F/convection, no flipping.
WOW! My complaint with not salting and roasting (aside from the oil thing) is the texture - real mushy. The texture this time (and it should've brined longer) was tighter and more dense. It crisped well too because of the even coating of oil.
If you're not a salter - go ahead and try it.
10.28.2008
10.26.2008
Beef
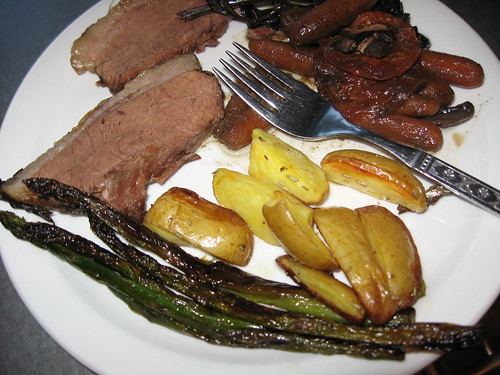
I bought a 1.5 lb of brisket (don't know if it was the point or flat), put it fat side up in a large cast iron pan, added a bunch of shrooms, carrots, bay leaves, 1/4 cup water, salt, pepper, rosemary and left it out until I went to bed. Then, I set the pan with a snug lid on in a 225 degree oven overnight (7-8 hours). The house smelled pretty special during the night. Next morning, I didn't even peek at it. Tossed it in the fridge. Later that night, I warmed it up and roasted some taters and asparagus.
The brisket was fork tender - it did not fall apart. VERY nice texture. Surprisingly the carrots were soft but far from mush. The next time I do it, potatoes go in with the meat. Low 'n slow - not with smoke - but not too bad. Give this one a shot!
10.18.2008
Cafe Bella, 2593 N High St,. 267-1998
I've never done a restaurant review in this space and I'm not going to start. I don't want the responsibility of damaging a restaurant's chance of success in a brutally competitive business. I would like to offer my observations on a pleasant experience we had the other night at Cafe Bella on N. High. It's currently situated in the middle of Columbus' Big Dig. This city project is endangering a number of businesses from Lane to Arcadia.
We got there on a Tuesday night after Frankie's soccer practice. We were all pretty hungry and it smelled wonderful. Cafe Bella is a casual Italian diner. To me, Italian comes in two flavors. Authentic and Boston/American Style. The latter has lots of red sauces and lots of pasta and bread; what I grew up eating. I make this distinction cautiously and not to sound like a snob. The difference is regional and the regions are very far apart. I absolutely love any Italian cuisine. Cafe Bella is the American style, but a little lighter. The tomato sauce is nice and fresh, just lovely.
Our genial host (owner too?) pulled up a chair, chatted a while and told us what he had to offer. We decided on two pasta dishes, one with breaded eggplant and one with meatballs. The pasta was spaghetti and we all decided to serve them in one dish, family style. He had many other offerings and would've cooked us anything; his display case was filled with fruit and vegetables. To this point, the only difference between visiting Cafe Bella and going to my mother's is I didn't get a hug before sitting down. It was special. No menus, plates like we'd have at home, talking to another couple down a table, and everyone enjoying themselves.
Having taken our order, our host and chef zipped up quickly and purposefully to get to work on our dinner. Eating with a child is tricky. We'd all like to dine for hours and relax. However, if that relaxation extends beyond 6-7 minutes, we're considering the takeout containers, starting the "1 ... 2 ... ", you know. Fortunately, we were served with time to spare. A big plate of pasta topped with breaded, sliced eggplant and meatballs in tomato sauce.
As I mentioned earlier, I was in heaven with the tomato sauce (I just finished my leftovers yesterday - right out of the fridge - cold, yum). The eggplant was thinly sliced, not oily (baked?), flavorful with a tenacious coating of light crispy breading and oh, sooo, ... I'm salivating excessively. Hey, where's Frankie? NO whining. The meatballs could be seen atop her fork, one by one being eaten as excitedly as if each were a sucker. She's five. This was a big deal. She nibbled them dutifully until they were finished. I think she ate about 3% of her body weight in meatballs alone. Trish and I dispensed with the small talk and got busy. I rarely get pasta outside because it's often over or undercooked. I believe there is no absolute specification when it comes to cooking pasta. It's perfect when it tastes good. The spaghetti was cooked exactly as I would cook it. Not too hard or soft.
I left feeling so damn satisfied and happy. Not because the meal was perfect, it was awesome, but it wasn't the familiar feeling of leaving a restaurant. It was like we had visited a friend and had dinner. The staff gave of themselves for our comfort.
Note: There is parking in back and can be accessed by High St (by Shreiner's) or up an alley from Neil.
10.11.2008
Panini Press (for the frugal)
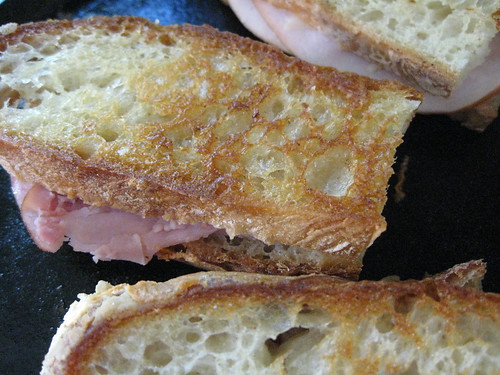
My mother made us "grilled" cheese sandwiches using Velveeta, Italian bread and pressed it between sheets of foil using a hot iron. The same iron used for clothes. They were sublime - Velveeta and all. Since my wife started hiding the iron when I used this method, I had to find an alternative.
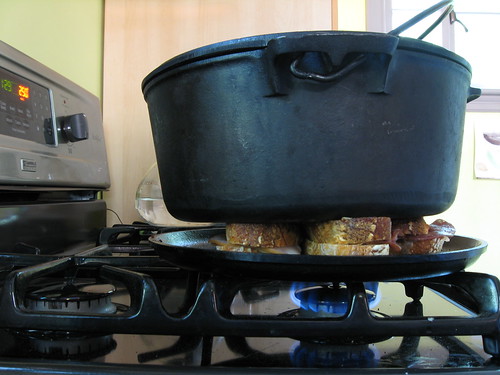
Today, I made a light lunch of small sandwiches with various meats and cheese. I lightly oiled a cast iron skillet (on bottom) and placed another cast iron pan on top. In this case, I used a dutch oven because it was pretty heavy. While a true panini press would have a heated top element, I can simply turn the sandwiches and cook them one side at a time. The top weight is nice because it insures the sandwiches make good contact with the bottom skillet and get nice and crisp. The whole sandwich melds together physically as flavorfully (I know it's not a word). They were very nice. A nice variation on this would be to use a ribbed cast iron pan to give the nice looking grill marks; they're cheap too.
10.05.2008
happy bday to me
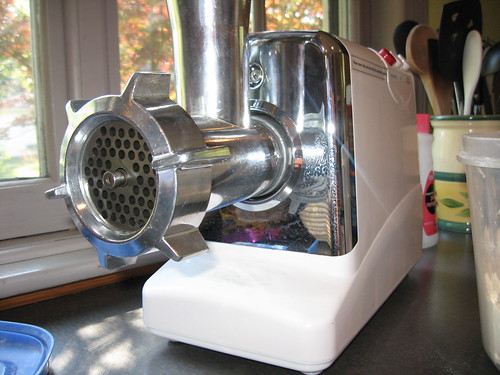
Just when I thought I knew absolutely everything about my wife, she surprised me with an instrument capable of grinding 176 pounds of meat per hour. I am without words and am a rich man.
Thanks my love (and thanks Andrew). Sniff.
9.29.2008
Just pasta, tomatoes and basil.
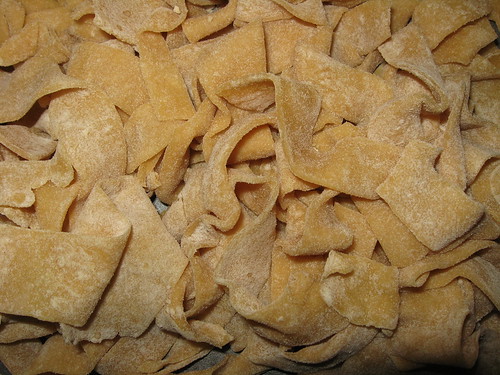
One of our favorite, yet simplest meals of the Summer uses lots of basil and tomatoes. I take a bowl of chopped fresh tomatoes, a couple slivers of garlic, toasted pinenuts, lots of basil, s+p, and a good slosh of olive oil. While that sits a bit, I cook some pasta and toss the hot pasta over this mixture. The heat of the cooked pasta warms up and gently cooks the tomatoes. Once the mixture cools a bit, the flavors have mixed and we eat a wonderfully simple meal.
We usually use a macaroni of some kind for the pasta. When I got home the other night, I had an itch for some fresh pasta. 2 C flour (1 wheat, 1 white), pinch of salt, olive oil (1T) and 3 eggs later (and the use of my trusty spackle knife) I had these noodles for the dish.
A very nice pasta option for this dish.
9.08.2008
weber_cam: School Lunch Edition (part 1)
This past weekend was good to catch up with friends and share school lunch suggestions. We never had to pack lunch when Frankie was in daycare, now we're faced with trying to make something interesting a few times a week. She actually likes mini corn dog day.
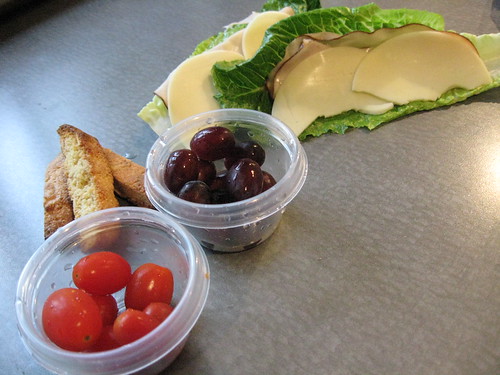
This takes a little thought, but I'm enjoying finding variety in the supermarket for her lunch. Tomorrow's main course is a couple romain leaves wrapped around smoked turkey and provolone. With this is a couple sides of grapes, tomatoes and a little dessert of cantuccini. The cold cut rolls were suggested by Christa (thanks!). I think they're a nifty alternative to a sandwich.
I'll be listing various options we learn of on the sidebar under "Plat du Jour" for you parents.
To bed with me - school night.
9.01.2008
Sweet Italian Sausage
I think I know what Cliff Clavin felt like walking into Cheers. When I walk in to Weiland's Gourmet Market, I shoot the breeze with the butcher. He told me the other day of the US's problems with hog casings. They're really expensive these days. The pork's stable, but the casing's have doubled in the past year. I've told them of my recent sausage making endeavors and they share my enthusiasm. They make Weilands for me.
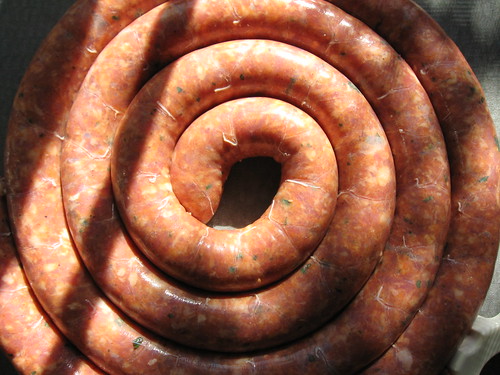
This was my first pork sausage attempt. Fresh ground pork butt (4 lbs), some garlic, smoked sweet Spanish paprika, fresh basil and some other spices. The critical spice was salt. If you add too much, too bad, batch ruined. Too little, still a problem. Incorporating more involves additional mixing and maybe overmixing. This one, I just followed the recipe and hoped for the best. The sample quenelle (alright, it was a good sized patty), I just cooked was fabulous. I'll be carting these off to our cookouts this weekend. Recipe by Ruhlman, followed to the letter with the addition of chopped fresh basil.
If you have a Kitchen Aid, the attachments are cheap (or get a dedicated grinder/stuffer under $100) and get into this hobby. It's fun and the final product is quite simply better than you can find anywhere.
8.30.2008
Tilapia on a bed of ratatouille
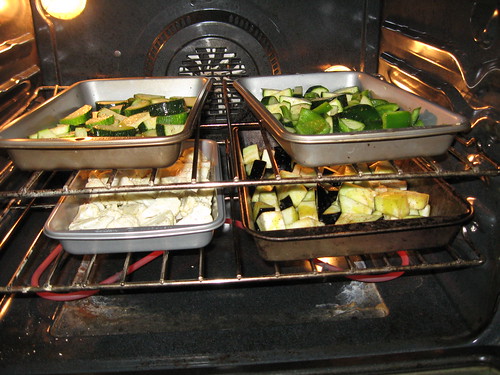
The other night I was roasting cauliflower for one of our favorite dishes. While the cauliflower roasted, I tossed in a few more pans to roast zucchini, green peppers, and eggplant chunks. I tossed the latter 3 roasted veggies/fruits into a large bowl for the next night and went on to prep the cauliflower dish.
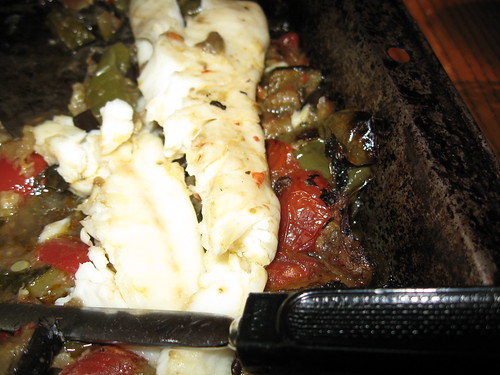
The next night, I took all the roasted veggies and simmered them with some garlic, basil and tomatoes for about a half hour. Nice and soft, I took the mixture and ladled it into a shallow bake pan and place a few tilapia fillets on top. The entire mixture was baked with the fillets getting a small squirt of lemon juice and olive oil half way through the 20 minute bake at 350°F.
The entire dish rested and 3 portions were served up. I saw this pairing in a magazine the other day and couldn't imagine the ratatouille would be good with the fish, but it was wonderful ... and fast. Definite new favorite for us.
8.25.2008
mmm ... kielbasa in the making
The gang bought me all the stuff for kielbasa for Father's day: stew beef, fat back, spices, hog casings. The works!
A few weeks back, I diced the beef and fat and got it ready. Doing this on a parental time scale in which weeks pass between steps, I finally got to break into action yesterday. I ground the beef and fat coarse, added spices, mixed and stuffed. A few complications during stuffing, but nothing big (I assembled the stuffer incorrectly which caused a delay), but the product never suffered.
I took a sample of a quunelle and a short kielbasa and smoked them to "take a peek" at the batch. Smoked kielbasa is from the gods. This discipline is amazing. Stew meat (cheap) and pork fat (usually free) combined to give a delicacy. The fresh sausage is a great deal of fun and a lot more fun than the dry-cured effort because of the immediate feedback.
Next? Sweet/hot Italian sausage.
8.20.2008
No Knead Focaccia
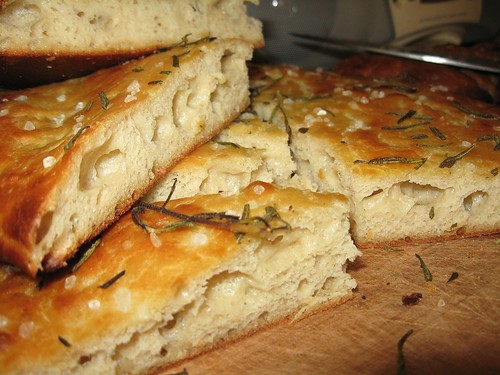
I couldn't seem to get another Weber Stephens commercial, so I had to do the production myself. Here's a quick kneadless focaccia. REMEMBER - the camera adds 10 lbs (seriously, I need to drop a few - I look like a slob).
And, here's a sample of one of these type of focaccias using 1 C unbleached white and 1 C King Arthur's White whole wheat.
8.17.2008
The soup that saved the ribs
A short while back I had a rib malfunction. I had a ton of rib meat left over. I hesitantly vacuum wrapped them all and took a break to think about what to do with the leftovers.
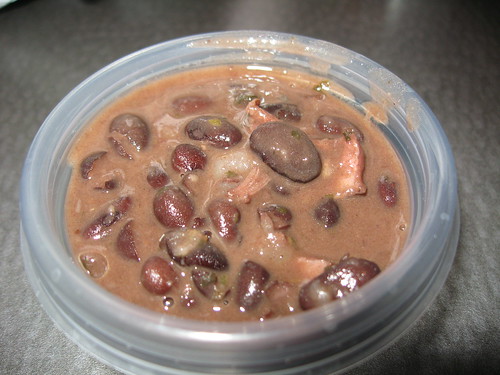
I took one of the many half-racks hanging out in the freezer, and tossed it in a mixture of black beans (canned, Goya, 2 x 15 oz with liquid), onions, garlic, olive oil, fresh ground cumin, dry oregano, salt and pepper and let the mixture barely perk a couple hours.
If I could package the smell of this simmering pot, I could sell it as an air freshener. I pulled the half rack out, let it cool, pulled the meat off and tossed it back in and we ate it the next night. Frankie's big on the bean thing, but hates soups. She ate this and was darn happy about it. Pleasing the capricious palate of the 5-year old is no small trick. It was a nice save from a mediocre bbq run. I will probably always cook a few extra half racks just for this soup.
8.08.2008
Chef's first soup, I was her sous chef
According to the movie Ratatouille, a chef is judged by her ability to make a soup.
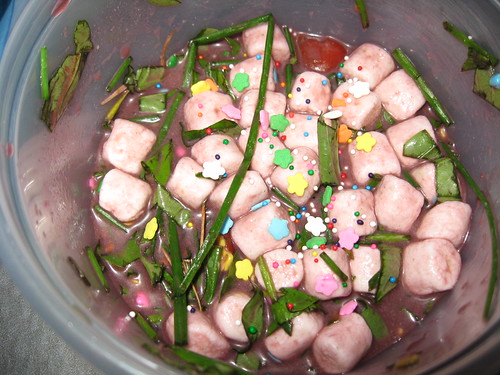
This is Frankie's first soup. It's local, organic and has lots of sprinkles in it. It has been put in the fridge for Mom's lunch for tomorrow. She cut the basil and chives fresh tonight for it. Our good friends gave us some very nice tomatoes from their garden. A few of those were used in it too. For color and texture, various colored and flavored sprinkles - LOTS of sprinkles, were added as needed.
From what I observed the recipe is as follows (she did this entirely on her own).
Soup
add in order:
water, 1/2C
basil, scissored-chiffonade, 3-4 leaves
chives, scissor-chopped finely
tomatoes, small diameter, 2, crushed
mini marshmallows, about 10
flower shaped candies, 10-20 shakes
green tiny sprinkles, 20 shakes
red sprinkles, ca. 20 shakes
taste, add more sprinkles if necessary,
garnish with additional sprinkles
Mix vigorously,
Chill in fridge until tomorrow.
8.03.2008
dueling Webers
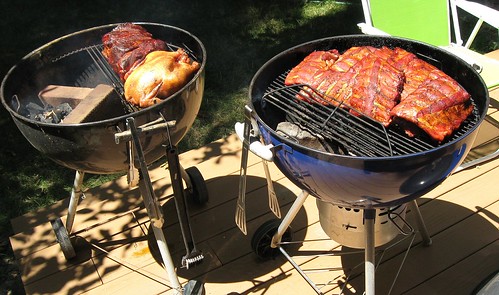
I don't know exactly what happened, but the ribs sucked. They cooked a long time, but they tasted a bit tough and a bit underdone - even though it would be impossible for them to underdone. Temps never got better 270 and hung about 240 most of the 6 hour cook. I'm thinking I stacked the grill too much. Not enough room between the half racks to properly render while cooking.
On the other side, the pork shoulder and chicken were fine. Just tainted from the bad rib run.
Agony of defeat.
7.22.2008
Vegged up Tabouleh
We do weekly menu planning 'round here. Keeps the food bills in control and minimizes trips to the grocery store. Tonight's dinner was penned in as "chicken, veg, starch." I had my mind set on the chicken; brined breasts and bbq'd with a light coat of sauce. Nothing fancy. Kid loves it. The veg and starch were left open. I often leave these two parts of the meal open to give me a bit of flexibility during the week.
I had an idea to collapse the starch/grain and vegetable. Traditional tabouleh is a great side; the blogosphere and traditional sources abound with recipes despite its simplicity. The critical components of tabouleh are: hydrated cracked wheat, LOTS of parsley, mint, olive oil and lemon juice.
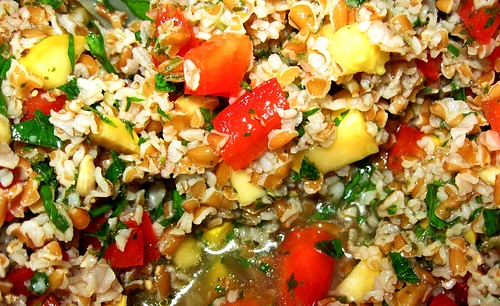
Breaking from a traditional tabouleh, yet keeping these critical components, I came up with this version based on what was in my fridge. It provided a nice all-in-one healthful, summer side for our chicken. It was served on a bed of spinach, a sliced tomato (also on the side) and, of course, the bbq'd chicken. A special summer meal.
There is a critical balance between the olive oil, lemon juice and salt. The quantities in this description are only a starting place. You'll have to keep tasting until it's to your liking.
Vegged up "Tabouleh", 4 healthy side portions
cracked wheat, 3/4C
water, 1.5C
finely diced red bell pepper, 1
finely diced yellow squash, 1 medium
parsley, flat leaf, finely chopped, ca. 1C
mint, 1T, dried (didn't have fresh)
olive oil, ca. 3T
lemon juice, 1.5 lemons' worth
salt, to taste (ca. 1t)
Mix everything at room temp, cover in wrap and let sit in fridge 12-24 hours in advance. Serve slightly chilled. Keeps nicely a couple days at least.
7.17.2008
Hot Air Popper Experimentation - I
Ever wonder what the temperature is inside those hot air poppers? Me too.
A month ago, I had a craving for popcorn and found a popper for a $1 at the Volunteers of America on Indianola. Having popped a bunch of corn, I wanted to probe further. I've used appliances like this to roast coffee beans successfully and knew they got pretty damn hot. But, how hot?
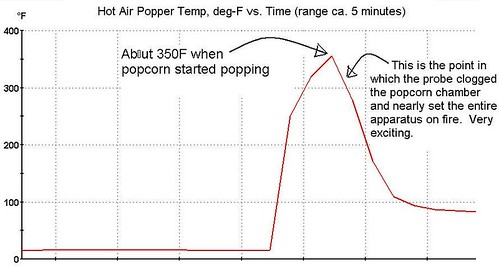
Armed with my trusty USB datalogger, I tossed a thermocouple in with the popcorn seeds and let it rip. I didn't anticipate the probe actually getting in the way of the popped corn, but no biggie. I was able to obtain the temperature of the beginning of popping before the popper nearly ignited. After the first few kernels popped at about 350°F, the chamber got jammed with popcorn and the edibility of the batch was shot (edibility?). It kept popping and jammed in the chamber. I don't know how the batch fit; kind of like an entire bag of cheese puffs fitting into a drunk frat boy's mouth. After chiseling the out the popped corn and letting the unit cool, I did another batch so I could have a snack while processing the data. It was good.
What will I do with this valuable nugget of data heretofore known only by senior scientists in the food science industry? Stay tuned (he said in a crafty voice).
7.13.2008
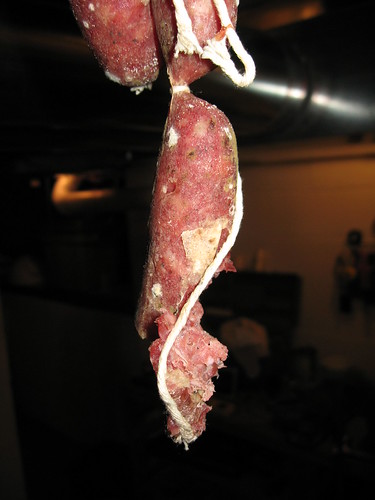
Saucisson sec is ready? (... non)
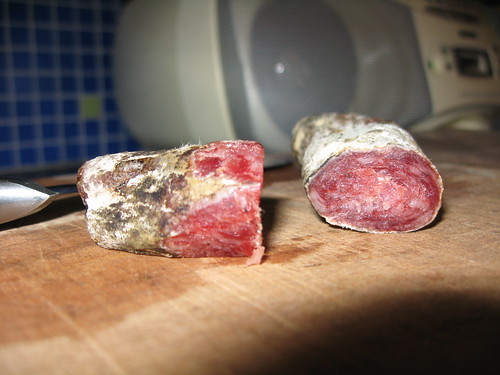
If I were Bourdain, I would've bit in with gusto. I'm not. I trembled and felt I had to do it. It's now 3:45 and we're off to a 4-yr old birthday party. Wish me luck. It's been 5 minutes and I'm still alive.
Developing.
Update 14-Jul-2008
How was that suspense? No, didn't die, not even a twinge of stomach disruption. And, it tasted darn good.
My advisor in all things pork, Andrew, suspects it's a tad under-cured, because the innermost core of the sausage still looks a bit more moist than the outer ring of familiar dried sausage.
Some thoughts:
• I'll let the remainder hang in the humid environment and keep cutting them open for observation every couple months. This will be a learning batch.
• I think it was a reasonably good run; no rancidity observed at the temps/humidity.
• In the future, I will go one step further regarding safety and freeze per CDC recommendations to insure a higher level of safety. It's an easy step, no reason not to do it (although some French buthers would never freeze meat prior to processing).
• The way in which I pierced the casings was not good. I must use a PIN and not a knife point. Some of the sausage was funny shaped and it could have compromised the integrity of the casing during drying.
• I'm switching to fresh (not dry cured) sausage (sage and sweet Italian for starters) for additional experience with grinding and mixing techniques.
• The humidity fussing I did earlier was silly. From all I've read, more humid is better. Too much humidity only slows things down. I simply hung them on a hanger inside of a tall, clean trash bucket in which the bottom had a few inches of water. This environment, with the sausage curing gives a steady 80%+ relative humidity and my basement was about 65°F during the entire cure.
• Finally, I think I need much wider casings for the sausage since it shrinks a lot on curing.
• Definitely a project I will revisit!
7.09.2008
DIY Food Dehydrator v. 2: Cherries
The 2nd Version of my dehydrator is a keeper. Been cranking out some hefty sheets of fruit. Haven't stacked trays yet; still working out some details.
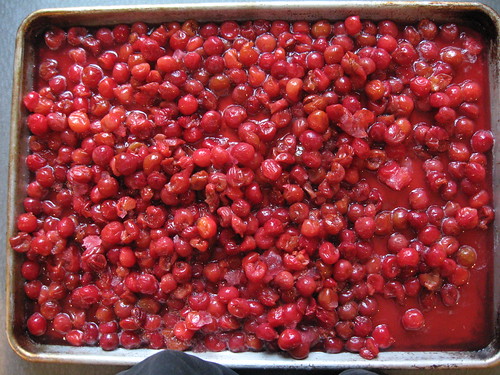
A couple years ago, our dear neighbors from our old neighborhood gave us a zillion sour cherries from their tree. The Mrs. pitted and tossed them in the freezer and that's where they've been - for at least a couple years.
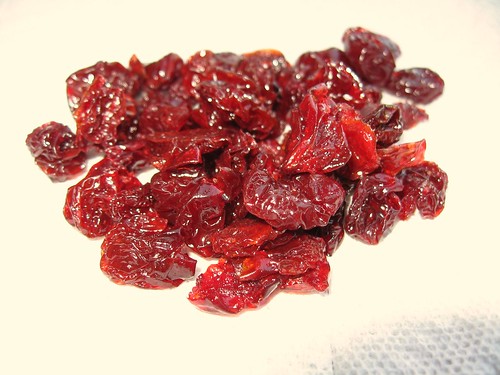
The Mrs. was kind enough to let me have the fruit of her labor for a dehydrator challenge. I sugared them a bit (ca. 1/2 C per huge batch shown) and lay them out for a dehydration session. They were really wet and soupy. Took about a week. But they didn't stick together, didn't get moldy. They turned out slightly tacky, well-separated and tasted like no dried cherry I've ever experienced. And, better than fresh. Check 'em out.
7.06.2008
Grilling Veggies: flip flop
Recently, I've had the good fortune to become better acquainted with Jim, Zach (Jim's associate who produces podcasts on Columbus Food.tv and, of course, Zach's lovely wife and fellow foodie, Mary. We've talked some fun food topics.
Most recently, we had a session discussion grilling veggies. I stated in the discussion I was content to grill veggies directly over coals, on the grate with no special utensils or pans.
The more definitive a statement I make, the more I am likely to think about it, question it, and change my mind. I think they call that flip flopping in the politics arena. Can't feel bad. Etched-in-stone habits are always healthy to challenge.
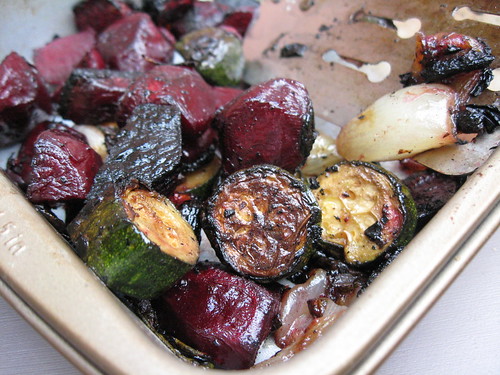
Back to the flip flop. We just got our share of veggies yesterday and I was cleaning greens and prepping veggies for the week ahead. The beets looked enticing; I thought roasting the beets and putting them on a bed of greens with a little feta and bread sounded perfect. I actually had never tried grilling veggies in a pan on the grill. Hmmm. I skinned the beats, chopped the zucchini, quartered an onion, tossed in some sliced basil and a couple slivers of garlic (all with a quick splash of olive oil and salt and pepper) and tossed the pan on the grate over the hot coals. Then, I went to walk the dog.
About 15-25 minutes later, bam! (ouch). They were gently smokey (I used Kingsford/hickory) and nicely browned. They cooled a bit and were tossed on the bed of greens. It was a lovely meal.
The shallow roasting pan was easier than tossing the veggies with a spatula and there was no chance of losing any in the grate, so the size of the dice didn't matter. I must also say, I use a pretty darkened thin roasting pan and don't bother to keep it shiny, it's clean but never looks it. I may never roast roots any other way again.
7.02.2008
Tahini Mixer (cordless)
Hoummus (I'll spell if a few different ways so I'll occasionally get it right) is one of the most popular staples in our repertoire. Simple, healthy and fast to prepare. And, the kid likes it. One problem. The critical ingredient, tahini, like most nut butters, separates on standing. This makes it tricky to pour or portion it into a recipe. Are you getting oil or the nut paste when poured? If it were mixed uniformly, this wouldn't be an issue.
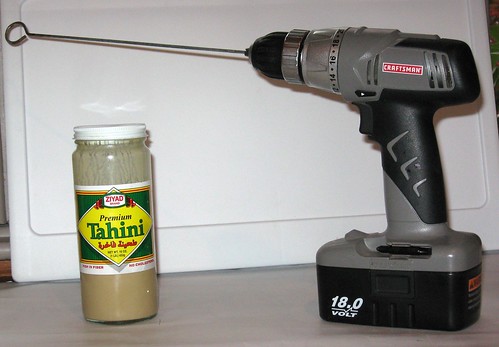
I always wanted to bring my tahini to the paint store so they could shake it on the paint stirring shaky thing. I just wasn't bold enough to actually do this so I tried to figure out a way to do it at home. The first thing I thought of was an immersion mixer. Problem with this is there's too much surface area and I figured the sticky tahini would adhere all over it ending up in a mess. The impeller in this application needed to have minimal surface area so the really sticky hummus wouldn't stick all over it.
I have these sharp, metal kebab skewers sitting in our infamous household "junk drawer." I don't use them for anything. I once brandished a bunch of the spikes when greeting a Jehovah’s Witness at the door trying to give me some Watch Tower shit, but that's about it. Suddenly, it hit. The loop at the end looked like a perfect impeller for this task. I grabbed my charged drill and gave it a whirl. In seconds, I had an extremely uniform tahini. When I pulled out the stirrer arm, it was nearly free of tahini.
I'm filing the process patent application tomorrow.
6.29.2008
DIY Food Dehydrator v. 2
Often the best solutions aren't sophisticated. My first dehydrator was more elaborate than it needed to be. A process improvement was in order.
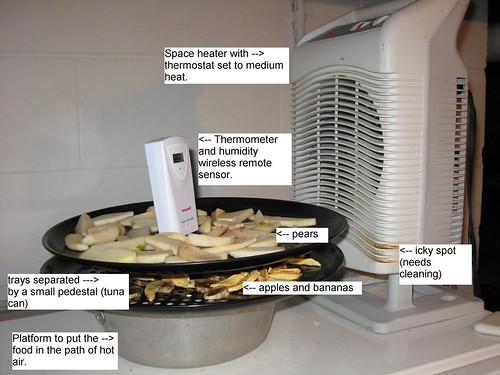
A better solution would simply bathe many trays with warm, moving air at a temperature between 85°F and 140°F. I wanted to scale up the operation (stackable trays). The previous design's airflow was fast and the air several inches over the hotplate wasn't as warm as the air closest to the heat source, thus limiting the capacity. The depicted "vertical" form of heat and a gentler fan was easily achieved with a simple space heater (off season price at thrift store, $4). The fan is gentler and the heat adjustable. With the middle setting, I was able to maintain a steady 92-95°F. Click the image for a better detail view. I'm currently doing two trays and see no reason I couldn't use at least 5-7 with the proper configuration of trays (still some work on that needed).
6.23.2008
La chien a mangé ma saucisse.
We're about a week and a half into the big dry curing experiment for my saucisson sec. Despite a fleeting fear that my saucisson was getting a bad mold (according to Len Poli, they're OK), things were going swimmingly.
The other day, the Mrs. and I were busily running around trying to get a bunch of stuff done. Suze was just hanging around watching us (foreshadowing - Suze usually sleeps). As we were running about, I noticed Suze was missing. I walked into the basement. Upon entering the basement, I noticed a beautiful burst of fresh-smelling sausage. Hmmm. I thought the aroma was settling down as the curing was progressing. Interesting (foreshadowing again).
I walked into the narrow, dark, humid hallway I call Sausage Curing Row and noticed, in a ray of artificial light, my dog leaning out a bit to make eye contact with me. She looked nervous. She always looks nervous. She looked a tad distressed. She always looks distressed. But, something was different. I was worried and went to see if she was alright.
She was fine. Really fine.
She smelled like garlic and I'm not sure, but I think she was smiling. Sausages were all over the floor and Suze had ravaged one of them. I rescued the poor little guys and realized only one had been violated. In the scuff, another had popped off the chain and fell in the water supplying the requisite high humidity. Suze ran away, a tad frustrated, and I scrambled to put the remaining saucisson back in the curing position with the barrier in place - that I removed that morning for some unknown reason. I managed to salvage about two thirds of the supply and left them to rest. Time will tell if we get any after another couple weeks.
6.19.2008
Pears, dehydrated and yummy
I'll be updating this post intermittently with bits of dried fruit from my nifty dehydrator. I've tweaked it a bit, but generally the same as initially disclosed. Just have to start stacking trays to do more in one run. I may have to put the hot plate so the element is vertical if I do this stacking thing.
6.18.2008
In which I become a sausagemaker (so the mrs won't be embarrassed by my former title even though my masculinity was never threatened) - updated
I needed to pierce the casings to let these dehydrate during their dry curing. I pierced using a knife tip. I didn't realize how much pressure these things were under, but they oozed meat in some places. I was supposed to use a pin. When I did - on some of them - things were fine. No oozing. Oh well. Only a few bucks invested. We'll see how they come out.
Now, the tough part. Waiting. Temps in the basement are a tad high, ca. 65°F and ca. 65-73%RH. They are supposed to be finished when very firm and have lost 30% of their weight from dehydration. I will be testing one several days before unleashing them on friends. A coworker told me to have him on speed dial the day I try it so I can call for help if I need it. Thanks Larry.
It's supposed to take 3-4 weeks. I'll be updating this post with progress.
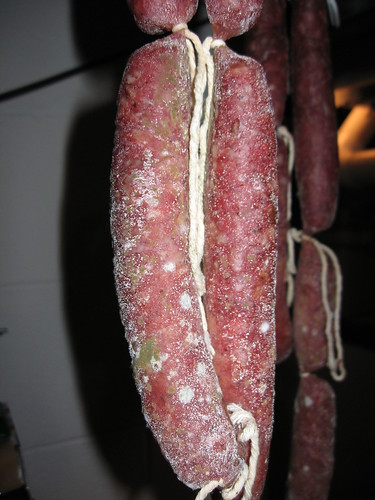
Day 8. Drying may be going well. The sausage is getting much more dense (losing moisture). The greenish spots on the exterior are worrying me. Although, I've never watched the intermediate steps of a dry cure before. The outer skin is getting whitish which looks consistent with other dry cured sausages I've seen. Anyone have any thoughts on the green spots? Like mold on cheese? Still have a couple more weeks and, despite the weather, we've maintained low 60's temperature and 70%RH +/-. Stay posted.
6.14.2008
DIY Fruit Dehydrator v. 1
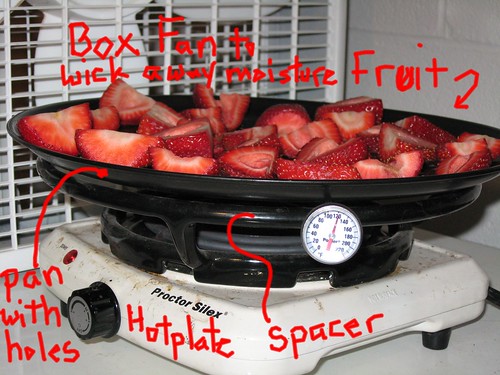
The other day, a coworker generously shared a piece of homemade strawberry fruit leather; it was sublime. Trader Joe's might sell these things for a quarter, but the descriptor 'leather' is apt. A well prepared nugget of dried fruit is a treat. Thanks Fred, I'm not worthy.
The light bulb went off. Scanning Ebay and Amazon for a dehydrator was my first move. Way too expensive for an initial attack. I read these devices operate at 85°F to ca. 100+°F and require a fan, presumably to wick away the moisture as the fruit dries. Seemed easy enough.
To the basement! I purchased some of those nearly tasteless California strawberries for my pilot runs and used the setup shown in the image. An inexpensive 800W hot plate on a low setting with some heat diffuser/spacer and a tray holding the fruit. I set the hotplate to get a specific surface temperature and placed a box fan beside it to drive off the moisture. Some temperature measuring devices were placed about and I was ready to evaluate parameters.
The fruit leather is an ambitious target. I'll attempt that later. For now, dried strawberries. Why not images of the final product? From two large containers of strawberries, there are none left. I'll post them later, although they don't look particularly special.*
So far, the parameters for strawberries (I'll be editing this as refinements become available):
• fruit should be cut to maximize surface area and cut uniformly (slices seem to be good).
• drying surface temperature, 85-100°F, too hot and they get dark spots
• box fan, slow speed
• drying time, ca. 24 hours, seems flexible
• for fruit that can discolor prior to dehydrating, e.g., apples, pears, etc. I've used a couple treatments. 1. a bath of lemon juice and water is the most reliable. 2. I've also used (for apples) a bath of balsamic vinegar and brown sugar. Gives the fruit an interesting flavor.
... more to come
[note to self: The hot plate idea is ok, but the heat is localized on the bottom. If I wanted a vertical stack of trays, I'd need a vertical heat source with a fan, i.e., a space heater!!!, to the thrift store. 24-Jun-08: Just scored an inexpensive space heater with a large range of heat settings. I'll be trying this with a stacked set of drying trays. Results to follow.]
Related link
My new improved dehydrator. It's awesome.
*rant: I detest the phrase 'food porn' and urge this disgusting phrase be abolished from food bloggers' vernacular. I'm no prude, but even the casual association of something as special as food and porn is wrong.
6.09.2008
Scalpel ...

Weather is wreaking havoc with my basement environmental conditions. Temps are up (63-70°F) and relative humidity is nuts (63-70+%).
I have my pork cut up, materials gathered - curing salt, nitrile gloves, etc. And, the mixer is chilled, locked and loaded. Now, I have to figure out if the low 60's/60-70%RH is adequate or too moist for the dry cure. I may just make plain old sumptuous Italian sausage if I back out of the dry cure and save that for the winter when the basement environment is more stable.
6.06.2008
Vegetarian BBQ: Roasted* Medley on Greens
A while back, the amazing Jim of CMH Gourmand asked me during a podcast if I had any vegetable favorites on the grill. I had to pause a bit to think of the vegetables I grill; there are many more possibilities than I originally thought.
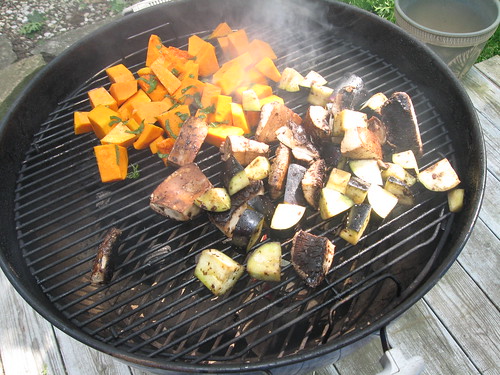
Tonight, I really wanted to serve up salad for the gang and I wanted something substantial. Fridays are usually pizza night - tough act to follow. I had a butternut squash lying around, then I picked up some eggplant, potabellos, baby greens and some Egyptian style Feta from Mediterranean Imports (the Egyptian Feta is like a slightly salty chevre, it's amazing - and cheap). I chopped the veggies in medium cubes, tossed them in a generous splash of olive oil, added salt and pepper and a big bunch of finely sliced sage and tossed it on a grill.
I used briquettes** stacked on one side (a large bunch) and spread the veggies all around the grill using an indirect method but had all the vents opened. Very hot. The grill was capped and I went to walk Suze. About 40 minutes later, I took a spatula and tossed the cooking veggies to mix them a bit. Surprisingly, the squash, shrooms and eggplant cooked well together. I let them go another few minutes and tossed them in a bowl to rest.
Finally, salad prep: beautiful roasted*/grilled veggies on a bed of greens speckled with feta, grape tomatoes and a light splash of Parmesan vinaigrette. Not the best image, but I think it captures the dish. Roasted vegetables, more common in winter, redone for summer dining.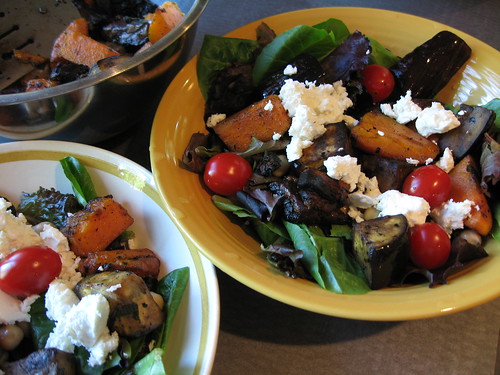
We'll be doing many more veggies this season. Thanks for putting that seed in my head Jim.
*I did mean roasted because the kettle is covered. A covered Weber/kettle provides even heating, much like a vented oven. It's baking, with smoke.
**I must retract a statement I made on the aforementioned podcast. I said briquettes, by themselves, afforded no smoke flavor. They indeed do. It took a vegetable to notice it.
On a related note, I've been meaning to get a new product; Kingsford briquettes embedded with hickory - they'd be killer all purpose fuel.
6.02.2008
Sausage, greens and beans
We usually have a special dinner on Sundays. We have a bit more time to think and plan the meal. This Sunday, however, like in past weekends, home improvement projects, landscaping, etc. left us a bit short on time for the dinner prep.
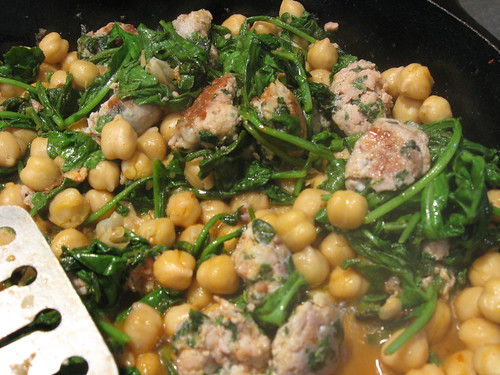
Saturday, I couldn't resist getting a couple chicken, spinach and Parmesan sausages (0.5 lb) from Weiland's. Didn't know what to do with them when I bought them. Sunday late afternoon crept around and, while cleaning out the hummingbird feeder, I sprung into action. I sauteed the sausage. When finished, I tossed in a strained can of chickpeas (Bush's), some baby arugula (12 oz, torn in shreds) and an additional touch of salt. I simmered it all for about 10 minutes, until most of the moisture from the leaves evaporated. Then, I let it cool a bit and served it up with ...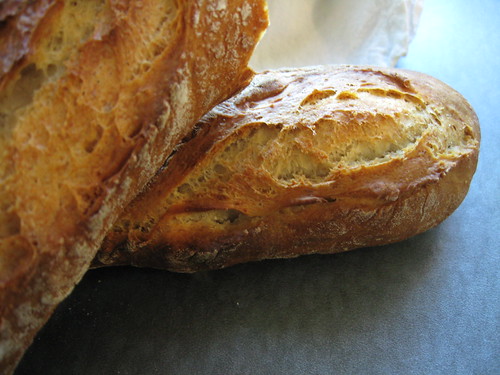
The nifty thing about this meal is the sausage provided all the seasonings for the entire dish simplifying the preparation. And, next time, we'd double the greens and chickpeas for the same amount of sausage.
5.31.2008
Not quite the farmer's market, but ...
This morning at Weiland's I got some nice young stalks of rhubarb for an interesting salad (by Wolfert), spanish (sweet) smoked paprika, chicken parmesan & spinach sausage (for a dish of greens and garbanzos this week) and HOG CASINGS!
Hog casings are currently $18/lb! Same as Reggiano. Fortunately, 1/18th lb. will suffice for 4 lbs. of sausage (thanks Mac for the idea). The butchers seemed happy to support a newbie sausage maker. All that and free coffee. A fun market indeed.
5.28.2008
Dry Curing: Environment Variable Tweaking
My recent food preoccupation has been the sausage. I've been engrossed in Ruhlman's Charcuterie to get familiar with the subject. A few things appear crucial to making sausage. It requires a good source of pork. I plan on finding it at North Market when I get to my first run. Also crucial to the craft is attention to sanitation and accurate measurement.
My first run will likely be a dry cured sausage which requires a 60°F and 60-70% relative humidity (RH) atmosphere. I found a spot in my basement that runs 57-65°F and the chamber I'm using has a layer of saturated salt solution in it. This should give me an equilibrium RH of 72%. It's also open to the dryer air in the basement, in case I need some circulation. 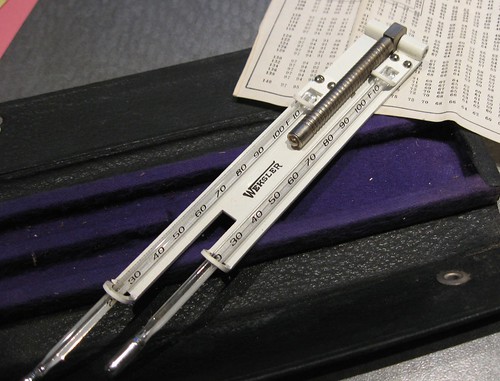
I know my family will express their unconditional love for me by tasting my creations, but I'm going the extra mile and am going to make my measurements as accurately as possible.
To that end, I used a sling-psychromoter for the determination of RH. It's one of the most primitive, yet most accurate methods for measuring temperature and RH. It's a bit of a pain to use, so I'm using it as a primary standard to calibrate my other devices. I bought a wireless Honeywell thermo-hygrometer and used the sling-psychrometer (depicted above) to do a single point calibration. It was spot on. Then, I set the wireless module in my curing chamber and was able to achieve the results shown below. A tad below the theoretical 72% RH that a salt solution should give, but it was open to air in my basement (52%RH), so it's reasonable.
If I need to get a bit cooler, I can wrap my chamber with a wick (cotton cloth dipped in water) and cool it another 10 degrees or so by evaporative cooling. All with no added energy!
I am sooo ready. Just need some curing salt #2 and I'm off and running! You just can't find tedious passages like this in books folks.
5.25.2008
Big Grain Waffles

Got this recipe on food.yahoo.com. Been waiting a couple weeks to try it. Not bad. Because of all the big grains, most of them weren't super crunchy, but they were very flavorful. All we topped them with was peach preserves from the Clintonville Community Market. Made a bunch extra to freeze for weekday b'fasts.
